HP LaserJet Pro 100 HP LaserJet Pro 100 Color MFP M175 - Software Technical Re - Page 145
Labels, Transparencies, Create a custom printing shortcut, Paper source: Automatically Select - m 127
 |
View all HP LaserJet Pro 100 manuals
Add to My Manuals
Save this manual to your list of manuals |
Page 145 highlights
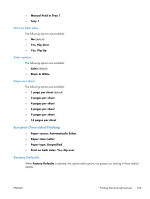
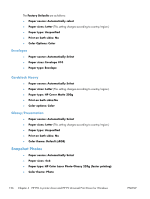
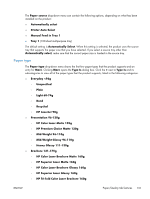
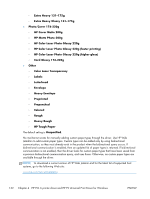
Labels ● Paper source: Automatically Select ● Paper sizes: Letter ● Paper type: Labels (this option is grayed out so it cannot be changed) ● Color options: Color Transparencies ● Paper source: Automatically Select ● Paper sizes: Letter ● Paper type: Transparency ● Color options: Color Create a custom printing shortcut 1. Select General Everyday Printing as a base. 2. Select the appropriate print settings on the Printing Shortcuts tab or use the settings on any of the Printing Preferences tabs. 3. On the Printing Shortcuts tab, click Save As.... The Printing Shortcuts dialog box appears. 4. Type a name for the custom printing shortcut, and then click the OK button. The custom printing shortcut appears in the Printing Shortcuts list. 5. To delete a custom printing shortcut, click the custom shortcut, and then click the Delete button. ENWW Printing Shortcuts tab features 127
-
 1
1 -
2
-
3
-
4
-
5
-
6
-
7
-
8
-
9
-
10
-
11
-
12
-
13
-
14
-
15
-
16
-
17
-
18
-
19
-
20
-
21
-
22
-
23
-
24
-
25
-
26
-
27
-
28
-
29
-
30
-
31
-
32
-
33
-
34
-
35
-
36
-
37
-
38
-
39
-
40
-
41
-
42
-
43
-
44
-
45
-
46
-
47
-
48
-
49
-
50
-
51
-
52
-
53
-
54
-
55
-
56
-
57
-
58
-
59
-
60
-
61
-
62
-
63
-
64
-
65
-
66
-
67
-
68
-
69
-
70
-
71
-
72
-
73
-
74
-
75
-
76
-
77
-
78
-
79
-
80
-
81
-
82
-
83
-
84
-
85
-
86
-
87
-
88
-
89
-
90
-
91
-
92
-
93
-
94
-
95
-
96
-
97
-
98
-
99
-
100
-
101
-
102
-
103
-
104
-
105
-
106
-
107
-
108
-
109
-
110
-
111
-
112
-
113
-
114
-
115
-
116
-
117
-
118
-
119
-
120
-
121
-
122
-
123
-
124
-
125
-
126
-
127
-
128
-
129
-
130
-
131
-
132
-
133
-
134
-
135
-
136
-
137
-
138
-
139
-
 140
140 -
 141
141 -
 142
142 -
 143
143 -
 144
144 -
 145
145 -
 146
146 -
 147
147 -
 148
148 -
 149
149 -
 150
150 -
151
-
152
-
153
-
154
-
155
-
156
-
157
-
158
-
159
-
160
-
161
-
162
-
163
-
164
-
165
-
166
-
167
-
168
-
169
-
170
-
171
-
172
-
173
-
174
-
175
-
176
-
177
-
178
-
179
-
180
-
181
-
182
-
183
-
184
-
185
-
186
-
187
-
188
-
189
-
190
-
191
-
192
-
193
-
194
-
195
-
196
-
197
-
198
-
199
-
200
-
201
-
202
-
203
-
204
-
205
-
206
-
207
-
208
-
209
-
210
-
211
-
212
-
213
-
214
-
215
-
216
-
217
-
218
-
219
-
220
-
221
-
222
-
223
-
224
-
225
-
226
-
227
-
228
-
229
-
230
-
231
-
232
-
233
-
234
-
235
-
236
 |
 |