HP Vectra XU 6/XXX HP Vectra XU6/150 PC - User’s Guide - Page 11
Connecting Audio Accessories, Connecting A Scsi Accessory
 |
View all HP Vectra XU 6/XXX manuals
Add to My Manuals
Save this manual to your list of manuals |
Page 11 highlights
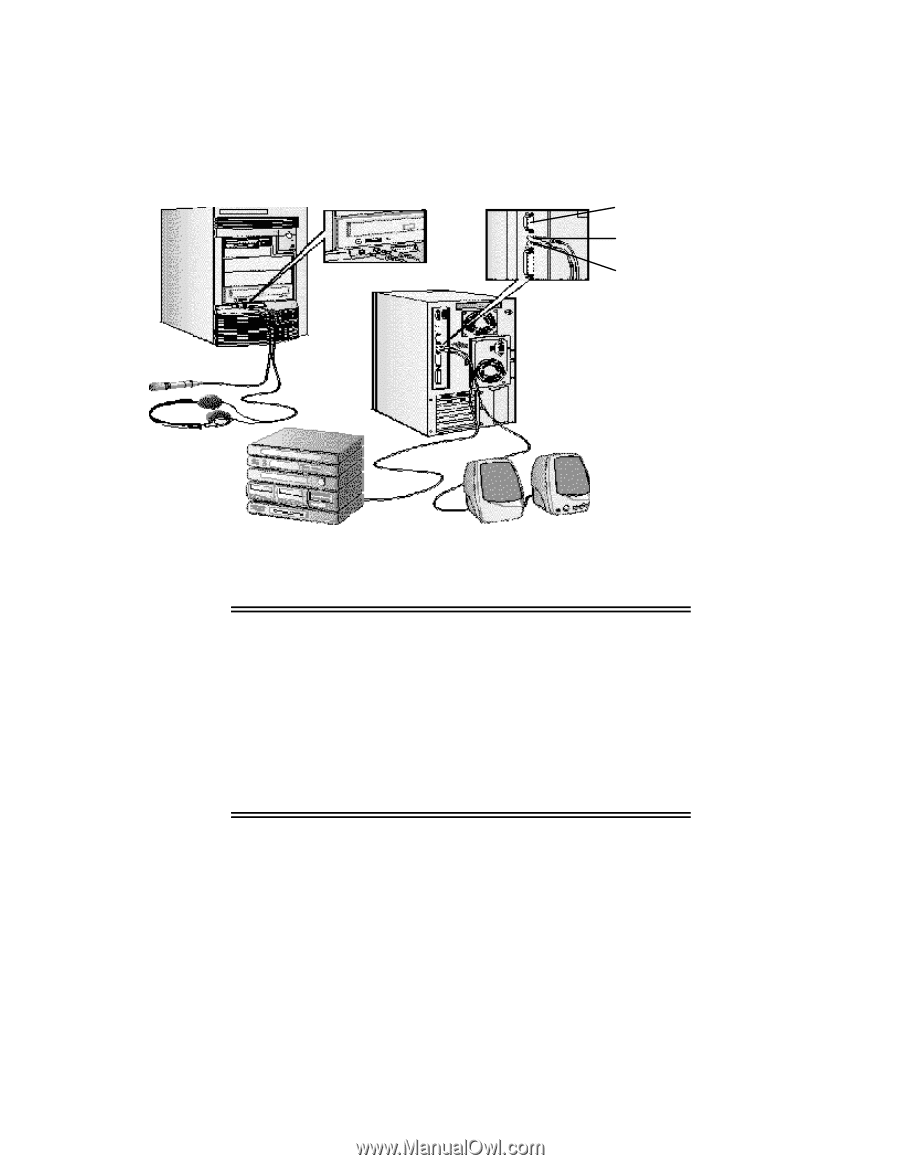
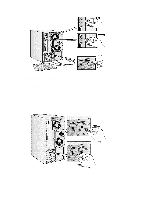
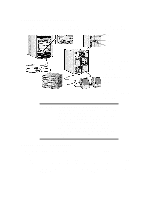
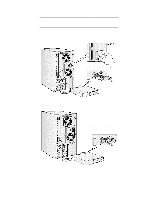
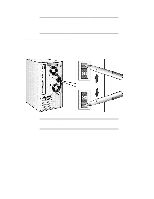
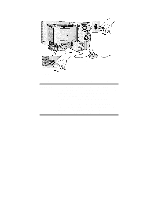
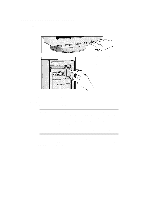
CONNECTING AUDIO ACCESSORIES Your PC has a Headphones jack and a Microphone jack on the front panel. An audio Stereo In jack, an audio Stereo Out jack, and a MIDI interface connector are located on the rear panel. MIDI connector Stereo in jack Stereo out jack NOTE The internal speaker and the Stereo Out jack on the rear of your PC are deactivated when you use the Headphones jack. The internal speaker is deactivated when you use the Stereo Out jack. Note that external speakers should have built-in amplifiers. The audio accessories shown h ere (headphones, microphone, speakers, and hifi system) are not supplied with your PC. WARNING: To avoid discomfort from unexpected noise, always turn the volume down before connecting headphones or speakers. Listening to loud sounds for prolonged periods may permanently damage your hearing. Before putting on headphones, place them around your neck and turn the volume down. When you put on the headphones, slowly increase the volume until you find a comfortable listening level, and leave the volume control in that position. CONNECTING A SCSI ACCESSORY Note that Ultra SCSI mode is disabled automatically when an external SCSI accessory is connected to your PC. 1 Refer to the manual provided with the SCSI accessory for instructions on selecting a SCSI address. You should assign an unused SCSI address to the accessory. SCSI addresses range from 0 to 7, with SCSI address 0 used by the first SCSI hard disk drive and SCSI address 7 reserved for the integrated SCSI controller.
-
 1
1 -
2
-
3
-
4
-
5
-
 6
6 -
 7
7 -
 8
8 -
 9
9 -
 10
10 -
 11
11 -
 12
12 -
 13
13 -
 14
14 -
 15
15 -
 16
16 -
17
-
18
-
19
-
20
-
21
-
22
-
23
-
24
-
25
-
26
-
27
-
28
-
29
-
30
-
31
-
32
-
33
-
34
-
35
-
36
-
37
-
38
-
39
-
40
-
41
-
42
-
43
-
44
-
45
-
46
-
47
-
48
-
49
-
50
-
51
-
52
-
53
-
54
-
55
-
56
-
57
-
58
-
59
-
60
-
61
-
62
-
63
-
64
-
65
-
66
-
67
-
68
-
69
-
70
-
71
-
72
-
73
-
74
-
75
-
76
-
77
-
78
-
79
-
80
-
81
-
82
-
83
-
84
-
85
-
86
-
87
-
88
-
89
-
90
-
91
-
92
-
93
-
94
-
95
-
96
-
97
-
98
-
99
-
100
-
101
-
102
-
103
-
104
-
105
-
106
-
107
-
108
-
109
-
110
-
111
-
112
-
113
-
114
-
115
-
116
-
117
-
118
-
119
-
120
-
121
-
122
-
123
-
124
-
125
-
126
 |
 |