HP Vectra XU 6/XXX HP Vectra XU6/150 PC - User’s Guide - Page 47
Installing Memory, Main Memory Modules
 |
View all HP Vectra XU 6/XXX manuals
Add to My Manuals
Save this manual to your list of manuals |
Page 47 highlights
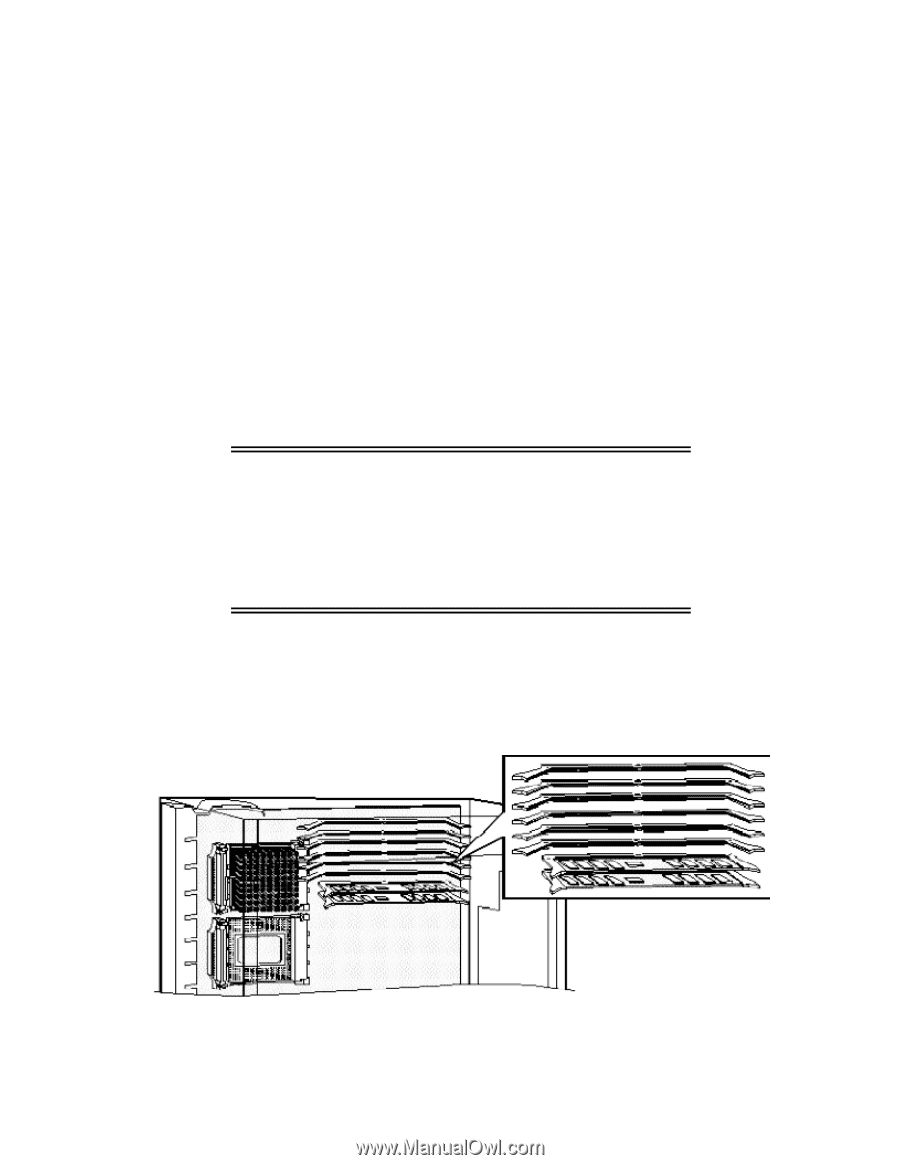
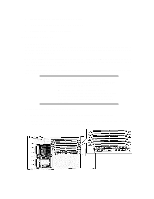
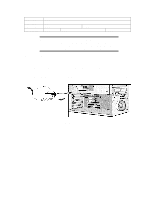
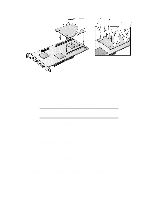
1 Check that all internal cables are safely routed. 2 Slide the power supply back into the computer. 3 Tighten the two self-retaining screws. INSTALLING MEMORY MAIN MEMORY MODULES Your PC is supplied with main memory. If you need more main memory to run your application software, you can install up to a total of 256 MB. Main memory upgrades are available in pairs of 8 MB, 16 MB, or 32 MB. Memory modules must be installed in identical pairs of the same size and same type (a pair of ECC or a pair of non-ECC) from bank A, up to bank D. For a list of available memory modules, refer to the beginning of this chapter. If your PC supports ECC (error correcting code) memory, error correcting will be disabled if any non-ECC memory is installed. WARNING: Static electricity can damage electronic components. Turn all equipment OFF. Don't let your clothes touch the accessory. To equalize the static electricity, rest the accessory bag on top of the power supply while you are removing the accessory from the bag. Handle the accessory as little as possible and with care. To install a pair of main memory modules: 1 Disconnect the computer's power cord and any telecommunications cable. 2 Remove the computer's cover (see "Removing and Replacing the Cover" earlier in this chapter). The location of the memory modules is shown here.
-
 1
1 -
2
-
3
-
4
-
5
-
6
-
7
-
8
-
9
-
10
-
11
-
12
-
13
-
14
-
15
-
16
-
17
-
18
-
19
-
20
-
21
-
22
-
23
-
24
-
25
-
26
-
27
-
28
-
29
-
30
-
31
-
32
-
33
-
34
-
35
-
36
-
37
-
38
-
39
-
40
-
41
-
 42
42 -
 43
43 -
 44
44 -
 45
45 -
 46
46 -
 47
47 -
 48
48 -
 49
49 -
 50
50 -
 51
51 -
 52
52 -
53
-
54
-
55
-
56
-
57
-
58
-
59
-
60
-
61
-
62
-
63
-
64
-
65
-
66
-
67
-
68
-
69
-
70
-
71
-
72
-
73
-
74
-
75
-
76
-
77
-
78
-
79
-
80
-
81
-
82
-
83
-
84
-
85
-
86
-
87
-
88
-
89
-
90
-
91
-
92
-
93
-
94
-
95
-
96
-
97
-
98
-
99
-
100
-
101
-
102
-
103
-
104
-
105
-
106
-
107
-
108
-
109
-
110
-
111
-
112
-
113
-
114
-
115
-
116
-
117
-
118
-
119
-
120
-
121
-
122
-
123
-
124
-
125
-
126
 |
 |