HP Vectra XU 6/XXX HP Vectra XU6/150 PC - User’s Guide - Page 59
Installing a Hard Disk Drive in a Front-Access Shelf
 |
View all HP Vectra XU 6/XXX manuals
Add to My Manuals
Save this manual to your list of manuals |
Page 59 highlights
IDE drives should be connected to the Primary IDE Channel cable (this cable is connected to the grey connector on the system board) NOTE The IDE data cables are in a bag supplied separately with your PC SCSI drives can be connected to any free connector on the SCSI cable 8 Connect the power cable and the data cable to the rear of the drive. (The connectors are shaped to go in one way only.) Power Cable Data Cable 9 Install any other accessories before completing the installation. 10 See "Completing the Installation of a Hard Disk Drive" later in this chapter to complete the installation. Installing a Hard Disk Drive in a Front-Access Shelf 1 Disconnect the computer's power cord and any telecommunications cable.
-
 1
1 -
2
-
3
-
4
-
5
-
6
-
7
-
8
-
9
-
10
-
11
-
12
-
13
-
14
-
15
-
16
-
17
-
18
-
19
-
20
-
21
-
22
-
23
-
24
-
25
-
26
-
27
-
28
-
29
-
30
-
31
-
32
-
33
-
34
-
35
-
36
-
37
-
38
-
39
-
40
-
41
-
42
-
43
-
44
-
45
-
46
-
47
-
48
-
49
-
50
-
51
-
52
-
53
-
 54
54 -
 55
55 -
 56
56 -
 57
57 -
 58
58 -
 59
59 -
 60
60 -
 61
61 -
 62
62 -
 63
63 -
 64
64 -
65
-
66
-
67
-
68
-
69
-
70
-
71
-
72
-
73
-
74
-
75
-
76
-
77
-
78
-
79
-
80
-
81
-
82
-
83
-
84
-
85
-
86
-
87
-
88
-
89
-
90
-
91
-
92
-
93
-
94
-
95
-
96
-
97
-
98
-
99
-
100
-
101
-
102
-
103
-
104
-
105
-
106
-
107
-
108
-
109
-
110
-
111
-
112
-
113
-
114
-
115
-
116
-
117
-
118
-
119
-
120
-
121
-
122
-
123
-
124
-
125
-
126
 |
 |
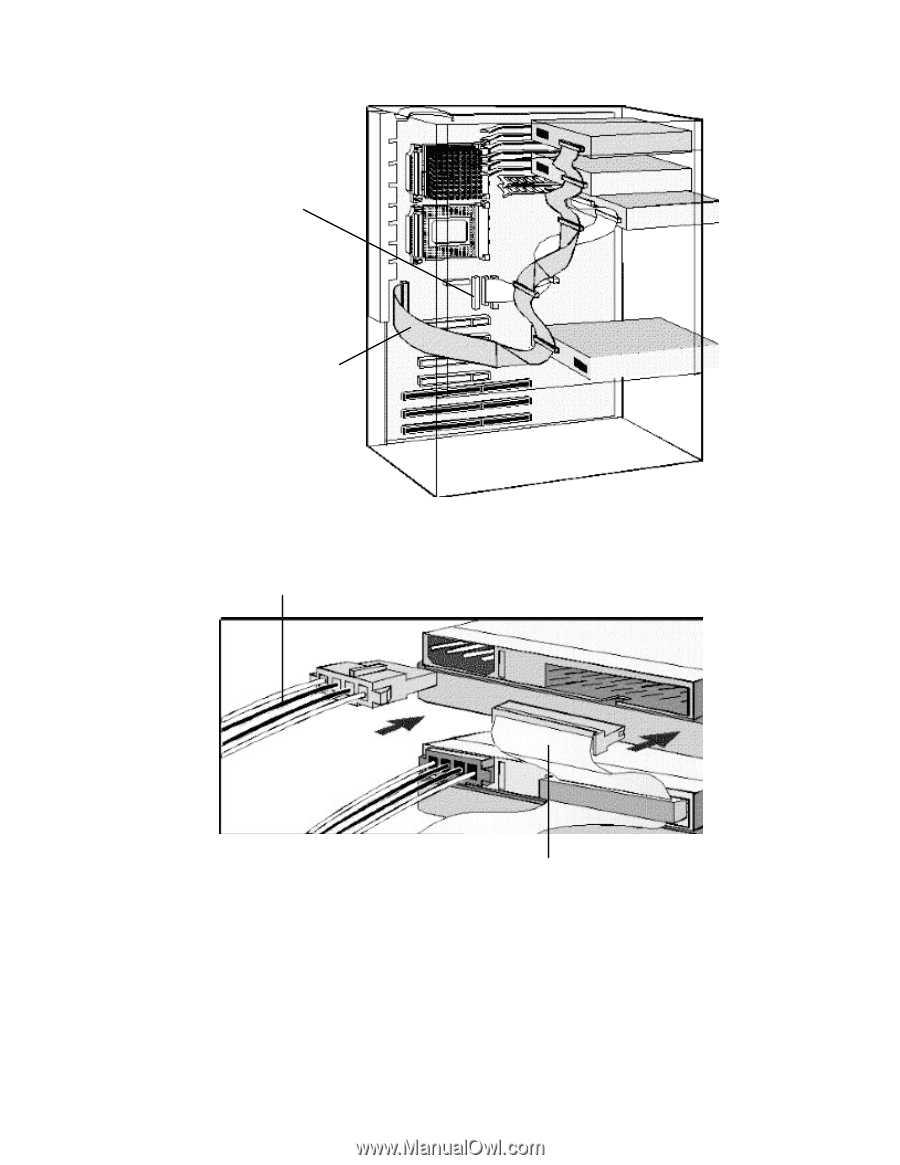
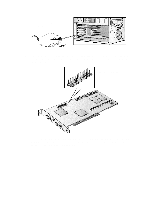
IDE drives should be
connected to the
Primary IDE Channel
cable (this cable is
connected to the grey
connector on the
system board)
NOTE
The IDE data cables
are in a bag supplied
separately with your
PC
SCSI drives can be
connected to any free
connector on the
SCSI cable
8
Connect the power cable and the data cable to the rear of the drive. (The connectors are
shaped to go in one way only.)
Power Cable
Data Cable
9
Install any other accessories before completing the installation.
10
See "Completing the Installation of a Hard Disk Drive" later in this chapter to complete the
installation.
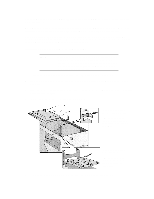
Installing a Hard Disk Drive in a Front-Access Shelf
1
Disconnect the computer’s power cord and any telecommunications cable.