HP Vectra XU 6/XXX HP Vectra XU6/150 PC - User’s Guide - Page 46
Replacing The Power Supply After Installing Accessories
 |
View all HP Vectra XU 6/XXX manuals
Add to My Manuals
Save this manual to your list of manuals |
Page 46 highlights
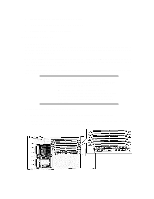
Unscrew the self-retaining screws 4 Using the small handle at the base of the power supply unit, slide the power supply out of the computer until it stops-the power supply unit remains connected to the computer Slide the power supply unit clear of the computer Power supply REPLACING THE POWER SUPPLY AFTER INSTALLING ACCESSORIES
-
 1
1 -
2
-
3
-
4
-
5
-
6
-
7
-
8
-
9
-
10
-
11
-
12
-
13
-
14
-
15
-
16
-
17
-
18
-
19
-
20
-
21
-
22
-
23
-
24
-
25
-
26
-
27
-
28
-
29
-
30
-
31
-
32
-
33
-
34
-
35
-
36
-
37
-
38
-
39
-
40
-
 41
41 -
 42
42 -
 43
43 -
 44
44 -
 45
45 -
 46
46 -
 47
47 -
 48
48 -
 49
49 -
 50
50 -
 51
51 -
52
-
53
-
54
-
55
-
56
-
57
-
58
-
59
-
60
-
61
-
62
-
63
-
64
-
65
-
66
-
67
-
68
-
69
-
70
-
71
-
72
-
73
-
74
-
75
-
76
-
77
-
78
-
79
-
80
-
81
-
82
-
83
-
84
-
85
-
86
-
87
-
88
-
89
-
90
-
91
-
92
-
93
-
94
-
95
-
96
-
97
-
98
-
99
-
100
-
101
-
102
-
103
-
104
-
105
-
106
-
107
-
108
-
109
-
110
-
111
-
112
-
113
-
114
-
115
-
116
-
117
-
118
-
119
-
120
-
121
-
122
-
123
-
124
-
125
-
126
 |
 |
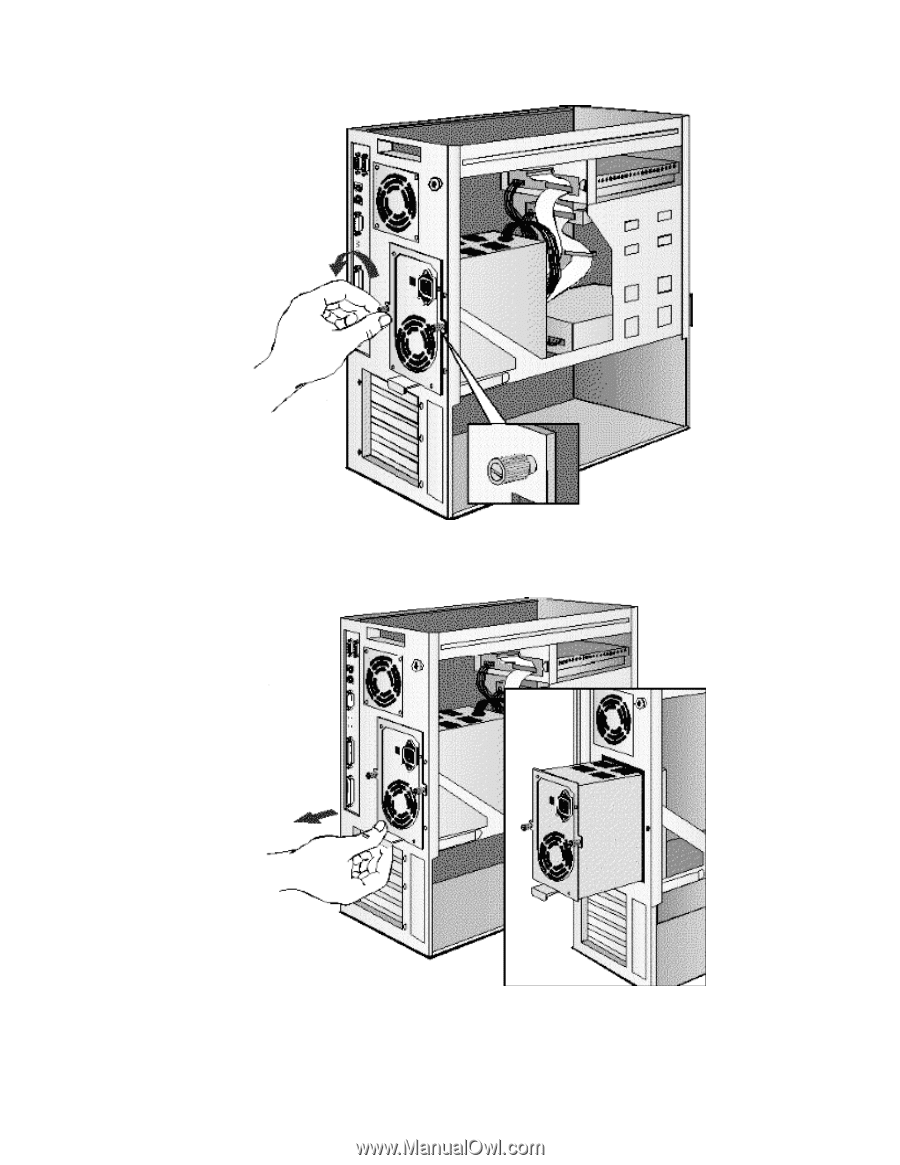
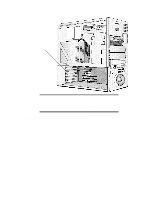
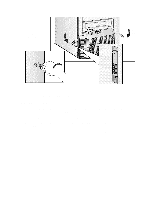
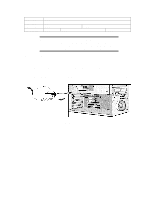
Unscrew the
self-retaining
screws
4
Using the small handle at the base of the power supply unit, slide the power supply out of
the computer until it stops—the power supply unit remains connected to the computer
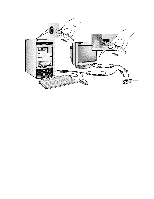
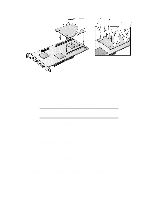
Slide the power
supply unit clear
of the computer
Power
supply
REPLACING THE POWER SUPPLY AFTER INSTALLING ACCESSORIES