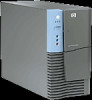
HP Workstation i2000 hp workstation i2000 owner's guide (a6037-90003) - Page 17

Internal System View after Side Door Removal

Page 17 highlights

hp workstation i2000 owner's guide Figure 28. Add Boot Option Details 65 Figure 29. Delete Boot Option 65 Figure 30. Change Boot Option Menu Order 66 Figure 31. BootNext Selection 67 Figure 32. Auto Boot Time Delay 68 Figure 33. Select Active Console Output Device 69 Figure 34. Select Active Console Input Devices 69 Figure 35. Select Active Standard Error Devices 70 Figure 36. Location of Configuration Mode Jumper 73 Figure 37. Removing the Four- (4) Chassis Screws 81 Figure 38. Bezel Interlock Clips 82 Figure 39. Internal System View after Side Door Removal 83 Figure 40. Power Supply Door in Opened Position 84 Figure 41. Peripheral Power Harness 85 Figure 42. Processor Power Harness 86 Figure 43. Processor Assembly 86 Figure 44. Memory Cards 87 Figure 45. Internal Component Locations 88 Figure 46. Fan Card Guide 89 Figure 47. Memory Card Retention Post (Front 90 Figure 48. Main Power Connection 90 Figure 49. Baseboard Mounting Screw Locations 91 Figure 50. Chassis Front With Bezel Removed 92 Figure 51. Front Panel Assembly 92 Figure 52. Processor Board Jumper Settings 94 Figure 53. Baseboard Jumpers and Connectors 95 Figure 54. I/O Board Connectors and Jumper Settings 97 Figure 55. Qlogic 1280* SCSI Adapter 100 Figure 56. DIMMS and DC-DC Converters 101 Figure 57. Correct Reinstallation of E-PAC 107 17

  • 1
  • 2
  • 3
  • 4
  • 5
  • 6
  • 7
  • 8
  • 9
  • 10
  • 11
  • 12
  • 13
  • 14
  • 15
  • 16
  • 17
  • 18
  • 19
  • 20
  • 21
  • 22
  • 23
  • 24
  • 25
  • 26
  • 27
  • 28
  • 29
  • 30
  • 31
  • 32
  • 33
  • 34
  • 35
  • 36
  • 37
  • 38
  • 39
  • 40
  • 41
  • 42
  • 43
  • 44
  • 45
  • 46
  • 47
  • 48
  • 49
  • 50
  • 51
  • 52
  • 53
  • 54
  • 55
  • 56
  • 57
  • 58
  • 59
  • 60
  • 61
  • 62
  • 63
  • 64
  • 65
  • 66
  • 67
  • 68
  • 69
  • 70
  • 71
  • 72
  • 73
  • 74
  • 75
  • 76
  • 77
  • 78
  • 79
  • 80
  • 81
  • 82
  • 83
  • 84
  • 85
  • 86
  • 87
  • 88
  • 89
  • 90
  • 91
  • 92
  • 93
  • 94
  • 95
  • 96
  • 97
  • 98
  • 99
  • 100
  • 101
  • 102
  • 103
  • 104
  • 105
  • 106
  • 107
  • 108
  • 109
  • 110
  • 111
  • 112
  • 113
  • 114
  • 115
  • 116
  • 117
  • 118
  • 119
  • 120
  • 121
  • 122
  • 123
  • 124
  • 125
  • 126
  • 127
  • 128
  • 129
  • 130
  • 131
  • 132

hp workstation i2000 owner’s guide
17
Figure 28. Add Boot Option Details
....................................................................
65
Figure 29. Delete Boot Option
............................................................................
65
Figure 30. Change Boot Option Menu Order
......................................................
66
Figure 31. BootNext Selection
............................................................................
67
Figure 32. Auto Boot Time Delay
.......................................................................
68
Figure 33. Select Active Console Output Device
................................................
69
Figure 34. Select Active Console Input Devices
.................................................
69
Figure 35. Select Active Standard Error Devices
...............................................
70
Figure 36. Location of Configuration Mode Jumper
...........................................
73
Figure 37. Removing the Four- (4) Chassis Screws
...........................................
81
Figure 38. Bezel Interlock Clips
..........................................................................
82
Figure 39. Internal System View after Side Door Removal
................................
83
Figure 40. Power Supply Door in Opened Position
............................................
84
Figure 41. Peripheral Power Harness
................................................................
85
Figure 42. Processor Power Harness
.................................................................
86
Figure 43. Processor Assembly
.........................................................................
86
Figure 44. Memory Cards
...................................................................................
87
Figure 45. Internal Component Locations
..........................................................
88
Figure 46. Fan Card Guide
.................................................................................
89
Figure 47. Memory Card Retention Post (Front)
................................................
90
Figure 48. Main Power Connection
....................................................................
90
Figure 49. Baseboard Mounting Screw Locations
..............................................
91
Figure 50. Chassis Front With Bezel Removed
..................................................
92
Figure 51. Front Panel Assembly
.......................................................................
92
Figure 52. Processor Board Jumper Settings
.....................................................
94
Figure 53. Baseboard Jumpers and Connectors
................................................
95
Figure 54. I/O Board Connectors and Jumper Settings
......................................
97
Figure 55. Qlogic 1280* SCSI Adapter
.............................................................
100
Figure 56. DIMMS and DC-DC Converters
......................................................
101
Figure 57. Correct Reinstallation of E-PAC
......................................................
107