IBM 4500R Hardware Maintenance Manual - Page 35
Temperature checkout, Wait approximately 20 seconds after you plug the power cord of your
 |
UPC - 087944567837
View all IBM 4500R manuals
Add to My Manuals
Save this manual to your list of manuals |
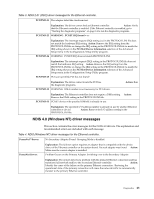
Page 35 highlights
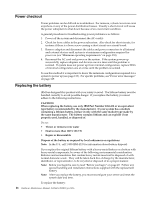
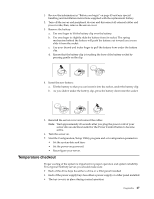
1. Review the information in "Before you begin" on page 45 and any special handling and installation instructions supplied with the replacement battery. 2. Turn off the server and peripheral devices and disconnect all external cables and power cords; then, remove the server cover. 3. Remove the battery: a. Use one finger to lift the battery clip over the battery. b. Use one finger to slightly slide the battery from its socket. The spring mechanism behind the battery will push the battery out toward you as you slide it from the socket. c. Use your thumb and index finger to pull the battery from under the battery clip. d. Ensure that the battery clip is touching the base of the battery socket by pressing gently on the clip. 4. Insert the new battery: a. Tilt the battery so that you can insert it into the socket, under the battery clip. b. As you slide it under the battery clip, press the battery down into the socket. 5. Reinstall the server cover and connect the cables. Note: Wait approximately 20 seconds after you plug the power cord of your server into an electrical outlet for the Power Control button to become active. 6. Turn the server on. 7. Start the Configuration/Setup Utility program and set configuration parameters. • Set the system date and time. • Set the power-on password. • Reconfigure your server. Temperature checkout Proper cooling of the system is important for proper operation and system reliability. For a typical Netfinity server, you should make sure: • Each of the drive bays has either a drive or a filler panel installed • Each of the power supply bays has either a power supply or a filler panel installed • The top cover is in place during normal operation Diagnostics 27
-
 1
1 -
2
-
3
-
4
-
5
-
6
-
7
-
8
-
9
-
10
-
11
-
12
-
13
-
14
-
15
-
16
-
17
-
18
-
19
-
20
-
21
-
22
-
23
-
24
-
25
-
26
-
27
-
28
-
29
-
 30
30 -
 31
31 -
 32
32 -
 33
33 -
 34
34 -
 35
35 -
 36
36 -
 37
37 -
 38
38 -
 39
39 -
 40
40 -
41
-
42
-
43
-
44
-
45
-
46
-
47
-
48
-
49
-
50
-
51
-
52
-
53
-
54
-
55
-
56
-
57
-
58
-
59
-
60
-
61
-
62
-
63
-
64
-
65
-
66
-
67
-
68
-
69
-
70
-
71
-
72
-
73
-
74
-
75
-
76
-
77
-
78
-
79
-
80
-
81
-
82
-
83
-
84
-
85
-
86
-
87
-
88
-
89
-
90
-
91
-
92
-
93
-
94
-
95
-
96
-
97
-
98
-
99
-
100
-
101
-
102
-
103
-
104
-
105
-
106
-
107
-
108
-
109
-
110
-
111
-
112
-
113
-
114
-
115
-
116
-
117
-
118
-
119
-
120
-
121
-
122
-
123
-
124
-
125
-
126
-
127
-
128
-
129
-
130
-
131
-
132
-
133
-
134
-
135
-
136
-
137
-
138
-
139
-
140
-
141
-
142
-
143
-
144
-
145
-
146
-
147
-
148
-
149
-
150
-
151
-
152
-
153
-
154
-
155
-
156
-
157
-
158
-
159
-
160
-
161
-
162
-
163
-
164
-
165
-
166
-
167
-
168
-
169
-
170
-
171
-
172
-
173
-
174
-
175
-
176
-
177
-
178
-
179
-
180
-
181
-
182
-
183
-
184
-
185
-
186
-
187
-
188
-
189
-
190
-
191
-
192
 |
 |
