IBM 4500R Hardware Maintenance Manual - Page 94
Db2 Grant Execute On Package Netfin.db2sqlc0 To Public, Db2 Connect Reset, Netfindb Grant /id
 |
UPC - 087944567837
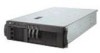
View all IBM 4500R manuals
Add to My Manuals
Save this manual to your list of manuals |
Page 94 highlights
DB2 GRANT EXECUTE ON PACKAGE NETFIN.DB2SQLC0 TO PUBLIC and then press Enter. Note: Specify PUBLIC or authorize only specific manager systems. To limit access to the database, substitute the authorization name of the managing system for PUBLIC. 2. Use the CONNECT RESET command to disconnect current users from the database. Type the following command at the OS/2 prompt: DB2 CONNECT RESET and then press Enter. 3. Use the NETFINDB GRANT command to grant (or revoke) database privileges. To grant or revoke table privileges on OS/2: a. Insert the Netfinity Manager CD into the CD-ROM drive (in this example, drive D; individual drive letters might be different). b. Make the CD-ROM drive the active drive. Type D: and then press Enter. c. Type the following command: NETFINDB GRANT /ID=id PUBLIC /DBNAME=databasename /PRIV=privilegecode where • id is the user ID to be granted access • databasename is the name of the database as specified during NETFINDB execution • privilegecode is one of the following privilege codes: - ALL - ALTER - CONTROL - DELETE - INDEX - INSERT - REFERENCES - SELECT - UPDATE d. Press Enter to execute the command. Note: Use PUBLIC or authorize only a specific ID or group name. Netfinity Manager update programs use the DB2SQLC0 package and do not require specific table privileges. To revoke privileges, substitute REVOKE for GRANT in the command line. To configure Netfinity Manager to discontinue export data through ODBC for use on DB2, refer to "ODBC database support" on page 89. Cataloging the database in the managing system: If the manager is using a remote database, catalog the node the database resides on and then catalog the database to that node. Once this step has been completed, the name of the Netfinity Manager database will appear in the System Information Tools Database Selection window. 86 Hardware Maintenance Manual: Netfinity 4500R Type 8656
-
 1
1 -
2
-
3
-
4
-
5
-
6
-
7
-
8
-
9
-
10
-
11
-
12
-
13
-
14
-
15
-
16
-
17
-
18
-
19
-
20
-
21
-
22
-
23
-
24
-
25
-
26
-
27
-
28
-
29
-
30
-
31
-
32
-
33
-
34
-
35
-
36
-
37
-
38
-
39
-
40
-
41
-
42
-
43
-
44
-
45
-
46
-
47
-
48
-
49
-
50
-
51
-
52
-
53
-
54
-
55
-
56
-
57
-
58
-
59
-
60
-
61
-
62
-
63
-
64
-
65
-
66
-
67
-
68
-
69
-
70
-
71
-
72
-
73
-
74
-
75
-
76
-
77
-
78
-
79
-
80
-
81
-
82
-
83
-
84
-
85
-
86
-
87
-
88
-
 89
89 -
 90
90 -
 91
91 -
 92
92 -
 93
93 -
 94
94 -
 95
95 -
 96
96 -
 97
97 -
 98
98 -
 99
99 -
100
-
101
-
102
-
103
-
104
-
105
-
106
-
107
-
108
-
109
-
110
-
111
-
112
-
113
-
114
-
115
-
116
-
117
-
118
-
119
-
120
-
121
-
122
-
123
-
124
-
125
-
126
-
127
-
128
-
129
-
130
-
131
-
132
-
133
-
134
-
135
-
136
-
137
-
138
-
139
-
140
-
141
-
142
-
143
-
144
-
145
-
146
-
147
-
148
-
149
-
150
-
151
-
152
-
153
-
154
-
155
-
156
-
157
-
158
-
159
-
160
-
161
-
162
-
163
-
164
-
165
-
166
-
167
-
168
-
169
-
170
-
171
-
172
-
173
-
174
-
175
-
176
-
177
-
178
-
179
-
180
-
181
-
182
-
183
-
184
-
185
-
186
-
187
-
188
-
189
-
190
-
191
-
192
 |
 |