IBM 4500R Hardware Maintenance Manual - Page 62
replace it with another., Touch the static-protective bag containing the drive to any unpainted metal
 |
UPC - 087944567837
View all IBM 4500R manuals
Add to My Manuals
Save this manual to your list of manuals |
Page 62 highlights
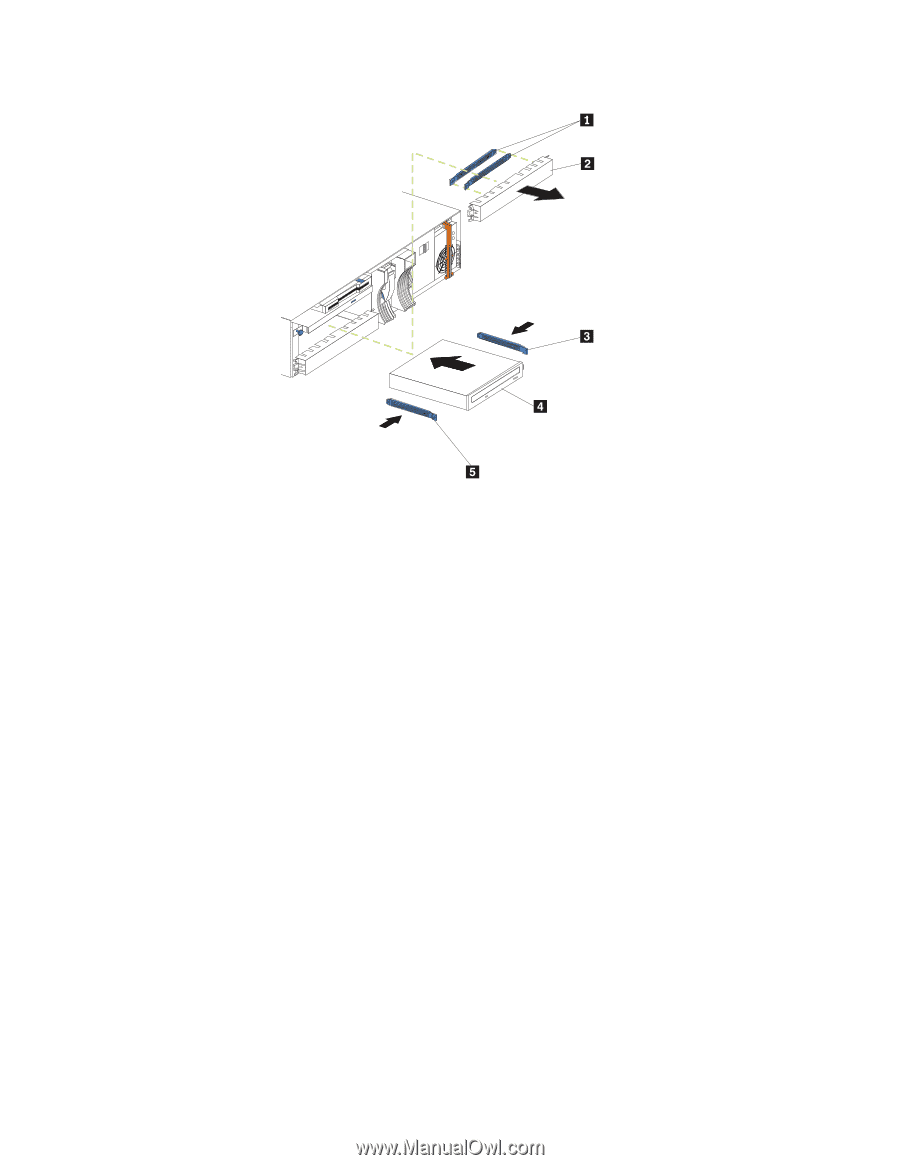
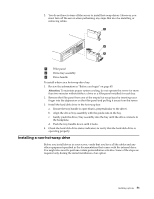
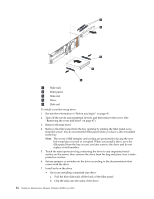
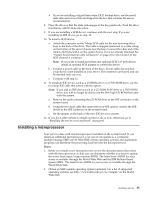
1 Slide rails 2 Filler panel 3 Slide rail 4 Drive 5 Slide rail To install a non-hot-swap drive: 1. Review the information in"Before you begin" on page 45. 2. Turn off the server and peripheral devices and then remove the cover. (See "Removing the cover and bezel" on page 47.) 3. Remove the trim bezel. 4. Remove the filler panel from the bay opening by pulling the filler panel away from the server. You do not need the filler panel when you have a drive installed in the bay. Note: The server's EMI integrity and cooling are protected by having the nonhot-swap bays covered or occupied. When you install a drive, save the filler panel from the bay, in case you later remove the drive and do not replace it with another. 5. Touch the static-protective bag containing the drive to any unpainted metal surface on the server; then, remove the drive from the bag and place it on a staticprotective surface. 6. Set any jumpers or switches on the drive according to the documentation that comes with the drive. 7. Install rails on the drive. • If you are installing a standard-size drive: a. Pull the blue slide rails off the back of the filler panel. b. Clip the rails onto the sides of the drive. 54 Hardware Maintenance Manual: Netfinity 4500R Type 8656
-
 1
1 -
2
-
3
-
4
-
5
-
6
-
7
-
8
-
9
-
10
-
11
-
12
-
13
-
14
-
15
-
16
-
17
-
18
-
19
-
20
-
21
-
22
-
23
-
24
-
25
-
26
-
27
-
28
-
29
-
30
-
31
-
32
-
33
-
34
-
35
-
36
-
37
-
38
-
39
-
40
-
41
-
42
-
43
-
44
-
45
-
46
-
47
-
48
-
49
-
50
-
51
-
52
-
53
-
54
-
55
-
56
-
 57
57 -
 58
58 -
 59
59 -
 60
60 -
 61
61 -
 62
62 -
 63
63 -
 64
64 -
 65
65 -
 66
66 -
 67
67 -
68
-
69
-
70
-
71
-
72
-
73
-
74
-
75
-
76
-
77
-
78
-
79
-
80
-
81
-
82
-
83
-
84
-
85
-
86
-
87
-
88
-
89
-
90
-
91
-
92
-
93
-
94
-
95
-
96
-
97
-
98
-
99
-
100
-
101
-
102
-
103
-
104
-
105
-
106
-
107
-
108
-
109
-
110
-
111
-
112
-
113
-
114
-
115
-
116
-
117
-
118
-
119
-
120
-
121
-
122
-
123
-
124
-
125
-
126
-
127
-
128
-
129
-
130
-
131
-
132
-
133
-
134
-
135
-
136
-
137
-
138
-
139
-
140
-
141
-
142
-
143
-
144
-
145
-
146
-
147
-
148
-
149
-
150
-
151
-
152
-
153
-
154
-
155
-
156
-
157
-
158
-
159
-
160
-
161
-
162
-
163
-
164
-
165
-
166
-
167
-
168
-
169
-
170
-
171
-
172
-
173
-
174
-
175
-
176
-
177
-
178
-
179
-
180
-
181
-
182
-
183
-
184
-
185
-
186
-
187
-
188
-
189
-
190
-
191
-
192
 |
 |