IBM 4500R Hardware Maintenance Manual - Page 98
ODBC database configuration, Creating the Netfinity Manager tables, Attention, Notes, Services
 |
UPC - 087944567837
View all IBM 4500R manuals
Add to My Manuals
Save this manual to your list of manuals |
Page 98 highlights
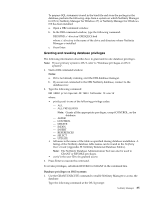
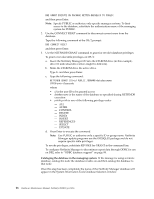
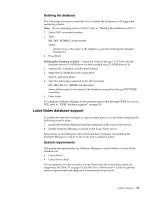
ODBC database configuration This section describes the procedures you must complete before Netfinity Manager can create the Netfinity Database Tables using ODBC. 1. Define the NETFIN ID so the Netfinity Database Administration can create the Netfinity Database tables with a table qualifier of NETFIN. Attention: NETFIN is a restricted user ID. The password is not retained by Netfinity Database Administration after use. Do not use this ID for exports. Notes: a. In OS/2 and Windows 95, NETFIN must either be the owner of the database or must be given administrator authority. b. In Windows NT, when exporting to DB2, NETFIN must either be the owner of the database or be defined as a system administrator through the NT User Manager for Domains or the NT User Manager. In Windows NT, when exporting to MS SQL, NETFIN must be the owner of the database or be given table create rights. 2. Create the database with the appropriate relationship with the NETFIN ID. 3. Make a database ODBC source either using the ODBC tools shipped with the operating system or the database. 4. On Windows NT, configure the Netfinity Support Program to export data using the ODBC database. a. Open Services from the Control Panel. b. Click Netfinity Support Program from the Services field, then click Startup. c. Click Automatic in the Startup Type button group. d. Click This Account in the Log On As field group. Enter in the This Account field the user name of the account that made this database an ODBC source. e. Click OK. Note: If the Event Scheduler or Alert Manager will be used to export data using ODBC, continue to have the ID which made the database an ODBC source logged on during the time Event Scheduler will be exporting data. Creating the Netfinity Manager tables To create the tables needed to enable Netfinity Manager to export data: 1. Open the Netfinity Manager Database Administration service. The Netfinity Manager Database Administration service is found in the Netfinity Manager folder or Netfinity Manager program group. Double-click this icon to open the Netfinity Manager Database Administration window. 2. Select a DBMS. Click in the Select DBMS listing the name of the DBMS which Netfinity Manager will be using to export data. 3. To create the Netfinity Manager table groups within the database, click Create and then click OK to open the Database Server window. The following table actions are also available: • Delete To remove the Netfinity Manager table groups from the database, click Delete and then click OK to open the Database Server window. 90 Hardware Maintenance Manual: Netfinity 4500R Type 8656
-
 1
1 -
2
-
3
-
4
-
5
-
6
-
7
-
8
-
9
-
10
-
11
-
12
-
13
-
14
-
15
-
16
-
17
-
18
-
19
-
20
-
21
-
22
-
23
-
24
-
25
-
26
-
27
-
28
-
29
-
30
-
31
-
32
-
33
-
34
-
35
-
36
-
37
-
38
-
39
-
40
-
41
-
42
-
43
-
44
-
45
-
46
-
47
-
48
-
49
-
50
-
51
-
52
-
53
-
54
-
55
-
56
-
57
-
58
-
59
-
60
-
61
-
62
-
63
-
64
-
65
-
66
-
67
-
68
-
69
-
70
-
71
-
72
-
73
-
74
-
75
-
76
-
77
-
78
-
79
-
80
-
81
-
82
-
83
-
84
-
85
-
86
-
87
-
88
-
89
-
90
-
91
-
92
-
 93
93 -
 94
94 -
 95
95 -
 96
96 -
 97
97 -
 98
98 -
 99
99 -
 100
100 -
 101
101 -
 102
102 -
 103
103 -
104
-
105
-
106
-
107
-
108
-
109
-
110
-
111
-
112
-
113
-
114
-
115
-
116
-
117
-
118
-
119
-
120
-
121
-
122
-
123
-
124
-
125
-
126
-
127
-
128
-
129
-
130
-
131
-
132
-
133
-
134
-
135
-
136
-
137
-
138
-
139
-
140
-
141
-
142
-
143
-
144
-
145
-
146
-
147
-
148
-
149
-
150
-
151
-
152
-
153
-
154
-
155
-
156
-
157
-
158
-
159
-
160
-
161
-
162
-
163
-
164
-
165
-
166
-
167
-
168
-
169
-
170
-
171
-
172
-
173
-
174
-
175
-
176
-
177
-
178
-
179
-
180
-
181
-
182
-
183
-
184
-
185
-
186
-
187
-
188
-
189
-
190
-
191
-
192
 |
 |