Mackie D8B Owners Manual - Page 12
Details, Now connect the audio inputs and outputs, to the console. - power supply
 |
View all Mackie D8B manuals
Add to My Manuals
Save this manual to your list of manuals |
Page 12 highlights
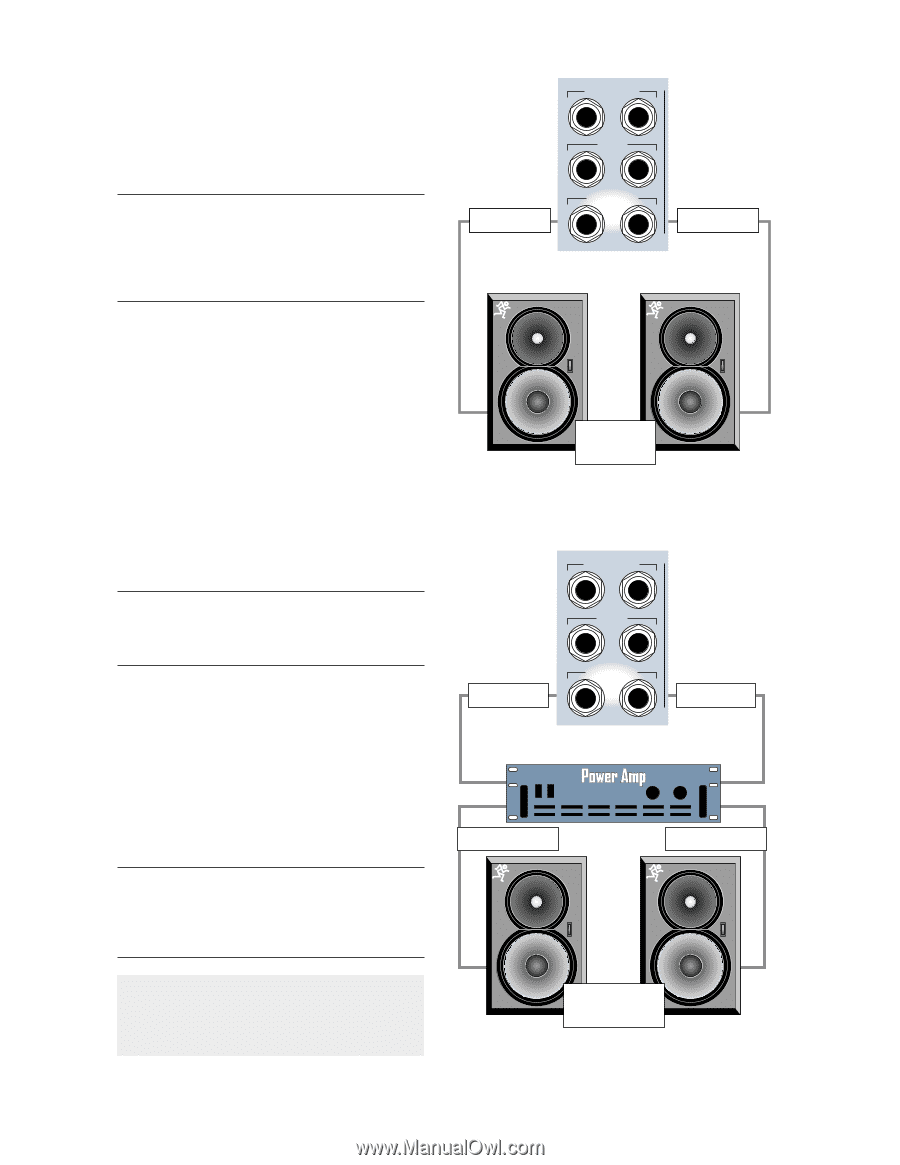
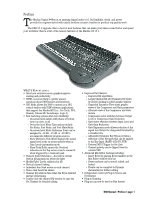
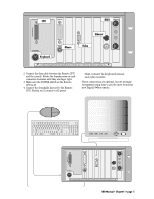
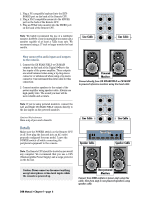
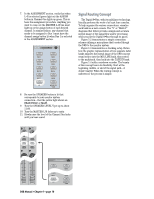
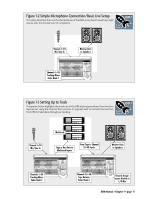
1. Plug a PC-compatible keyboard into the KEYBOARD port on the back of the Remote CPU. 2. Plug a PS/2 compatible mouse into the MOUSE port on the back of the Remote CPU. 3. Plug an SVGA video monitor into the VIDEO port on the back of the Remote CPU. Note: We highly recommend the use of a multisync monitor; however, if one is unavailable you must use a monitor capable of at least a 72Hz scan rate. We recommend using a 17-inch or larger monitor for best results. Line Cable MASTER OUT LR CR MAIN LR CR NEAR FIELD LR Line Cable Now connect the audio inputs and outputs to the console. 1. Connect the CR NEAR FIELD or CR MAIN outputs on the back of the Digital 8•Bus to the line inputs of the power amplifier. These outputs are wired balanced when using a tip-ring-sleeve connector or unbalanced when using a tip-sleeve connector. Use instrument/line-level cable for this connection. 2. Connect monitor speakers to the output of the power amplifier using speaker cable. Always use high quality wire. The sound you hear will be more reliable and accurate. Note: If you're using powered monitors, connect the Left and Right CR NEAR FIELD outputs directly to the line inputs on the powered monitors. Optional Refreshments Have a sip of java and a biscotti. Details Make sure the POWER switch on the Remote CPU is off. Now plug the linecord into an AC outlet properly configured for your model. Leave the POWER switch off while connecting the peripheral equipment to the console. Powered Monitors Connect directly from CR NEARFIELD or CR MAIN to powered reference monitors using line-level cable. Line Cable MASTER OUT LR CR MAIN LR CR NEAR FIELD LR Line Cable Speaker Cable Speaker Cable Note: The Remote CPU should be treated as you would any computer. We recommend that you use a UPS (Uninterruptible Power Supply) and a surge protector on the AC line. Caution: Never connect or disconnect anything except microphone or line-level inputs while the console is powered up. D8B Manual • Chapter 1 • page 6 Non-powered Monitors Connect from D8B outputs to power amp using line cable, then from amp to non-powered speakers using speaker cable.
-
 1
1 -
2
-
3
-
4
-
5
-
6
-
 7
7 -
 8
8 -
 9
9 -
 10
10 -
 11
11 -
 12
12 -
 13
13 -
 14
14 -
 15
15 -
 16
16 -
 17
17 -
18
-
19
-
20
-
21
-
22
-
23
-
24
-
25
-
26
-
27
-
28
-
29
-
30
-
31
-
32
-
33
-
34
-
35
-
36
-
37
-
38
-
39
-
40
-
41
-
42
-
43
-
44
-
45
-
46
-
47
-
48
-
49
-
50
-
51
-
52
-
53
-
54
-
55
-
56
-
57
-
58
-
59
-
60
-
61
-
62
-
63
-
64
-
65
-
66
-
67
-
68
-
69
-
70
-
71
-
72
-
73
-
74
-
75
-
76
-
77
-
78
-
79
-
80
-
81
-
82
-
83
-
84
-
85
-
86
-
87
-
88
-
89
-
90
-
91
-
92
-
93
-
94
-
95
-
96
-
97
-
98
-
99
-
100
-
101
-
102
-
103
-
104
-
105
-
106
-
107
-
108
-
109
-
110
-
111
-
112
-
113
-
114
-
115
-
116
-
117
-
118
-
119
-
120
-
121
-
122
-
123
-
124
-
125
-
126
-
127
-
128
-
129
-
130
-
131
-
132
-
133
-
134
-
135
-
136
-
137
-
138
-
139
-
140
-
141
-
142
-
143
-
144
-
145
-
146
-
147
-
148
-
149
-
150
-
151
-
152
-
153
-
154
-
155
-
156
-
157
-
158
-
159
-
160
-
161
-
162
-
163
-
164
-
165
-
166
-
167
-
168
-
169
-
170
-
171
-
172
-
173
-
174
-
175
-
176
-
177
-
178
-
179
-
180
-
181
-
182
-
183
-
184
-
185
-
186
-
187
-
188
-
189
-
190
-
191
-
192
-
193
-
194
-
195
-
196
-
197
-
198
 |
 |