Mackie D8B Owners Manual - Page 42
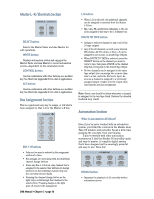
Master L-R/Shortcuts Bus Assignment Automation SELECT button, WRITE button
 |
View all Mackie D8B manuals
Add to My Manuals
Save this manual to your list of manuals |
Page 42 highlights
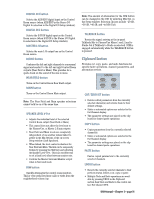
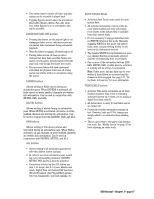
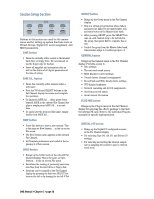
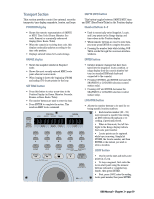
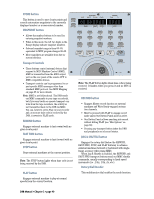
Master L-R/Shortcuts Section MASTER L/R SHORTCUTS SELECT WRITE CONTROL ALT SELECT button Selects the Master Fader and Aux Master for edit operations. WRITE button Displays automation status and engages the Master Fader and Aux Master to record automation events-dependent on the automation mode. CONTROL button Used in combination with other buttons as a modifier key. See Shortcuts (Appendix D) for a list of applications. ALT button Used in combination with other buttons as a modifier key. See Shortcuts (Appendix D) for a list of applications. Bus Assignment Section This is a quick and easy way to assign, or tell what's been assigned to, Bus 1-8 or the Master L-R bus. ASSIGNMENT ASSIGN BUS 1 ASSIGN BUS 3 ASSIGN BUS 5 ASSIGN BUS 7 ASSIGN L-R ASSIGN BUS 2 ASSIGN BUS 4 ASSIGN BUS 6 ASSIGN BUS 8 ASSIGN ROUTE TO TAPE BUS 1-8 buttons • Only one bus may be selected in the assignment section at a time. • Bus assigns are used along with the individual channel Assign buttons. • Press any Bus 1-8 button. Any channel that's assigned to the selected bus will have its Assign button lit on the individual channel strip (on the currently selected bank). • Pressing the channel Assign button so the light stays on will assign that channel to the selected bus. Pressing Assign so the light goes off removes the assignment. D8B Manual • Chapter 2 • page 36 L-R button • When L-R is selected, the individual channels can be assigned or removed from the Master L-R bus. • Mic, Line, FX, and Returns (Channels 1-72) can all be assigned in this way to the L-R Master bus. ROUTE TO TAPE button • Assigns a selected channel to any or all of the 24 tape outputs. • Any of the 48 channels, as well as any internal FX returns, Alt I/O return, or Bus 1-8 can be assigned to one or more, or all (24) Tape Outputs. • When ROUTE TO TAPE is selected, press the SELECT button on the channel you want to route to tape, then press ASSIGN on the channel strip that corresponds to the desired Tape Output. • No two channels can be assigned to the same tape output (you can assign two or more channels to a bus, and route the bus to tape). As soon as a channel is assigned to a previously assigned output, it takes over the output, thus removing the previous assignment. Note: Great care should be taken whenever a channel is assigned to its own tape track. Beware the dreaded feedback loop. Ouch! Automation Section What Is Automation All About? Even if you've never worked with an automation system, you'll find the controls in the Mackie Real Time OS intuitive and powerful. Spend a little time grasping the concepts, then start mixing. If you've worked with other automation systems you'll find the Mackie OS incredibly quick and easy to master. A complete digital system that's been designed well is amazingly powerful and easy to use. Have fun! AUTOMATION BYPASS FADERS MUTES AUTO TOUCH FADER MOTORS OFF PAN ALL TRIM LEVELS BYPASS button • Bypasses the playback of all currently written automation moves.
-
 1
1 -
2
-
3
-
4
-
5
-
6
-
7
-
8
-
9
-
10
-
11
-
12
-
13
-
14
-
15
-
16
-
17
-
18
-
19
-
20
-
21
-
22
-
23
-
24
-
25
-
26
-
27
-
28
-
29
-
30
-
31
-
32
-
33
-
34
-
35
-
36
-
 37
37 -
 38
38 -
 39
39 -
 40
40 -
 41
41 -
 42
42 -
 43
43 -
 44
44 -
 45
45 -
 46
46 -
 47
47 -
48
-
49
-
50
-
51
-
52
-
53
-
54
-
55
-
56
-
57
-
58
-
59
-
60
-
61
-
62
-
63
-
64
-
65
-
66
-
67
-
68
-
69
-
70
-
71
-
72
-
73
-
74
-
75
-
76
-
77
-
78
-
79
-
80
-
81
-
82
-
83
-
84
-
85
-
86
-
87
-
88
-
89
-
90
-
91
-
92
-
93
-
94
-
95
-
96
-
97
-
98
-
99
-
100
-
101
-
102
-
103
-
104
-
105
-
106
-
107
-
108
-
109
-
110
-
111
-
112
-
113
-
114
-
115
-
116
-
117
-
118
-
119
-
120
-
121
-
122
-
123
-
124
-
125
-
126
-
127
-
128
-
129
-
130
-
131
-
132
-
133
-
134
-
135
-
136
-
137
-
138
-
139
-
140
-
141
-
142
-
143
-
144
-
145
-
146
-
147
-
148
-
149
-
150
-
151
-
152
-
153
-
154
-
155
-
156
-
157
-
158
-
159
-
160
-
161
-
162
-
163
-
164
-
165
-
166
-
167
-
168
-
169
-
170
-
171
-
172
-
173
-
174
-
175
-
176
-
177
-
178
-
179
-
180
-
181
-
182
-
183
-
184
-
185
-
186
-
187
-
188
-
189
-
190
-
191
-
192
-
193
-
194
-
195
-
196
-
197
-
198
 |
 |
