Netgear MS70 User Manual - Page 89
Set up a static route, ADVANCED > Advanced Setup > Static Routes
 |
View all Netgear MS70 manuals
Add to My Manuals
Save this manual to your list of manuals |
Page 89 highlights
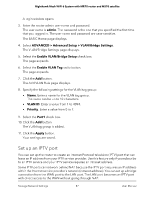
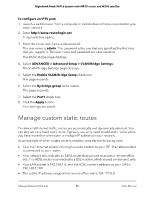
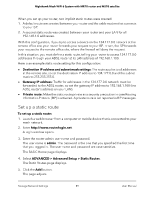
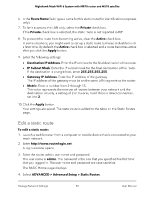
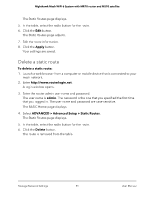
Nighthawk Mesh WiFi 6 System with MR70 router and MS70 satellite When you set up your router, two implicit static routes were created: 1. A default route was created between your router and the cable modem that connects to your ISP. 2. A second static route was created between your router and your LAN for all 192.168.1.0 addresses. With this configuration, if you try to access a device on the 134.177.0.0 network at the remote office site, your router forwards your request to your ISP. In turn, the ISP forwards your request to the remote office site, where the firewall will deny the request. In this situation, you must define a static route, telling your router to access 134.177.0.0 addresses through your ADSL router at its LAN address of 192.168.1.100. Here is an example static route setting for this configuration: • Destination IP address and subnet mask settings: The route applies to all addresses at the remote site, so set the destination IP address to 134.177.0.0 and the subnet mask to 255.255.255.0. • Gateway IP address: Traffic for addresses in the 134.177.0.0 network must be forwarded to the ADSL router, so set the gateway IP address to 192.168.1.100 (the ADSL router's address on your LAN). • Private route: Make the static route private as a security precaution in case Routing Information Protocol (RIP) is activated. A private route is not reported in RIP messages. Set up a static route To set up a static route: 1. Launch a web browser from a computer or mobile device that is connected to your mesh network. 2. Enter http://www.routerlogin.net. A login window opens. 3. Enter the router admin user name and password. The user name is admin. The password is the one that you specified the first time that you logged in. The user name and password are case-sensitive. The BASIC Home page displays. 4. Select ADVANCED > Advanced Setup > Static Routes. The Static Routes page displays. 5. Click the Add button. The page adjusts. Manage Network Settings 89 User Manual
-
 1
1 -
2
-
3
-
4
-
5
-
6
-
7
-
8
-
9
-
10
-
11
-
12
-
13
-
14
-
15
-
16
-
17
-
18
-
19
-
20
-
21
-
22
-
23
-
24
-
25
-
26
-
27
-
28
-
29
-
30
-
31
-
32
-
33
-
34
-
35
-
36
-
37
-
38
-
39
-
40
-
41
-
42
-
43
-
44
-
45
-
46
-
47
-
48
-
49
-
50
-
51
-
52
-
53
-
54
-
55
-
56
-
57
-
58
-
59
-
60
-
61
-
62
-
63
-
64
-
65
-
66
-
67
-
68
-
69
-
70
-
71
-
72
-
73
-
74
-
75
-
76
-
77
-
78
-
79
-
80
-
81
-
82
-
83
-
 84
84 -
 85
85 -
 86
86 -
 87
87 -
 88
88 -
 89
89 -
 90
90 -
 91
91 -
 92
92 -
 93
93 -
 94
94 -
95
-
96
-
97
-
98
-
99
-
100
-
101
-
102
-
103
-
104
-
105
-
106
-
107
-
108
-
109
-
110
-
111
-
112
-
113
-
114
-
115
-
116
-
117
-
118
-
119
-
120
-
121
-
122
-
123
-
124
-
125
-
126
-
127
-
128
-
129
-
130
-
131
-
132
-
133
-
134
-
135
-
136
-
137
-
138
-
139
-
140
-
141
-
142
-
143
-
144
-
145
-
146
-
147
-
148
-
149
-
150
-
151
 |
 |
