Oki MC770 MC770/780 User Guide - Troubleshooting - Page 56
Insert a new toner cartridge., Gently wipe the surface of the LED head, lens with a soft tissue.
 |
View all Oki MC770 manuals
Add to My Manuals
Save this manual to your list of manuals |
Page 56 highlights
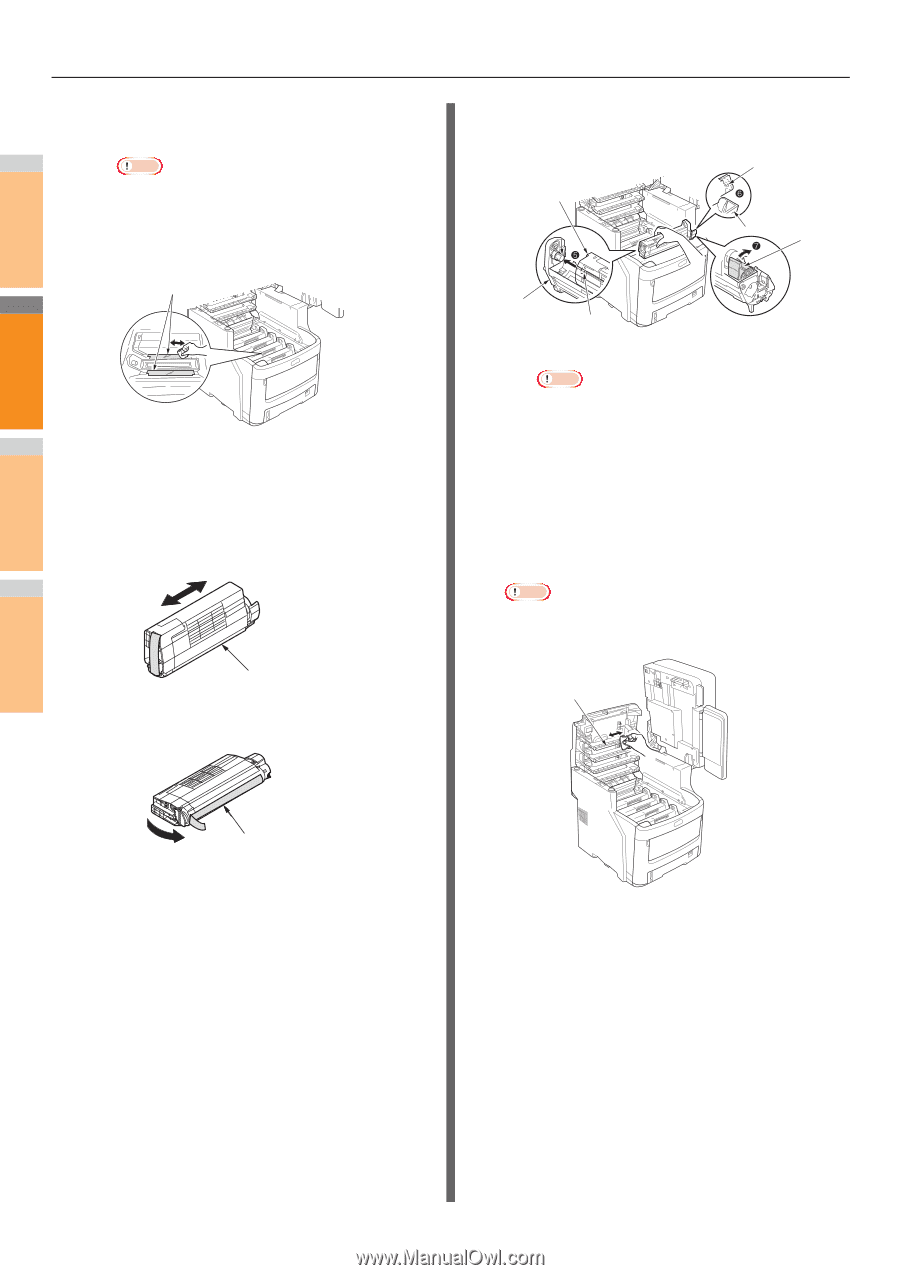
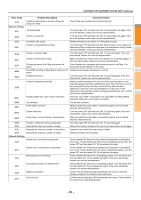
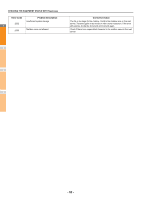
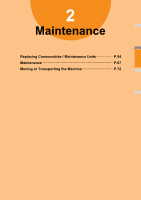
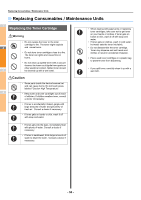
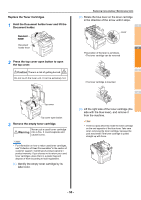
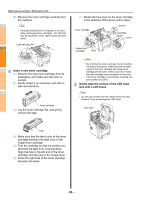
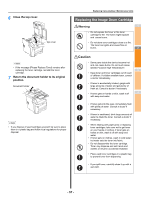
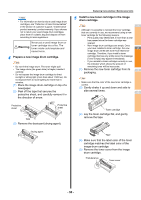
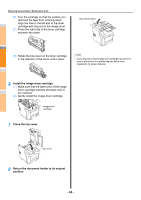
Replacing Consumables / Maintenance Units (4) Remove the toner cartridge carefully from the machine. 1 Note • If the light-shielding film is dropped on the toner while exchanging toner cartridges, the LED lens may be exposed to toner. Wipe it clean with soft tissue. Light-shielding film 2 4 3 Insert a new toner cartridge. (1) Remove the new toner cartridge from its packaging, and make sure the color is correct. (2) Gently shake it up and down and side to side several times. 4 Toner cartridge (3) Lay the toner cartridge flat, and gently remove the tape. 5 (7) Rotate the blue lever on the toner cartridge in the direction of the arrow until it stops. Toner cartridge Groove Cartridge guide Lever Image drum cartridges Hole Note • Do not force the toner cartridge into the machine. If it doesn't fit properly, make sure that the label colors of the toner cartridge and image drum cartridge are the same. If the colors don't match, the toner cartridge cannot properly be mounted. • If the toner cartridge is not properly mounted, the print quality may suffer. 5 Gently wipe the surface of the LED head lens with a soft tissue. Note • Do not use solvents such as methyl alcohol or paint thinners. They will damage the LED head. LED head Tape 6 (4) Make sure that the label color of the toner cartridge matches the label color of the image drum cartridge. (5) Turn the cartridge so that the surface you removed the tape from is facing down. Align the hole in the left end of the toner cartridge with the post in the image drum. 7 (6) Press the right side of the toner cartridge securely into place. - 56 -
-
 1
1 -
2
-
3
-
4
-
5
-
6
-
7
-
8
-
9
-
10
-
11
-
12
-
13
-
14
-
15
-
16
-
17
-
18
-
19
-
20
-
21
-
22
-
23
-
24
-
25
-
26
-
27
-
28
-
29
-
30
-
31
-
32
-
33
-
34
-
35
-
36
-
37
-
38
-
39
-
40
-
41
-
42
-
43
-
44
-
45
-
46
-
47
-
48
-
49
-
50
-
 51
51 -
 52
52 -
 53
53 -
 54
54 -
 55
55 -
 56
56 -
 57
57 -
 58
58 -
 59
59 -
 60
60 -
 61
61 -
62
-
63
-
64
-
65
-
66
-
67
-
68
-
69
-
70
-
71
-
72
-
73
-
74
-
75
-
76
-
77
-
78
-
79
 |
 |