Sony PDWHD1500 User Manual (PDW-HD1500 / F1600 Operation Manual for Firmware V - Page 108
PREFIX, NUMERIC, To check the titles of recorded clips
 |
View all Sony PDWHD1500 manuals
Add to My Manuals
Save this manual to your list of manuals |
Page 108 highlights
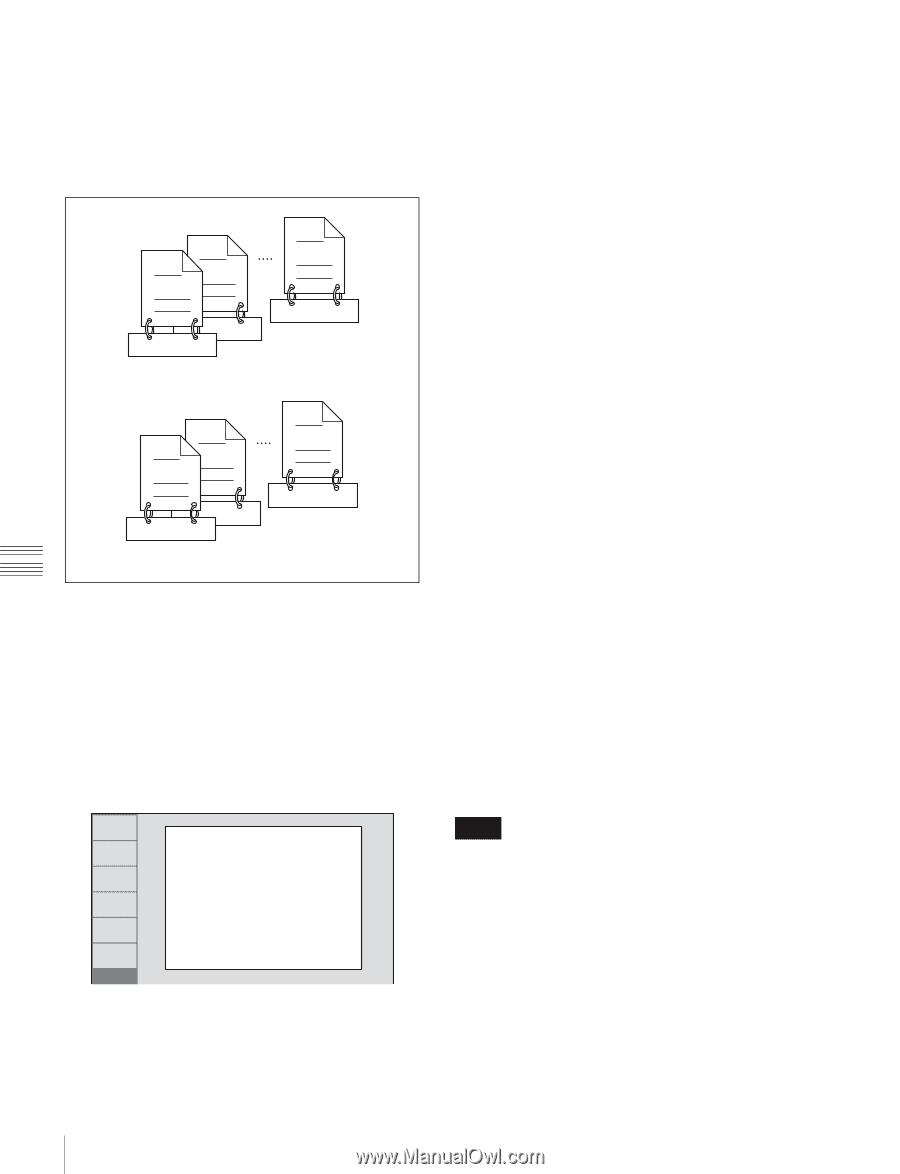
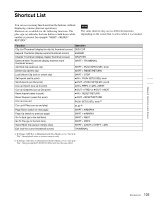
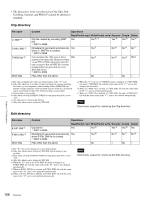
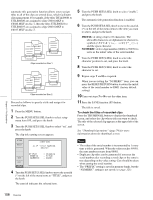
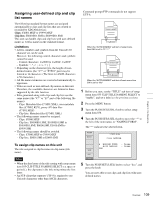
automatic title generation function allows you to assign titles to all of the clips on several discs, which facilitates clip management. For example, if the titles TITLE00001 to TITLE00020 are assigned to clips C0001.MXF to C0020.MXF on disc 1, then the titles TITLE00021 to TITLE00037 are assigned to clips C0001.MXF to C0017.MXF on disc 2. C0002.MXF C0001.MXF C0020.MXF TITLE00002 TITLE00001 TITLE00020 Clips recorded on Disc 1 C0002.MXF C0001.MXF C0017.MXF TITLE00022 TITLE00021 TITLE00037 Clips recorded on Disc 2 Proceed as follows to specify a title and assign it to recorded clips. 1 Press the MENU button. 2 Turn the PUSH SET(S.SEL) knob to select setup menu item 035, and press the knob. 3 Turn the PUSH SET(S.SEL) knob to select "on", and press the knob. The clip title naming screen appears. RETURN SELECT ITEM-035 CLIP TITLE NAMING SELECT *TITLE - disable PREFIX - TITLE SAVE NUMERIC - 00001 EXIT SETUP 4 Turn the PUSH SET(S.SEL) knob to move the asterisk (*) on the left of the menu items to "TITLE", and press the knob. The asterisk indicates the selected item. 5 Turn the PUSH SET(S.SEL) knob to select "enable", and press the knob. The automatic title generation function is enabled. 6 Turn the PUSH SET(S.SEL) knob to move the asterisk (*) on the left of the menu items to the item you want to select, and press the knob. PREFIX: A string of up to 10 characters. The allowable characters are alphanumeric characters, symbols and the space character. NUMERIC: A five-digit number (00001 to 99999) to serve as the initial value of the serial number. 7 Turn the PUSH SET(S.SEL) knob to select the character position to set, and press the knob. 8 Turn the PUSH SET(S.SEL) knob to select the character to set. 9 Repeat steps 7 and 8 as required. When you are setting the "NUMERIC" item, you can press the RESET/RETURN button to return the initial value of the serial number to 00001 (factory default setting). 10Carry out steps 7 to 9 to set the other item. 11Press the SAVE function (F5) button. The title is saved. To check the titles of recorded clips Press the THUMBNAIL button to display the thumbnail screen, and select the clip whose title you want to check. The title of the selected clip appears at the upper left of the screen. See "Thumbnail Operations" (page 74) for more information about the thumbnail screen. Notes • The value of the serial number is incremented by 1 every time a title is generated. When the value reaches 99999, the next number restarts from 00001. • Duplicate clip titles can be generated if you reset the serial number after recording several clips or the same is true depending on the value setting. Care should be taken when setting the serial number. • The "PREFIX" setting is saved in memory banks, but the "NUMERIC" setting is not saved (see page 125). Chapter 6 File Operations 108 Overview
-
 1
1 -
2
-
3
-
4
-
5
-
6
-
7
-
8
-
9
-
10
-
11
-
12
-
13
-
14
-
15
-
16
-
17
-
18
-
19
-
20
-
21
-
22
-
23
-
24
-
25
-
26
-
27
-
28
-
29
-
30
-
31
-
32
-
33
-
34
-
35
-
36
-
37
-
38
-
39
-
40
-
41
-
42
-
43
-
44
-
45
-
46
-
47
-
48
-
49
-
50
-
51
-
52
-
53
-
54
-
55
-
56
-
57
-
58
-
59
-
60
-
61
-
62
-
63
-
64
-
65
-
66
-
67
-
68
-
69
-
70
-
71
-
72
-
73
-
74
-
75
-
76
-
77
-
78
-
79
-
80
-
81
-
82
-
83
-
84
-
85
-
86
-
87
-
88
-
89
-
90
-
91
-
92
-
93
-
94
-
95
-
96
-
97
-
98
-
99
-
100
-
101
-
102
-
 103
103 -
 104
104 -
 105
105 -
 106
106 -
 107
107 -
 108
108 -
 109
109 -
 110
110 -
 111
111 -
 112
112 -
 113
113 -
114
-
115
-
116
-
117
-
118
-
119
-
120
-
121
-
122
-
123
-
124
-
125
-
126
-
127
-
128
-
129
-
130
-
131
-
132
-
133
-
134
-
135
-
136
-
137
-
138
-
139
-
140
-
141
-
142
-
143
-
144
-
145
-
146
-
147
-
148
-
149
-
150
-
151
-
152
-
153
-
154
-
155
-
156
-
157
-
158
-
159
-
160
-
161
-
162
-
163
-
164
-
165
-
166
-
167
-
168
-
169
-
170
-
171
-
172
-
173
-
174
-
175
-
176
-
177
-
178
-
179
-
180
-
181
-
182
-
183
-
184
-
185
-
186
-
187
-
188
 |
 |