Sony PDWHD1500 User Manual (PDW-HD1500 / F1600 Operation Manual for Firmware V - Page 61
Editing operations, To set up mixing of audio input signals
 |
View all Sony PDWHD1500 manuals
Add to My Manuals
Save this manual to your list of manuals |
Page 61 highlights
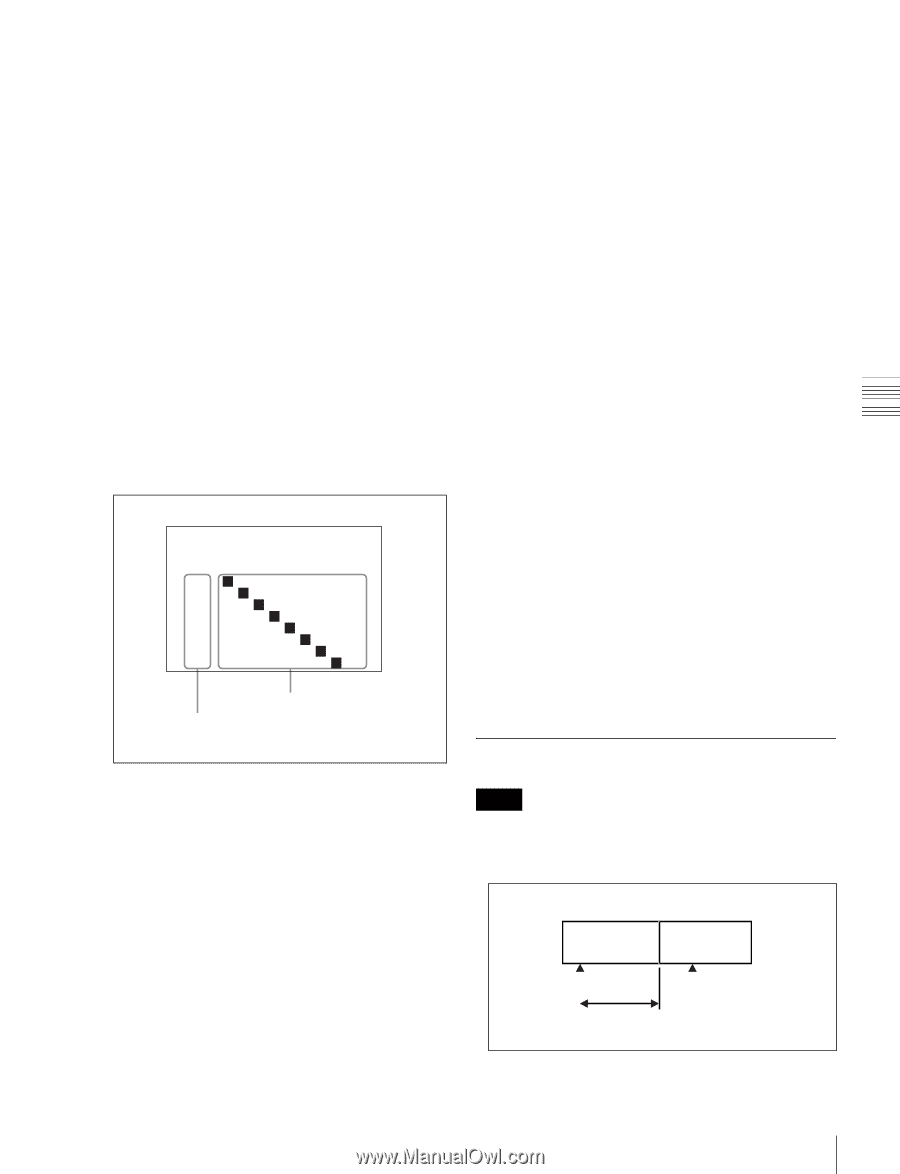
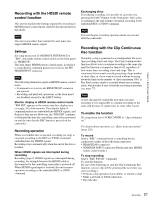
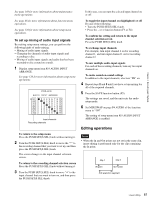
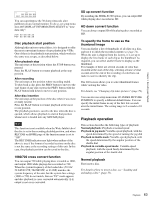
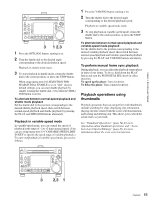
Chapter 4 Recording and Playback See page 148 for more information about maintenance menu operations. See page 48 for more information about function menu operations. See page 126 for more information about setup menu operations. To set up mixing of audio input signals By making setup menu settings, you can perform the following kinds of audio mixing. • Mixing of audio input signals. • Changing the channels of audio input signals and recording to disc. • Mixing of audio input signals and audio that has been recorded to disc (sound on sound). 1 Display setup menu item 819 AUDIO INPUT ARRANGE. See page 126 for more information about setup menu operations. ITEM-819 AUDIO INPUT ARRANGE *CH1: 1 2 3 4 5 6 7 8 PB CH2: 1 2 3 4 5 6 7 8 PB CH3: 1 2 3 4 5 6 7 8 PB CH4: 1 2 3 4 5 6 7 8 PB CH5: 1 2 3 4 5 6 7 8 PB CH6: 1 2 3 4 5 6 7 8 PB CH7: 1 2 3 4 5 6 7 8 PB CH8: 1 2 3 4 5 6 7 8 PB Input channels Recording channels To return to the setup menu Press the PUSH SET(S.SEL) knob without turning it. 2 Turn the PUSH SET(S.SEL) knob to move the "*" to the recording channel that you want to set up, and then press the PUSH SET(S.SEL) knob. The screen changes to the input channel selection screen. To return to the recording channel selection screen Press the PUSH SET(S.SEL) knob without turning it. 3 Turn the PUSH SET(S.SEL) knob to move "p" to the input channel that you want to turn on, and then press the PUSH SET(S.SEL) knob. In this state, you can turn the selected input channel on or off. To toggle the input channel on (highlighted) or off Do one of the following. • Turn the PUSH SET(S.SEL) knob. • Press the - or + function button (F3 or F4). To confirm the setting and return to the input channel selection screen Press the PUSH SET(S.SEL) knob. To exchange input channels For example, turn input channel 2 on for recording channel 1, and turn input channel 1 on for recording channel 2. To mix multiple audio input signals For each of the recording channels, turn any two input channels on. To make sound-on-sound settings In addition to the input channels, also turn "PB" on. 4 Repeat steps 2 and 3 until you have set up mixing for all of the required channels. 5 Press the SAVE function button (F5). The settings are saved, and the unit exits the audio setup mode. 6 Set MIX/SWAP on page P4 AUDIO of the function menu to "ON". The setting of setup menu item 819 AUDIO INPUT ARRANGE is enabled. Editing operations Notes • When the In and Out points are not set in the same clip, insert editing is performed only for the clip containing the In point. Clip 1 Clip 2 IN point OUT point Edit execution segment 61 Linear Editing
-
 1
1 -
2
-
3
-
4
-
5
-
6
-
7
-
8
-
9
-
10
-
11
-
12
-
13
-
14
-
15
-
16
-
17
-
18
-
19
-
20
-
21
-
22
-
23
-
24
-
25
-
26
-
27
-
28
-
29
-
30
-
31
-
32
-
33
-
34
-
35
-
36
-
37
-
38
-
39
-
40
-
41
-
42
-
43
-
44
-
45
-
46
-
47
-
48
-
49
-
50
-
51
-
52
-
53
-
54
-
55
-
 56
56 -
 57
57 -
 58
58 -
 59
59 -
 60
60 -
 61
61 -
 62
62 -
 63
63 -
 64
64 -
 65
65 -
 66
66 -
67
-
68
-
69
-
70
-
71
-
72
-
73
-
74
-
75
-
76
-
77
-
78
-
79
-
80
-
81
-
82
-
83
-
84
-
85
-
86
-
87
-
88
-
89
-
90
-
91
-
92
-
93
-
94
-
95
-
96
-
97
-
98
-
99
-
100
-
101
-
102
-
103
-
104
-
105
-
106
-
107
-
108
-
109
-
110
-
111
-
112
-
113
-
114
-
115
-
116
-
117
-
118
-
119
-
120
-
121
-
122
-
123
-
124
-
125
-
126
-
127
-
128
-
129
-
130
-
131
-
132
-
133
-
134
-
135
-
136
-
137
-
138
-
139
-
140
-
141
-
142
-
143
-
144
-
145
-
146
-
147
-
148
-
149
-
150
-
151
-
152
-
153
-
154
-
155
-
156
-
157
-
158
-
159
-
160
-
161
-
162
-
163
-
164
-
165
-
166
-
167
-
168
-
169
-
170
-
171
-
172
-
173
-
174
-
175
-
176
-
177
-
178
-
179
-
180
-
181
-
182
-
183
-
184
-
185
-
186
-
187
-
188
 |
 |