TRENDnet TV-IP762IC User Guide - Page 32
Step 3: DDNS Settings, Step 4: Camera Name Settings, Step 5: Time Settings
 |
View all TRENDnet TV-IP762IC manuals
Add to My Manuals
Save this manual to your list of manuals |
Page 32 highlights
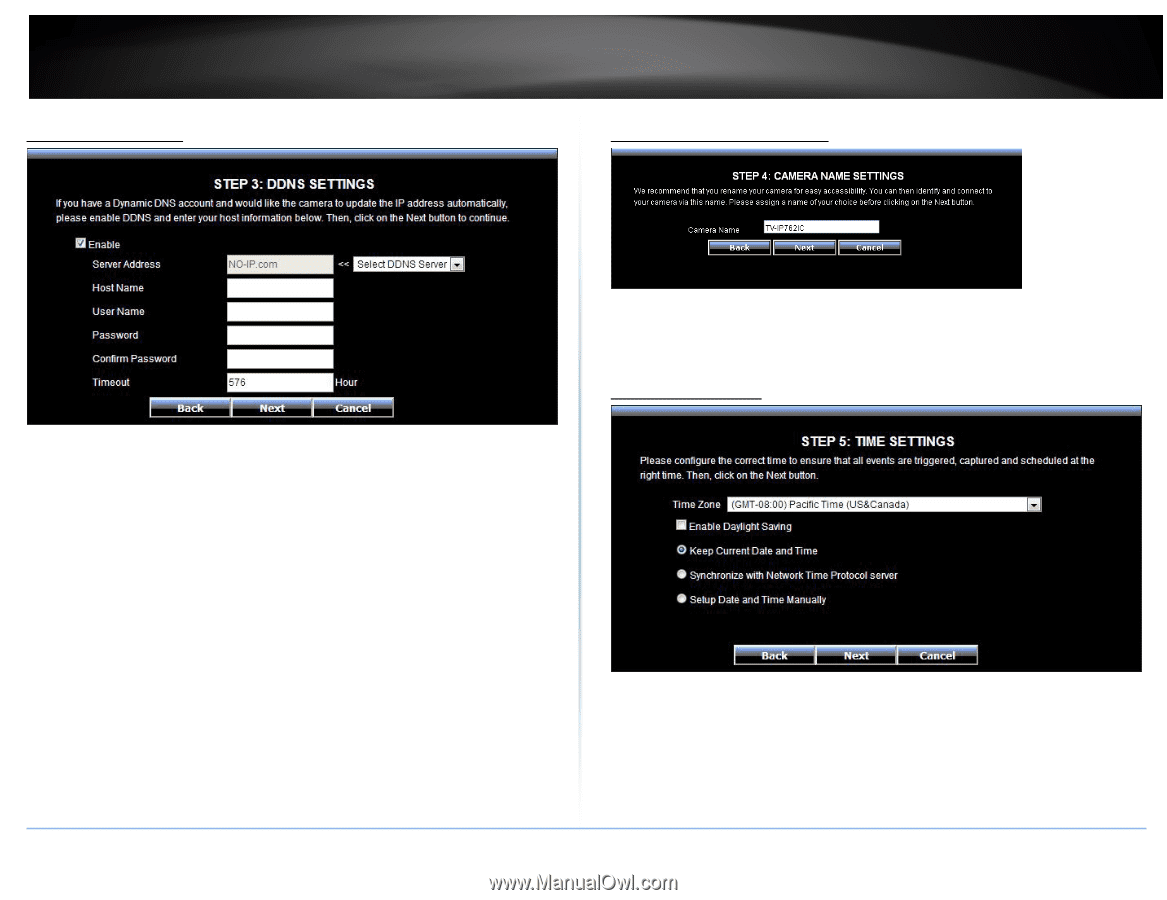
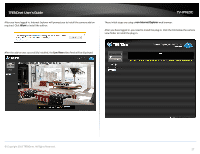
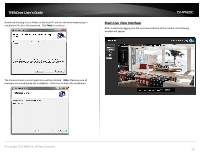
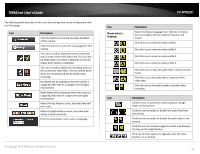
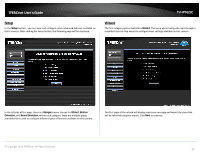
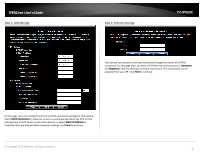
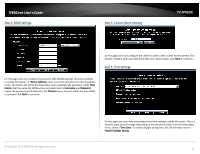
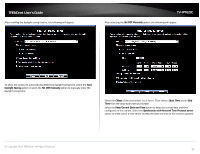
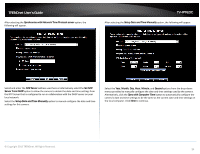
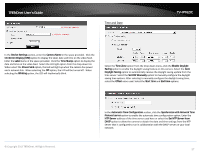
TRENDnet User's Guide Step 3: DDNS Settings Step 4: Camera Name Settings TV-IP762IC On this page users can configure the camera's name. Enter a name for the camera. This feature is helpful when you have more than one camera setup. Click Next to continue. Step 5: Time Settings On this page users can configure the Dynamic DNS (DDNS) settings. Click the checkbox to enable this feature. In Server Address, select one of the domains from the drop-down menu. The field to the left of the drop-down menu automatically populates. Under Host Name enter the name the DDNS service provided. Enter a Username and Password, repeat the password and finally enter the Timeout value. Timeout states the time DDNS is updated. Click Next to continue. © Copyright 2013 TRENDnet. All Rights Reserved. On this page users can view and configure the time settings used by this router. This is a dynamic page and will change depending on the selections made. From the drop-down menu, select a Time Zone. To enable daylight saving time, tick the checkbox next to Enable Daylight Saving. 32
-
 1
1 -
2
-
3
-
4
-
5
-
6
-
7
-
8
-
9
-
10
-
11
-
12
-
13
-
14
-
15
-
16
-
17
-
18
-
19
-
20
-
21
-
22
-
23
-
24
-
25
-
26
-
 27
27 -
 28
28 -
 29
29 -
 30
30 -
 31
31 -
 32
32 -
 33
33 -
 34
34 -
 35
35 -
 36
36 -
 37
37 -
38
-
39
-
40
-
41
-
42
-
43
-
44
-
45
-
46
-
47
-
48
-
49
-
50
-
51
-
52
-
53
-
54
-
55
-
56
-
57
-
58
-
59
-
60
-
61
-
62
-
63
-
64
-
65
-
66
-
67
 |
 |