TRENDnet TV-IP762IC User Guide - Page 42
Audio and Video
 |
View all TRENDnet TV-IP762IC manuals
Add to My Manuals
Save this manual to your list of manuals |
Page 42 highlights
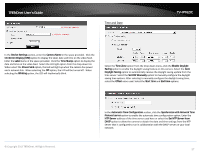
TRENDnet User's Guide Audio and Video In the Video Profile sections, you can configure the following. TV-IP762IC In the Day/Night Mode section, you can configure the following. Select the Encode Type option from the drop-down list. Encoding types that can be selected are MPEG4, H.264, and profile 3 will be on JPEG permanently. Select the Resolution size option from the drop-down list. Resolutions that can be selected are 1280x720, 640x352, 320x176, and 160x80. The resolution of 1280x720 is only available on profiles 1 and 3. Select the Frames Per Second (FPS) from the drop-down list. FPS speeds that can be selected are 30, 15, 10, 6, 5, 3, 2, and 1. Select the Encode Mode option from the drop-down list. Encoding modes that can be selected are Constant Bit Rate (CBR) and Quality and profile 3 will use the quality mode permanently. After selecting CBR as the Encode Mode, select the Bits Per Second (bps) value. Options to choose from are between 64 Kbps and 4 Mbps. After selecting Quality as the Encode Mode, select the Quality option. Options to choose from are Low, Fair, Standard, Good, and Excellent. Users can also enter a custom RSTP URL in the space provided. The camera allows users to record data in day and night mode. The camera has IR LED's for night mode. When selecting the Day mode, the viewing image is in normal color. However, when you use Night mode, the viewing image turns black and white. The reason for this is to create a clearer and smoother image. When you select the Auto mode, the Day/Night function is concealed. Please Note: This allows you to set the camera to switch automatically from day to night mode (default) or to permanently set the color and Black/White operations. Also note, even when the camera is set to color mode, it will switch to Black/White night vision if there is no longer enough ambient light to support the color saturation. Select the Day/Night Mode option from the drop-down list. Options to choose from are Auto, Manual, Always day mode, Always night mode, and Schedule. When selecting Auto, the camera will automatically switch between day and night modes depending on the light conditions. When selecting Manual, the user can manually toggle between day and night modes by clicking the button on the Live View page. When selecting Always day mode or Always night mode the camera will stay on the mode selected even when the light conditions change. When selecting the Schedule option, the camera will toggle between day and night modes depending on the time schedule configured. © Copyright 2013 TRENDnet. All Rights Reserved. 42
-
 1
1 -
2
-
3
-
4
-
5
-
6
-
7
-
8
-
9
-
10
-
11
-
12
-
13
-
14
-
15
-
16
-
17
-
18
-
19
-
20
-
21
-
22
-
23
-
24
-
25
-
26
-
27
-
28
-
29
-
30
-
31
-
32
-
33
-
34
-
35
-
36
-
 37
37 -
 38
38 -
 39
39 -
 40
40 -
 41
41 -
 42
42 -
 43
43 -
 44
44 -
 45
45 -
 46
46 -
 47
47 -
48
-
49
-
50
-
51
-
52
-
53
-
54
-
55
-
56
-
57
-
58
-
59
-
60
-
61
-
62
-
63
-
64
-
65
-
66
-
67
 |
 |
