Epson LQ-1000 User Manual - Page 102
DIP switch panel 2, Table A-2.
 |
View all Epson LQ-1000 manuals
Add to My Manuals
Save this manual to your list of manuals |
Page 102 highlights
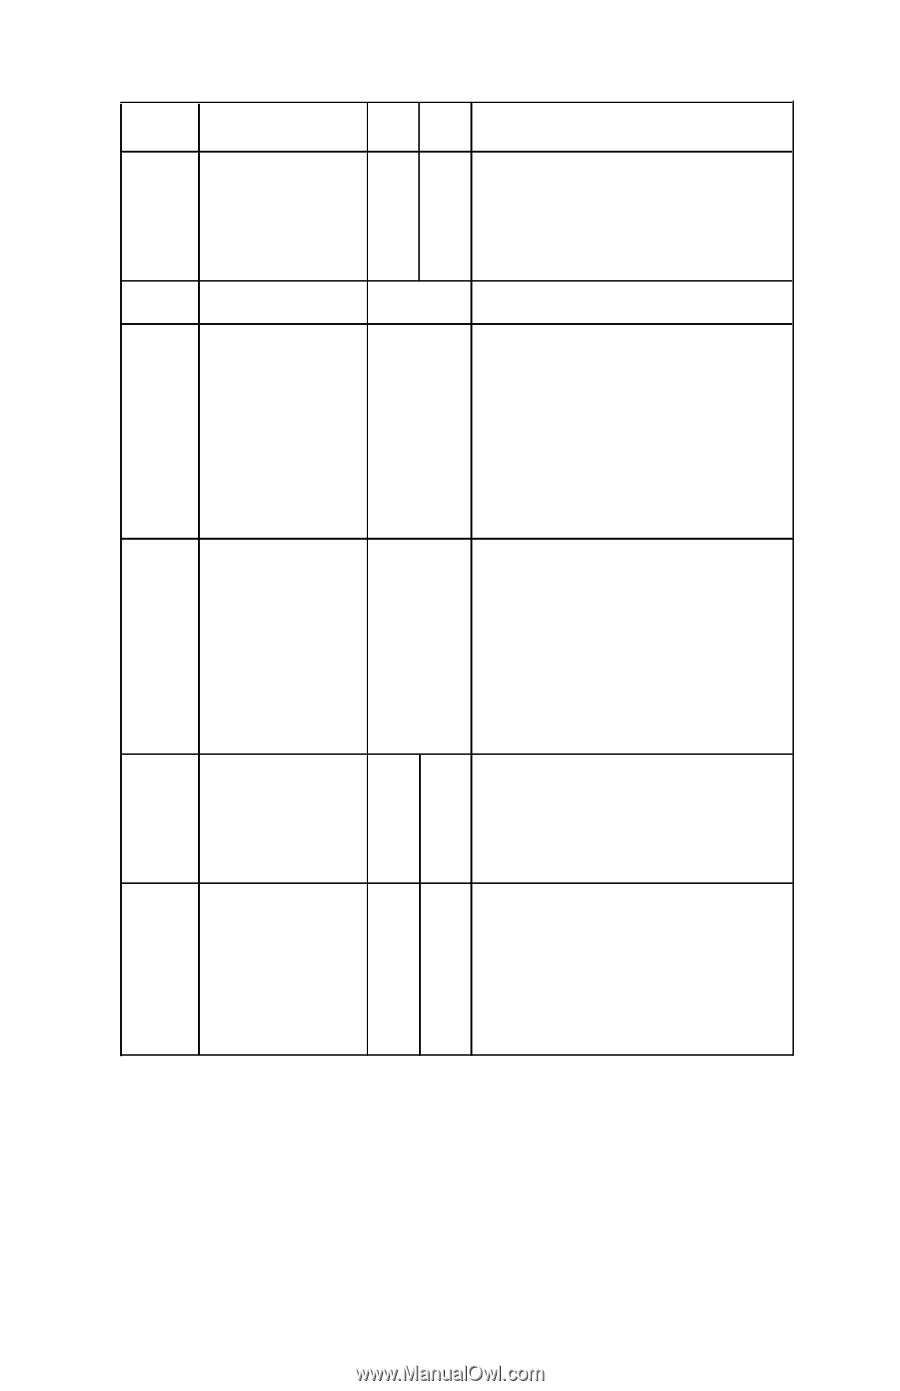
Table A-2. DIP switch panel 2 Switch No. Function 2-1 Select 11 -inch or 12-inch paper length ON OFF Explanation 12" 1 1 " The LQ must know the length of paper being used in order to skip perforations and establish top-ofpage setting. Most continuous-feed and single-sheet paper is 11 inch. 2-2 Not used 2-3 Select serial 2-4 interface and parity setting See Table A-4 When you receive your LQ, the DIP switches are set for a parallel interface. If your computer uses a parallel interface, you don't have to change anything. If your computer uses a serial interface, find what parity setting it requires, and set these switches according to Table A-4. 2-5 Select the baud If you're using a serial interface, use 2-6 rate if you're using these switches to set the baud a serial interface rate-the rate at which the printer receives data from the computer See Table You should check your computer A-5 manual (or commercial software program) for baud rate setting requirements, and set these switches according to Table A-5. 2-7 Printer select signal ON OFF When this switch is ON, the printer cannot be deactivated by software codes. For most uses and commercial software programs, you should leave this switch ON. 2-8 Automatic line ON OFF When this switch is ON, the LQ adds feed a line feed to each carriage return; when it is OFF: it does not. If your printing has an extra space between lines, turn the switch OFF. If all the lines of your printing are on top of each other, turn the switch ON. = Factory setting when delivered A-4
-
 1
1 -
2
-
3
-
4
-
5
-
6
-
7
-
8
-
9
-
10
-
11
-
12
-
13
-
14
-
15
-
16
-
17
-
18
-
19
-
20
-
21
-
22
-
23
-
24
-
25
-
26
-
27
-
28
-
29
-
30
-
31
-
32
-
33
-
34
-
35
-
36
-
37
-
38
-
39
-
40
-
41
-
42
-
43
-
44
-
45
-
46
-
47
-
48
-
49
-
50
-
51
-
52
-
53
-
54
-
55
-
56
-
57
-
58
-
59
-
60
-
61
-
62
-
63
-
64
-
65
-
66
-
67
-
68
-
69
-
70
-
71
-
72
-
73
-
74
-
75
-
76
-
77
-
78
-
79
-
80
-
81
-
82
-
83
-
84
-
85
-
86
-
87
-
88
-
89
-
90
-
91
-
92
-
93
-
94
-
95
-
96
-
 97
97 -
 98
98 -
 99
99 -
 100
100 -
 101
101 -
 102
102 -
 103
103 -
 104
104 -
 105
105 -
 106
106 -
 107
107 -
108
-
109
-
110
-
111
-
112
-
113
-
114
-
115
-
116
-
117
-
118
-
119
-
120
-
121
-
122
-
123
-
124
-
125
-
126
-
127
-
128
-
129
-
130
-
131
-
132
-
133
-
134
-
135
-
136
-
137
-
138
-
139
-
140
-
141
-
142
-
143
-
144
-
145
-
146
-
147
-
148
-
149
-
150
-
151
-
152
-
153
-
154
-
155
-
156
-
157
-
158
-
159
-
160
-
161
-
162
-
163
-
164
-
165
-
166
-
167
-
168
-
169
-
170
-
171
-
172
-
173
-
174
-
175
-
176
-
177
-
178
-
179
-
180
-
181
-
182
-
183
-
184
-
185
 |
 |