Epson LQ-1000 User Manual - Page 53
Setting the Top-of- Position, Installing the Paper Separator and Tractor Cover
 |
View all Epson LQ-1000 manuals
Add to My Manuals
Save this manual to your list of manuals |
Page 53 highlights
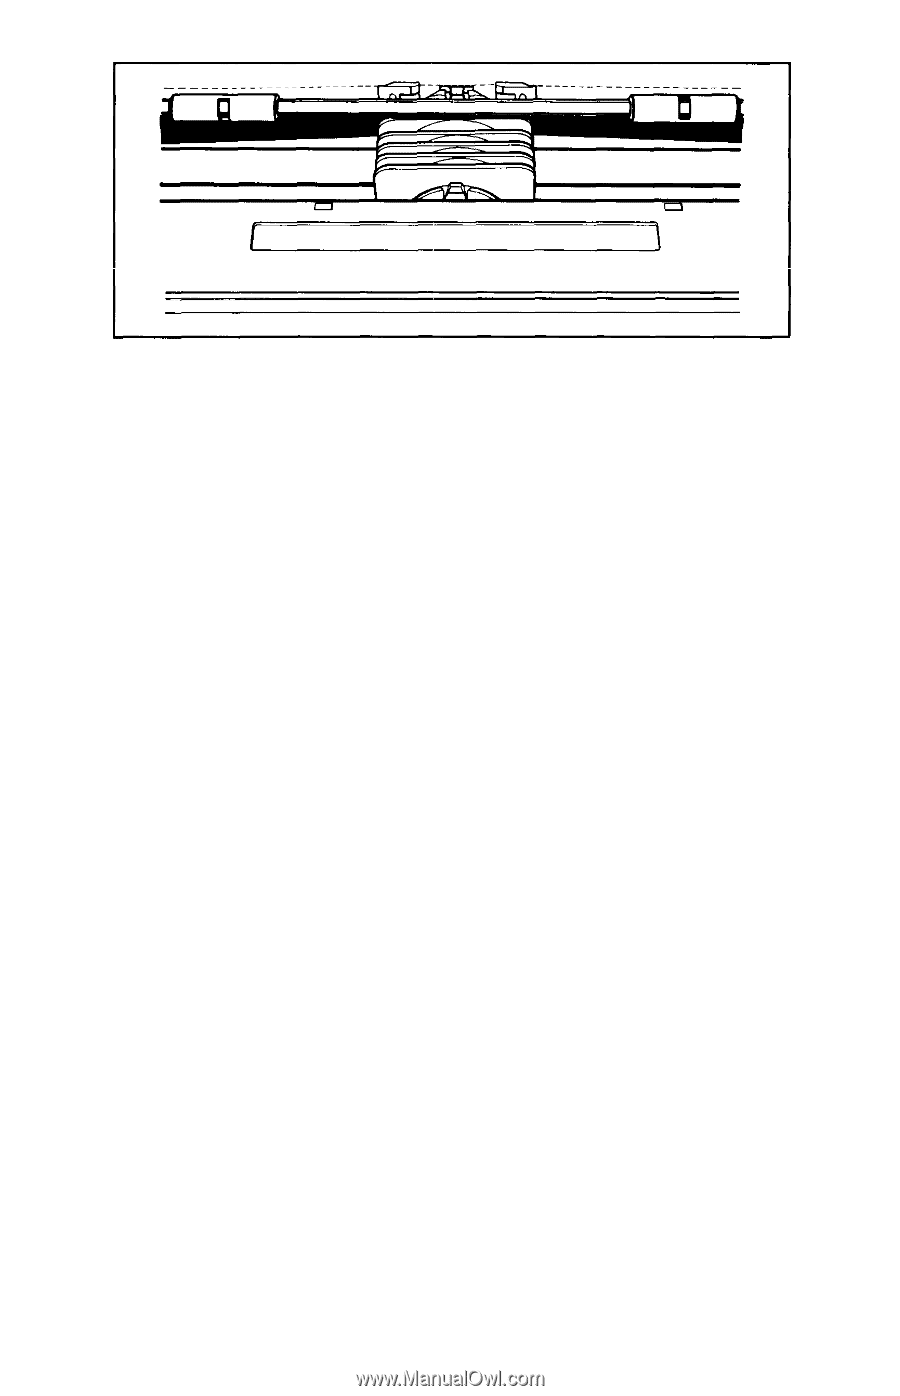
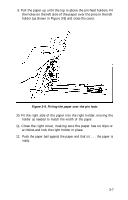
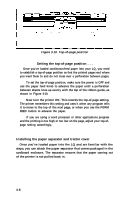
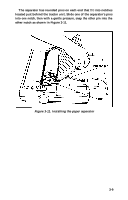
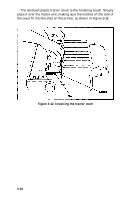
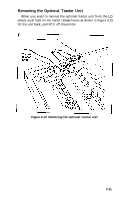
Figure 3-10. Top-of-page position Setting the top-of-page position . . . Once you've loaded continuous-feed paper into your LQ, you need to establish a top-of-page position so that the printed pages end where you want them to and do not cross over a perforation between pages. To set the top-of-page position, make sure the power is OFF and use the paper feed knob to advance the paper until a perforation between sheets lines up evenly with the top of the ribbon guide, as shown in Figure 3-10. Now turn the printer ON. This records the top-of-page setting. The printer remembers this setting and uses it when any program tells it to move to the top of the next page, or when you use the FORM FEED button to advance the paper. If you are using a word processor or other applications program and the printing is too high or too low on the page, adjust your top-ofpage setting accordingly, Installing the paper separator and tractor cover Once you've loaded paper into the LQ and are familiar with the steps, you can attach the paper separator that comes packaged in the cardboard enclosure. The separator ensures that the paper coming out of the printer is not pulled back in. 3-8
-
 1
1 -
2
-
3
-
4
-
5
-
6
-
7
-
8
-
9
-
10
-
11
-
12
-
13
-
14
-
15
-
16
-
17
-
18
-
19
-
20
-
21
-
22
-
23
-
24
-
25
-
26
-
27
-
28
-
29
-
30
-
31
-
32
-
33
-
34
-
35
-
36
-
37
-
38
-
39
-
40
-
41
-
42
-
43
-
44
-
45
-
46
-
47
-
 48
48 -
 49
49 -
 50
50 -
 51
51 -
 52
52 -
 53
53 -
 54
54 -
 55
55 -
 56
56 -
 57
57 -
 58
58 -
59
-
60
-
61
-
62
-
63
-
64
-
65
-
66
-
67
-
68
-
69
-
70
-
71
-
72
-
73
-
74
-
75
-
76
-
77
-
78
-
79
-
80
-
81
-
82
-
83
-
84
-
85
-
86
-
87
-
88
-
89
-
90
-
91
-
92
-
93
-
94
-
95
-
96
-
97
-
98
-
99
-
100
-
101
-
102
-
103
-
104
-
105
-
106
-
107
-
108
-
109
-
110
-
111
-
112
-
113
-
114
-
115
-
116
-
117
-
118
-
119
-
120
-
121
-
122
-
123
-
124
-
125
-
126
-
127
-
128
-
129
-
130
-
131
-
132
-
133
-
134
-
135
-
136
-
137
-
138
-
139
-
140
-
141
-
142
-
143
-
144
-
145
-
146
-
147
-
148
-
149
-
150
-
151
-
152
-
153
-
154
-
155
-
156
-
157
-
158
-
159
-
160
-
161
-
162
-
163
-
164
-
165
-
166
-
167
-
168
-
169
-
170
-
171
-
172
-
173
-
174
-
175
-
176
-
177
-
178
-
179
-
180
-
181
-
182
-
183
-
184
-
185
 |
 |