Epson LQ-1000 User Manual - Page 47
Installing the Tractor Unit, leave it tilted up, as shown
 |
View all Epson LQ-1000 manuals
Add to My Manuals
Save this manual to your list of manuals |
Page 47 highlights
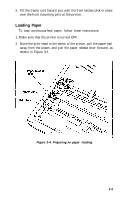
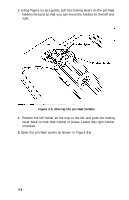
Figure 3-2. Continuous-feed paper without stand Installing the Tractor Unit 1. Remove the original dust cover that was included with your LQ. Replace it with the front lid packaged with the tractor unit, and leave it tilted up, as shown in Figure 3-3. Figure 3-3. Installing the tractor unit 2. Hold the tractor with the gears to the right, and fit the rear notches on the tractor unit over the rear mounting pins on the printer, as shown in Figure 3-3. 3-2
-
 1
1 -
2
-
3
-
4
-
5
-
6
-
7
-
8
-
9
-
10
-
11
-
12
-
13
-
14
-
15
-
16
-
17
-
18
-
19
-
20
-
21
-
22
-
23
-
24
-
25
-
26
-
27
-
28
-
29
-
30
-
31
-
32
-
33
-
34
-
35
-
36
-
37
-
38
-
39
-
40
-
41
-
 42
42 -
 43
43 -
 44
44 -
 45
45 -
 46
46 -
 47
47 -
 48
48 -
 49
49 -
 50
50 -
 51
51 -
 52
52 -
53
-
54
-
55
-
56
-
57
-
58
-
59
-
60
-
61
-
62
-
63
-
64
-
65
-
66
-
67
-
68
-
69
-
70
-
71
-
72
-
73
-
74
-
75
-
76
-
77
-
78
-
79
-
80
-
81
-
82
-
83
-
84
-
85
-
86
-
87
-
88
-
89
-
90
-
91
-
92
-
93
-
94
-
95
-
96
-
97
-
98
-
99
-
100
-
101
-
102
-
103
-
104
-
105
-
106
-
107
-
108
-
109
-
110
-
111
-
112
-
113
-
114
-
115
-
116
-
117
-
118
-
119
-
120
-
121
-
122
-
123
-
124
-
125
-
126
-
127
-
128
-
129
-
130
-
131
-
132
-
133
-
134
-
135
-
136
-
137
-
138
-
139
-
140
-
141
-
142
-
143
-
144
-
145
-
146
-
147
-
148
-
149
-
150
-
151
-
152
-
153
-
154
-
155
-
156
-
157
-
158
-
159
-
160
-
161
-
162
-
163
-
164
-
165
-
166
-
167
-
168
-
169
-
170
-
171
-
172
-
173
-
174
-
175
-
176
-
177
-
178
-
179
-
180
-
181
-
182
-
183
-
184
-
185
 |
 |
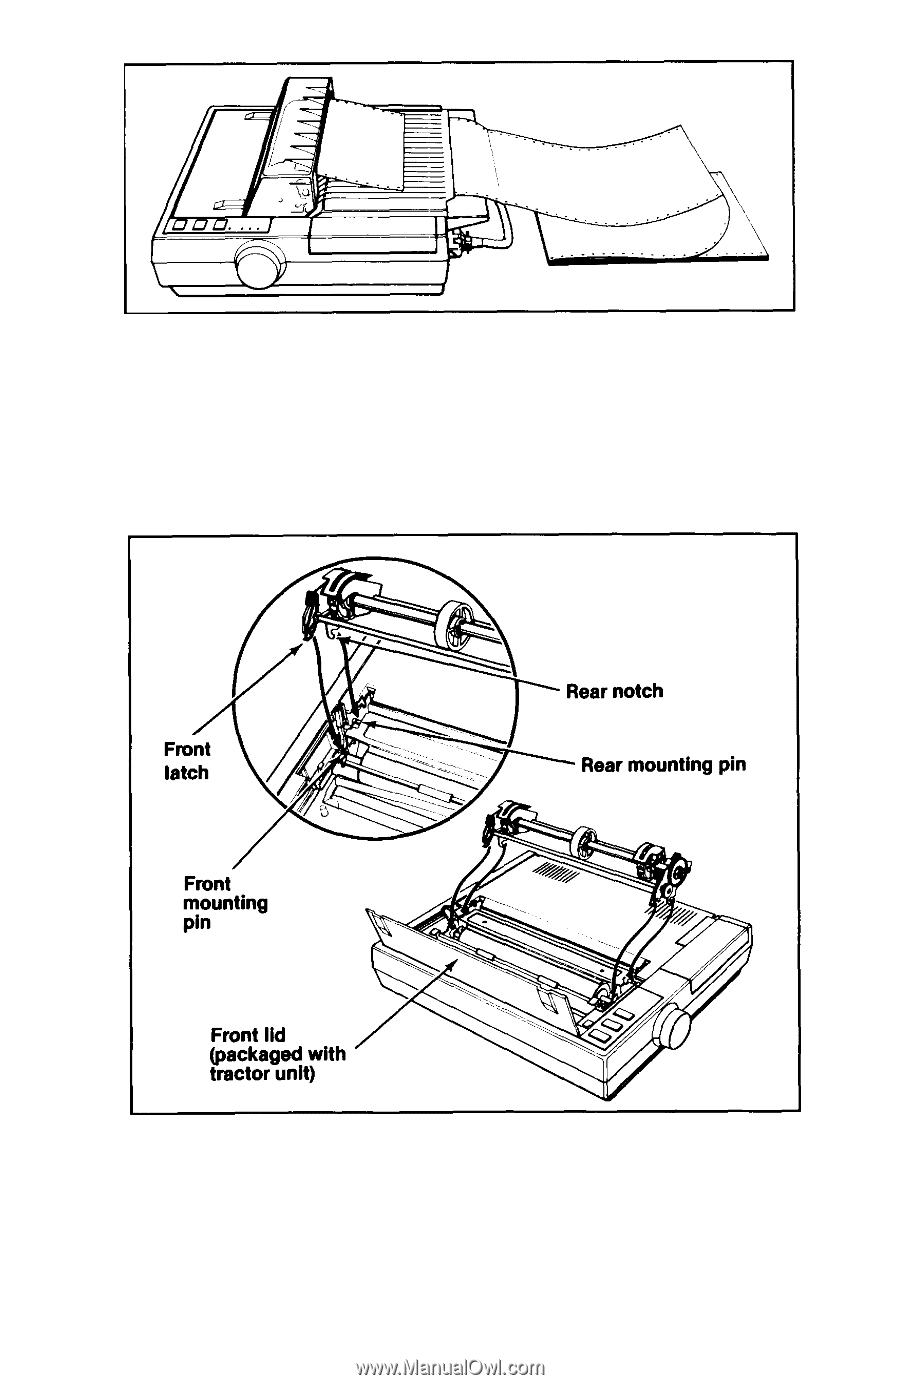
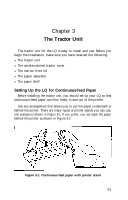
Figure 3-2. Continuous-feed paper without stand
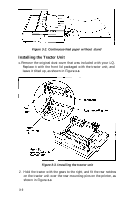
Installing the Tractor Unit
1.
Remove the original dust cover that was included with your LQ.
Replace it with the front lid packaged with the tractor unit, and
leave it tilted up, as shown in Figure
3-3.
Figure 3-3. Installing the tractor unit
2.
Hold the tractor with the gears to the right, and fit the rear notches
on the tractor unit over the rear mounting pins on the printer, as
shown in Figure
3-3.
3-2