Epson LQ-1000 User Manual - Page 34
installation instructions, paying special attention to setting
 |
View all Epson LQ-1000 manuals
Add to My Manuals
Save this manual to your list of manuals |
Page 34 highlights
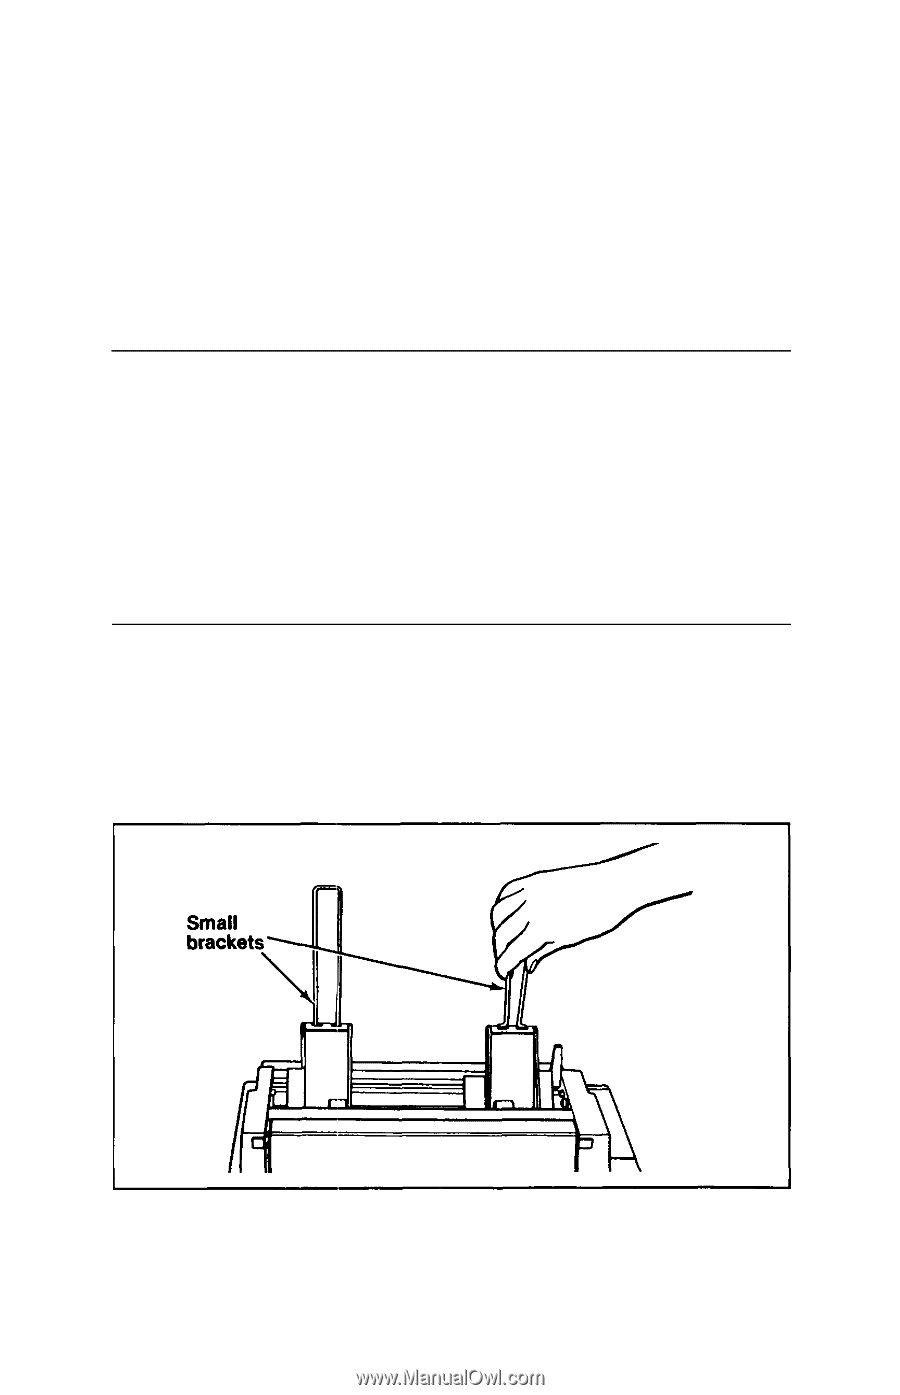
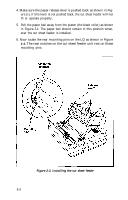
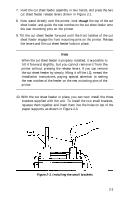
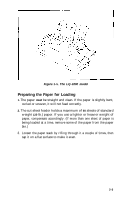
7. Hold the cut sheet feeder assembly in two hands, and press the two cut sheet feeder release levers shown in Figure 2-1. 8. Now stand directly over the printer, look through the top of the cut sheet feeder, and guide the rear notches on the cut sheet feeder onto the rear mounting pins on the printer. 9. Tilt the cut sheet feeder forward until the front latches of the cut sheet feeder engage the front mounting pins on the printer. Release the levers and the cut sheet feeder locks in place. Note When the cut sheet feeder is properly installed, it is possible to tilt it forward slightly, but you cannot remove it from the printer without pressing the release levers. If you can remove the cut sheet feeder by simply lifting it off the LQ, reread the installation instructions, paying special attention to setting the rear notches of the feeder on the rear mounting pins of the printer. 10. With the cut sheet feeder in place, you can now install the three brackets supplied with the unit. To install the two small brackets, squeeze them together and insert them into the holes on top of the paper supports, as shown in Figure 2-3. Figure 2-3. Installing the small brackets 2-3
-
 1
1 -
2
-
3
-
4
-
5
-
6
-
7
-
8
-
9
-
10
-
11
-
12
-
13
-
14
-
15
-
16
-
17
-
18
-
19
-
20
-
21
-
22
-
23
-
24
-
25
-
26
-
27
-
28
-
 29
29 -
 30
30 -
 31
31 -
 32
32 -
 33
33 -
 34
34 -
 35
35 -
 36
36 -
 37
37 -
 38
38 -
 39
39 -
40
-
41
-
42
-
43
-
44
-
45
-
46
-
47
-
48
-
49
-
50
-
51
-
52
-
53
-
54
-
55
-
56
-
57
-
58
-
59
-
60
-
61
-
62
-
63
-
64
-
65
-
66
-
67
-
68
-
69
-
70
-
71
-
72
-
73
-
74
-
75
-
76
-
77
-
78
-
79
-
80
-
81
-
82
-
83
-
84
-
85
-
86
-
87
-
88
-
89
-
90
-
91
-
92
-
93
-
94
-
95
-
96
-
97
-
98
-
99
-
100
-
101
-
102
-
103
-
104
-
105
-
106
-
107
-
108
-
109
-
110
-
111
-
112
-
113
-
114
-
115
-
116
-
117
-
118
-
119
-
120
-
121
-
122
-
123
-
124
-
125
-
126
-
127
-
128
-
129
-
130
-
131
-
132
-
133
-
134
-
135
-
136
-
137
-
138
-
139
-
140
-
141
-
142
-
143
-
144
-
145
-
146
-
147
-
148
-
149
-
150
-
151
-
152
-
153
-
154
-
155
-
156
-
157
-
158
-
159
-
160
-
161
-
162
-
163
-
164
-
165
-
166
-
167
-
168
-
169
-
170
-
171
-
172
-
173
-
174
-
175
-
176
-
177
-
178
-
179
-
180
-
181
-
182
-
183
-
184
-
185
 |
 |