Epson LQ-1000 User Manual - Page 32
CHAP 2-THE CUT SHEET FEEDER, Installing the Cut Sheet Feeder
 |
View all Epson LQ-1000 manuals
Add to My Manuals
Save this manual to your list of manuals |
Page 32 highlights
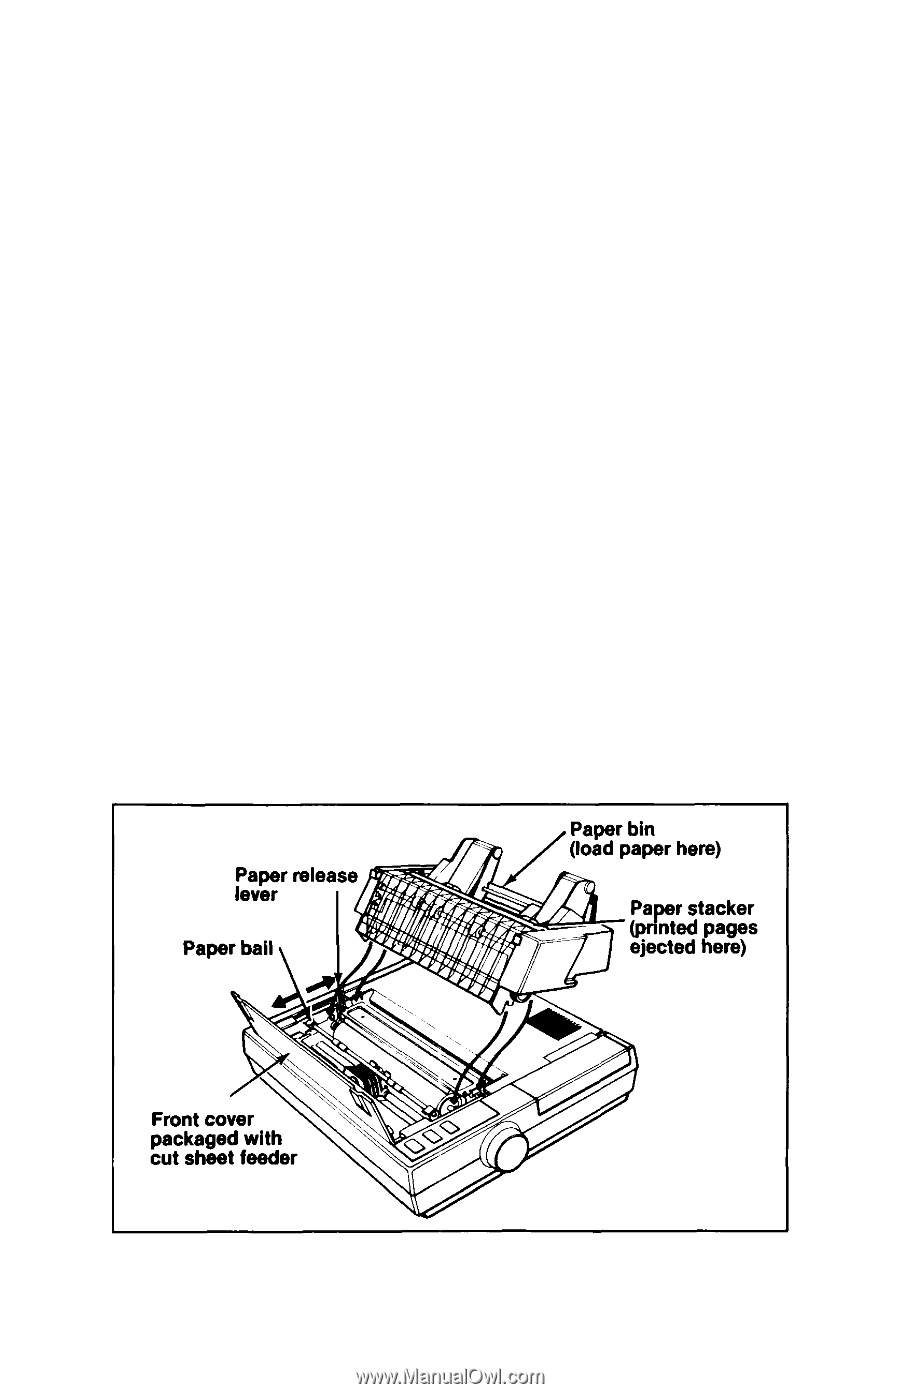
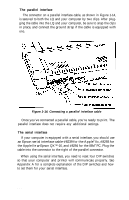
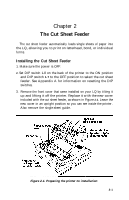
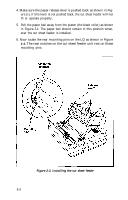
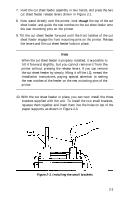
Chapter 2 The Cut Sheet Feeder The cut sheet feeder automatically loads single sheets of paper into the LQ, allowing you to print on letterhead, bond, or individual forms. Installing the Cut Sheet Feeder 1. Make sure the power is OFF. 2. Set DIP switch 1-8 on the back of the printer to the ON position and DIP switch 1-7 to the OFF position to select the cut sheet feeder. See Appendix A for information on resetting the DIP switches. 3. Remove the front cover that came installed on your LQ by tilting it up and lifting it off the printer. Replace it with the new cover included with the cut sheet feeder, as shown in Figure 2-1. Leave the new cover in an upright position so you can see inside the printer. Also remove the single-sheet guide. Figure 2-1. Preparing the printer for installation 2-1
-
 1
1 -
2
-
3
-
4
-
5
-
6
-
7
-
8
-
9
-
10
-
11
-
12
-
13
-
14
-
15
-
16
-
17
-
18
-
19
-
20
-
21
-
22
-
23
-
24
-
25
-
26
-
 27
27 -
 28
28 -
 29
29 -
 30
30 -
 31
31 -
 32
32 -
 33
33 -
 34
34 -
 35
35 -
 36
36 -
 37
37 -
38
-
39
-
40
-
41
-
42
-
43
-
44
-
45
-
46
-
47
-
48
-
49
-
50
-
51
-
52
-
53
-
54
-
55
-
56
-
57
-
58
-
59
-
60
-
61
-
62
-
63
-
64
-
65
-
66
-
67
-
68
-
69
-
70
-
71
-
72
-
73
-
74
-
75
-
76
-
77
-
78
-
79
-
80
-
81
-
82
-
83
-
84
-
85
-
86
-
87
-
88
-
89
-
90
-
91
-
92
-
93
-
94
-
95
-
96
-
97
-
98
-
99
-
100
-
101
-
102
-
103
-
104
-
105
-
106
-
107
-
108
-
109
-
110
-
111
-
112
-
113
-
114
-
115
-
116
-
117
-
118
-
119
-
120
-
121
-
122
-
123
-
124
-
125
-
126
-
127
-
128
-
129
-
130
-
131
-
132
-
133
-
134
-
135
-
136
-
137
-
138
-
139
-
140
-
141
-
142
-
143
-
144
-
145
-
146
-
147
-
148
-
149
-
150
-
151
-
152
-
153
-
154
-
155
-
156
-
157
-
158
-
159
-
160
-
161
-
162
-
163
-
164
-
165
-
166
-
167
-
168
-
169
-
170
-
171
-
172
-
173
-
174
-
175
-
176
-
177
-
178
-
179
-
180
-
181
-
182
-
183
-
184
-
185
 |
 |