HTC Wildfire User Manual - Page 18
Setting up your phone for the first time, Connect to Wi-Fi network, Finish - s parts
 |
View all HTC Wildfire manuals
Add to My Manuals
Save this manual to your list of manuals |
Page 18 highlights
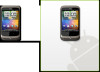
18 Your HTC Wildfire user guide Setting up your phone for the first time When you switch on your phone for the first time, you can set up your email accounts and favorite social networks like Facebook® and Twitter™. You can also easily transfer contacts and other data from your old phone to your new phone. Just follow the onscreen instructions. You can choose to skip any part of the setup and do it at another time. If you haven't inserted your SIM card, your phone will show you how to install it. Turn it off and insert your SIM card. Then turn it on again to start the setup. 1. Choose your language and tap Next. Your phone will then automatically set up GPRS/3G, MMS, and WAP connections. 2. If you want some tips on using the onscreen keyboard, follow the tutorial. If not, tap Skip. 3. On the Internet connection screen, choose how you want to connect to the Internet, and then tap Next. 4. If there's Wi-Fi in range, tap Next and then the wireless network you want to connect to. Or if you'd rather set it up later, just clear the Connect to Wi-Fi network check box. 5. Features such as Clock and Weather need to know your location. But we take your privacy seriously. So, on the Use Google location screen, you can choose whether to allow this information to be collected. Either clear or select the two check boxes, then tap Next. Location-based services may incur extra data fees from your mobile operator. Don't worry. You can enable or disable them in your phone's Location and Privacy settings. 6. Choose the type of email account you want to set up and follow the onscreen instructions. Be sure to sign in to your Google Account. Tap Google account > Next > Sign in. You can also set up POP3 and Microsoft Exchange ActiveSync accounts, or skip and do it later. To find out how to set up these accounts, see the Accounts and sync and Email chapters. 7. Choose the type of social network account (such as Facebook or Twitter) you want to access from your phone and follow the onscreen instructions. Or skip and do it at a later time. 8. The final screen shows where you can get more help using your phone. Tap Finish.
-
 1
1 -
2
-
3
-
4
-
5
-
6
-
7
-
8
-
9
-
10
-
11
-
12
-
 13
13 -
 14
14 -
 15
15 -
 16
16 -
 17
17 -
 18
18 -
 19
19 -
 20
20 -
 21
21 -
 22
22 -
 23
23 -
24
-
25
-
26
-
27
-
28
-
29
-
30
-
31
-
32
-
33
-
34
-
35
-
36
-
37
-
38
-
39
-
40
-
41
-
42
-
43
-
44
-
45
-
46
-
47
-
48
-
49
-
50
-
51
-
52
-
53
-
54
-
55
-
56
-
57
-
58
-
59
-
60
-
61
-
62
-
63
-
64
-
65
-
66
-
67
-
68
-
69
-
70
-
71
-
72
-
73
-
74
-
75
-
76
-
77
-
78
-
79
-
80
-
81
-
82
-
83
-
84
-
85
-
86
-
87
-
88
-
89
-
90
-
91
-
92
-
93
-
94
-
95
-
96
-
97
-
98
-
99
-
100
-
101
-
102
-
103
-
104
-
105
-
106
-
107
-
108
-
109
-
110
-
111
-
112
-
113
-
114
-
115
-
116
-
117
-
118
-
119
-
120
-
121
-
122
-
123
-
124
-
125
-
126
-
127
-
128
-
129
-
130
-
131
-
132
-
133
-
134
-
135
-
136
-
137
-
138
-
139
-
140
-
141
-
142
-
143
-
144
-
145
-
146
-
147
-
148
-
149
-
150
-
151
-
152
-
153
-
154
-
155
-
156
-
157
-
158
-
159
-
160
-
161
-
162
-
163
-
164
-
165
-
166
-
167
-
168
-
169
-
170
-
171
-
172
-
173
-
174
-
175
-
176
-
177
-
178
-
179
-
180
-
181
-
182
-
183
-
184
-
185
-
186
-
187
-
188
 |
 |
