HP Designjet L26100 HP Designjet L26500 / L26100 Printer Series - Printer asse - Page 17
Bringen Sie einen Schwenkblock am rechten Standfuß
 |
View all HP Designjet L26100 manuals
Add to My Manuals
Save this manual to your list of manuals |
Page 17 highlights
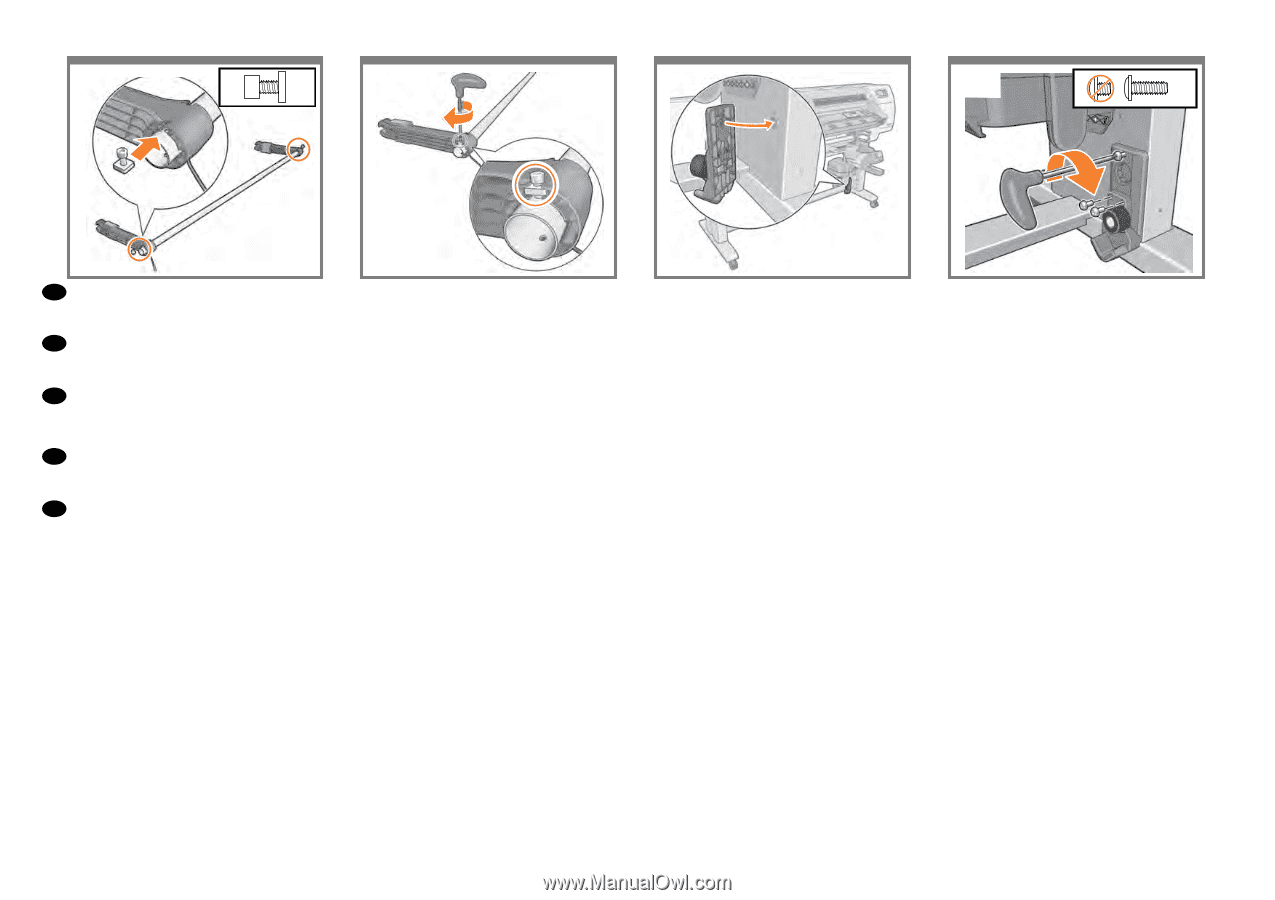
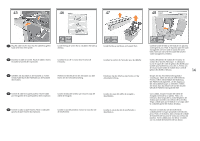
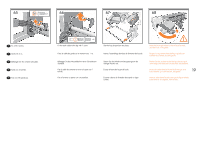
57 x2 58 x2 59 60 x3 EN Slot the 2 square nutted screws into place. FR Insérez les 2 vis carrées. DE Setzen Sie die zwei Schrauben mit der quadratischen Mutter richtig ein. ES Coloque las 2 tuercas cuadradas. PT Encaixe os dois parafusos no lugar. Tighten the 2 screws. Serrez les 2 vis. Ziehen Sie die zwei Schrauben fest. Apriete los 2 tornillos. Aperte os dois parafusos. Locate a pivot block onto the right hand leg. Fixez le bloc pivotant sur le montant droit. Bringen Sie einen Schwenkblock am rechten Standfuß an. Localice un bloqueo de pivote en la pata derecha. Posicione o bloco giratório na perna do lado direito. Fix with 3 screws. Serrez les 3 vis. Befestigen Sie ihn mit drei Schrauben. Fíjelo con 3 tornillos. Fixe com três parafusos. 17
-
 1
1 -
2
-
3
-
4
-
5
-
6
-
7
-
8
-
9
-
10
-
11
-
 12
12 -
 13
13 -
 14
14 -
 15
15 -
 16
16 -
 17
17 -
 18
18 -
 19
19 -
 20
20 -
 21
21 -
 22
22 -
23
-
24
-
25
-
26
-
27
-
28
-
29
-
30
-
31
-
32
-
33
-
34
-
35
-
36
-
37
-
38
-
39
-
40
-
41
-
42
-
43
-
44
-
45
-
46
-
47
-
48
 |
 |