HP GbE2c HP GbE2c Ethernet Blade Switch for c-Class BladeSystem Application Gu - Page 132
RMON group 2—history, History MIB objects
 |
UPC - 808736802215
View all HP GbE2c manuals
Add to My Manuals
Save this manual to your list of manuals |
Page 132 highlights
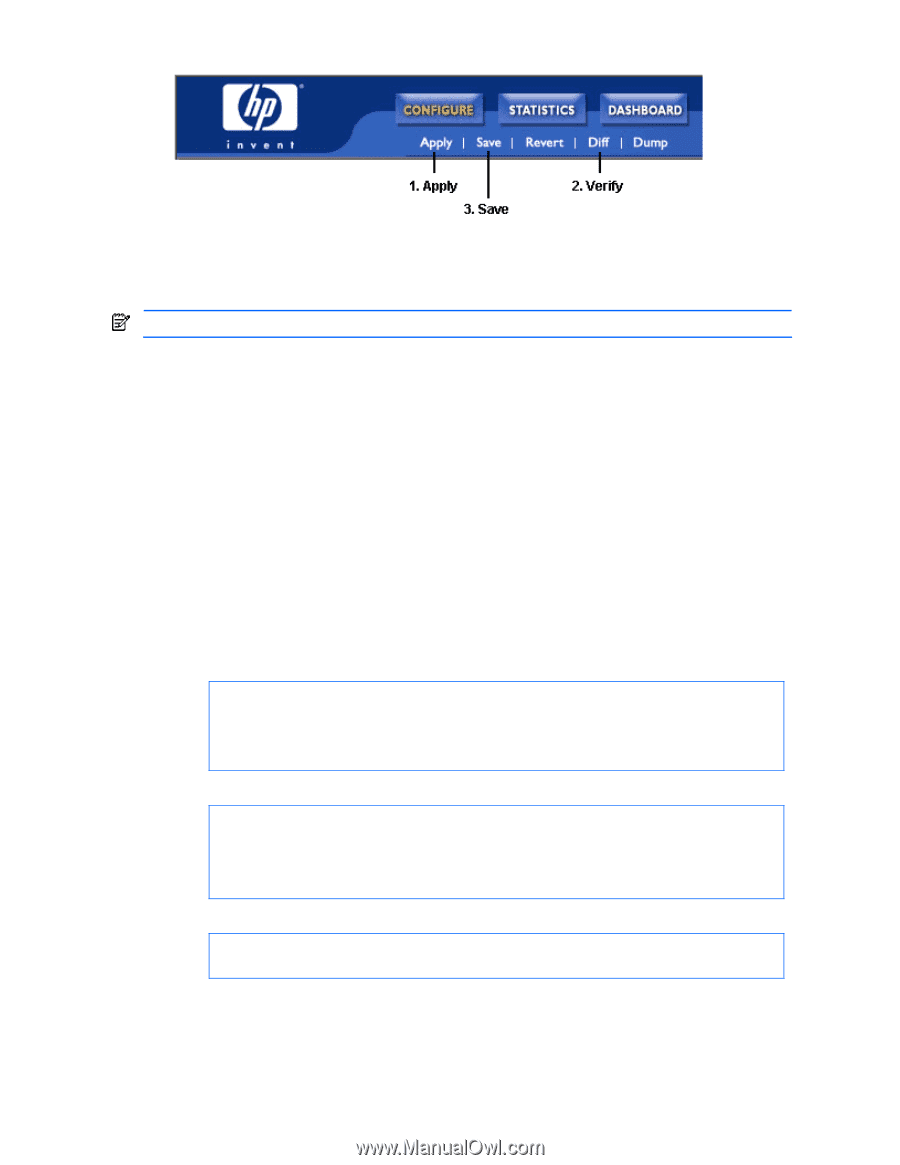
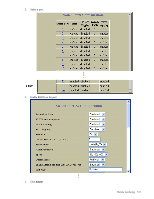
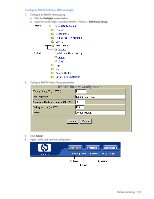
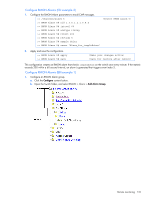
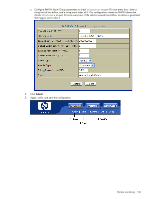
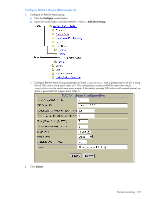
5. Apply, verify, and save the configuration. RMON group 2-history The RMON History group allows you to sample and archive Ethernet statistics for a specific interface during a specific time interval. NOTE: RMON port statistics must be enabled for the port before an RMON history group can monitor the port. Data is stored in buckets, which store data gathered during discreet sampling intervals. At each configured interval, the history instance takes a sample of the current Ethernet statistics, and places them into a bucket. History data buckets reside in dynamic memory. When the switch is re-booted, the buckets are emptied. Requested buckets (/cfg/rmon/hist x/rbnum) are the number of buckets, or data slots, requested by the user for each History Group. Granted buckets (/info/rmon/hist x/gbnum) are the number of buckets granted by the system, based on the amount of system memory available. The system grants a maximum of 50 buckets. Use an SNMP browser to view History samples. History MIB objects The type of data that can be sampled must be of an ifIndex object type, as described in RFC1213 and RFC1573. The most common data type for the history sample is as follows: 1.3.6.1.2.1.2.2.1.1.x -mgmt.interfaces.ifTable.ifIndex.interface The last digit (x) represents the interface on which to monitor, which corresponds to the port number (1-24). History sampling is done per port, by utilizing the interface number to specify the port number. Configure RMON History (CLI example) 1. Enable RMON on each port where you wish to collect RMON History. >> /cfg/port 23/rmon >> Port 23# ena >> Port 23 RMON# apply >> Port 23 RMON# save (Select Port 23 RMON) (Enable RMON) (Make your changes active) (Save for restore after reboot) 2. Configure the RMON History parameters. >> /cfg/rmon/hist 1 (Select RMON History 1) >> RMON History 1# ifoid 1.3.6.1.2.1.2.2.1.1.23 >> RMON History 1# rbnum 30 >> RMON History 1# intrval 120 >> RMON History 1# owner "Owner_History_1" 3. Apply and save the configuration. >> RMON History 1# apply >> RMON History 1# save (Make your changes active) (Save for restore after reboot) This configuration creates an RMON History group to monitor port 23. It takes a data sample every two minutes, and places the data into one of the 30 requested buckets. After 30 samples are gathered, the new samples overwrite the previous samples, beginning with the first bucket. Use SNMP to view the data. Remote monitoring 132
-
 1
1 -
2
-
3
-
4
-
5
-
6
-
7
-
8
-
9
-
10
-
11
-
12
-
13
-
14
-
15
-
16
-
17
-
18
-
19
-
20
-
21
-
22
-
23
-
24
-
25
-
26
-
27
-
28
-
29
-
30
-
31
-
32
-
33
-
34
-
35
-
36
-
37
-
38
-
39
-
40
-
41
-
42
-
43
-
44
-
45
-
46
-
47
-
48
-
49
-
50
-
51
-
52
-
53
-
54
-
55
-
56
-
57
-
58
-
59
-
60
-
61
-
62
-
63
-
64
-
65
-
66
-
67
-
68
-
69
-
70
-
71
-
72
-
73
-
74
-
75
-
76
-
77
-
78
-
79
-
80
-
81
-
82
-
83
-
84
-
85
-
86
-
87
-
88
-
89
-
90
-
91
-
92
-
93
-
94
-
95
-
96
-
97
-
98
-
99
-
100
-
101
-
102
-
103
-
104
-
105
-
106
-
107
-
108
-
109
-
110
-
111
-
112
-
113
-
114
-
115
-
116
-
117
-
118
-
119
-
120
-
121
-
122
-
123
-
124
-
125
-
126
-
 127
127 -
 128
128 -
 129
129 -
 130
130 -
 131
131 -
 132
132 -
 133
133 -
 134
134 -
 135
135 -
 136
136 -
 137
137 -
138
-
139
-
140
-
141
-
142
-
143
-
144
-
145
-
146
-
147
-
148
-
149
-
150
-
151
-
152
-
153
-
154
-
155
-
156
-
157
-
158
-
159
-
160
-
161
-
162
-
163
-
164
-
165
 |
 |