HP Officejet Pro 8500A User Guide - Page 72
Remove numbers from the junk fax list, Print a Junk Fax Report
 |
View all HP Officejet Pro 8500A manuals
Add to My Manuals
Save this manual to your list of manuals |
Page 72 highlights
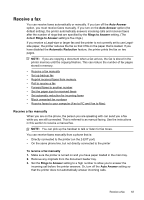
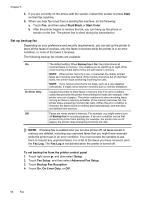
Chapter 6 Remove numbers from the junk fax list If you no longer want to block a fax number, you can remove a number from your junk fax list. To remove numbers from the list of junk fax numbers 1. Touch right arrow , and then select Setup. 2. Touch Fax Setup, and then select Basic Fax Setup. 3. Touch down arrow , and then select Junk Fax Blocker or Junk Fax Blocker Setup. 4. Touch Remove Numbers. 5. Touch the number you want to remove, and then select OK. Print a Junk Fax Report Use the following procedure to print a list of blocked junk fax numbers. To print a Junk Fax Report 1. Touch right arrow , and then select Setup. 2. Touch Fax Setup, and then select Basic Fax Setup. 3. Touch down arrow , and then select Junk Fax Blocker. 4. Touch Print Reports, and then select Junk Fax List. Receive faxes to your computer (Fax to PC and Fax to Mac) If the printer is connected to your computer with a USB cable, you can use Fax to PC and Fax to Mac to automatically receive faxes and save faxes directly to your computer. With Fax to PC and Fax to Mac, you can store digital copies of your faxes easily and also eliminate the hassle of dealing with bulky paper files. NOTE: If the printer is connected to a network using an Ethernet cable or a wireless connection, you can use HP Digital Fax instead. For more information, see HP Digital Solutions. Received faxes are saved as TIFF (Tagged Image File Format). Once the fax is received, you get an on-screen notification with a link to the folder where the fax is saved. The files are named in the following method: XXXX_YYYYYYYY_ZZZZZZ.tif, where X is the sender's information, Y is the date, and Z is the time that the fax was received. NOTE: Fax to PC and Fax to Mac are available for receiving black-and-white faxes only. Color faxes are printed instead of being saved to the computer. This section contains the following topics: • Fax to PC and Fax to Mac requirements • Activate Fax to PC and Fax to Mac • Modify Fax to PC or Fax to Mac settings 68 Fax
-
 1
1 -
2
-
3
-
4
-
5
-
6
-
7
-
8
-
9
-
10
-
11
-
12
-
13
-
14
-
15
-
16
-
17
-
18
-
19
-
20
-
21
-
22
-
23
-
24
-
25
-
26
-
27
-
28
-
29
-
30
-
31
-
32
-
33
-
34
-
35
-
36
-
37
-
38
-
39
-
40
-
41
-
42
-
43
-
44
-
45
-
46
-
47
-
48
-
49
-
50
-
51
-
52
-
53
-
54
-
55
-
56
-
57
-
58
-
59
-
60
-
61
-
62
-
63
-
64
-
65
-
66
-
 67
67 -
 68
68 -
 69
69 -
 70
70 -
 71
71 -
 72
72 -
 73
73 -
 74
74 -
 75
75 -
 76
76 -
 77
77 -
78
-
79
-
80
-
81
-
82
-
83
-
84
-
85
-
86
-
87
-
88
-
89
-
90
-
91
-
92
-
93
-
94
-
95
-
96
-
97
-
98
-
99
-
100
-
101
-
102
-
103
-
104
-
105
-
106
-
107
-
108
-
109
-
110
-
111
-
112
-
113
-
114
-
115
-
116
-
117
-
118
-
119
-
120
-
121
-
122
-
123
-
124
-
125
-
126
-
127
-
128
-
129
-
130
-
131
-
132
-
133
-
134
-
135
-
136
-
137
-
138
-
139
-
140
-
141
-
142
-
143
-
144
-
145
-
146
-
147
-
148
-
149
-
150
-
151
-
152
-
153
-
154
-
155
-
156
-
157
-
158
-
159
-
160
-
161
-
162
-
163
-
164
-
165
-
166
-
167
-
168
-
169
-
170
-
171
-
172
-
173
-
174
-
175
-
176
-
177
-
178
-
179
-
180
-
181
-
182
-
183
-
184
-
185
-
186
-
187
-
188
-
189
-
190
-
191
-
192
-
193
-
194
-
195
-
196
-
197
-
198
-
199
-
200
-
201
-
202
-
203
-
204
-
205
-
206
-
207
-
208
-
209
-
210
-
211
-
212
-
213
-
214
-
215
-
216
-
217
-
218
-
219
-
220
-
221
-
222
-
223
-
224
-
225
-
226
-
227
-
228
-
229
-
230
-
231
-
232
-
233
-
234
-
235
-
236
-
237
-
238
-
239
-
240
-
241
-
242
-
243
-
244
-
245
-
246
 |
 |