HP P2055d HP LaserJet P2050 Series - Software Technical Reference - Page 180
Troubleshooting the product setup, Show Info? - paper tray
 |
UPC - 884962230343
View all HP P2055d manuals
Add to My Manuals
Save this manual to your list of manuals |
Page 180 highlights
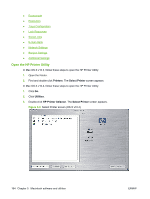
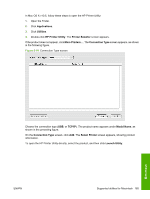
6. Click Add. The product appears in the Printer List. 7. To configure installable options such as a duplexing unit or optional paper tray, click Show Info? on the printer list and select Installable Options in the pull-down menu. 8. If the product has the optional Tray 3, select Tray 3. 9. Select the Duplex Unit check box. 10. Click Apply Changes, and then close the Printer List dialog. Troubleshooting the product setup If the product does not appear in the printer list after an installation: Carry out each one of these solutions in the order given, and restart the setup process after each one to see if the issue has been resolved. ● Verify that the USB or network cable is connected between the product and the computer and that the product is powered on. ● Try disconnecting and reconnecting the cable. If the computer has more than one USB port, try a different USB port. ● Turn the product off and then back on again. ● Turn the computer off and then back on again. ● If you are using a USB hub on the computer, disconnect the other USB devices from the hub. If the wrong PPD appears in the Kind column in the printer list after an installation: 1. Unplug USB cable. 2. Delete the print queue with the incorrect type (for example, Generic PostScript Printer). 3. Reinstall the product software. 4. Turn the computer off and then on again. 5. Reconnect the USB cable from the computer to the product. If these steps do not resolve the problem, delete the incorrect print queue, click Add, select the product from the list, and then browse manually for the product PPD. 162 Chapter 5 Macintosh software and utilities ENWW
-
 1
1 -
2
-
3
-
4
-
5
-
6
-
7
-
8
-
9
-
10
-
11
-
12
-
13
-
14
-
15
-
16
-
17
-
18
-
19
-
20
-
21
-
22
-
23
-
24
-
25
-
26
-
27
-
28
-
29
-
30
-
31
-
32
-
33
-
34
-
35
-
36
-
37
-
38
-
39
-
40
-
41
-
42
-
43
-
44
-
45
-
46
-
47
-
48
-
49
-
50
-
51
-
52
-
53
-
54
-
55
-
56
-
57
-
58
-
59
-
60
-
61
-
62
-
63
-
64
-
65
-
66
-
67
-
68
-
69
-
70
-
71
-
72
-
73
-
74
-
75
-
76
-
77
-
78
-
79
-
80
-
81
-
82
-
83
-
84
-
85
-
86
-
87
-
88
-
89
-
90
-
91
-
92
-
93
-
94
-
95
-
96
-
97
-
98
-
99
-
100
-
101
-
102
-
103
-
104
-
105
-
106
-
107
-
108
-
109
-
110
-
111
-
112
-
113
-
114
-
115
-
116
-
117
-
118
-
119
-
120
-
121
-
122
-
123
-
124
-
125
-
126
-
127
-
128
-
129
-
130
-
131
-
132
-
133
-
134
-
135
-
136
-
137
-
138
-
139
-
140
-
141
-
142
-
143
-
144
-
145
-
146
-
147
-
148
-
149
-
150
-
151
-
152
-
153
-
154
-
155
-
156
-
157
-
158
-
159
-
160
-
161
-
162
-
163
-
164
-
165
-
166
-
167
-
168
-
169
-
170
-
171
-
172
-
173
-
174
-
 175
175 -
 176
176 -
 177
177 -
 178
178 -
 179
179 -
 180
180 -
 181
181 -
 182
182 -
 183
183 -
 184
184 -
 185
185 -
186
-
187
-
188
-
189
-
190
-
191
-
192
-
193
-
194
-
195
-
196
-
197
-
198
-
199
-
200
-
201
-
202
-
203
-
204
-
205
-
206
-
207
-
208
-
209
-
210
-
211
-
212
-
213
-
214
-
215
-
216
-
217
-
218
-
219
-
220
-
221
-
222
-
223
-
224
-
225
-
226
-
227
-
228
-
229
-
230
 |
 |
