Panasonic KX-TGA4500B Telephone Equipment - Page 52
Listening to messages from the base unit, Mailbox, Set password, Initial setting, Message full
 |
View all Panasonic KX-TGA4500B manuals
Add to My Manuals
Save this manual to your list of manuals |
Page 52 highlights
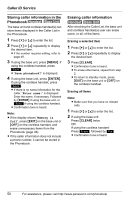
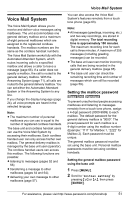
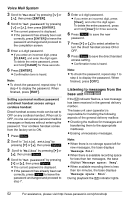
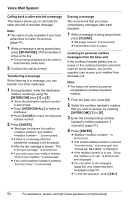
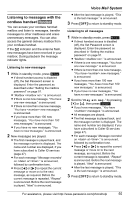
Voice Mail System 3 Scroll to "Mailbox" by pressing {}, then press {ENTER}. 4 Scroll to "Set password" by pressing {}, then press {ENTER}. L The current password is displayed. L If the password has already been set correctly, press {ENTER} to leave the password unchanged and proceed to the completion screen. 5 Enter a 4-digit password. L If you enter an incorrect digit, press {CLEAR}, and enter the digit again. To delete the entire password, press and hold {CLEAR} for three seconds. 6 Press {ENTER}. L Confirmation tone is heard. Note: L To check the password, repeat step 1 to step 4 to display the password. When finished, press {EXIT}. Setting a personal mailbox password and direct handset access using a cordless handset Direct handset access mode can be set to OFF on any cordless handset. When set to OFF, no one can access personal mailbox messages or features without entering the password. Your cordless handset comes from the factory set to ON. 1 Press Menu . 2 Scroll to "Initial setting" by pressing {V} or {^}, then press Select . 3 Scroll to "Mailbox" by pressing {V} or {^}, then press Select . 4 Scroll to "Set password" by pressing {V} or {^}, then press Select . L The current password is displayed. L If the password has already been set correctly, press Next to leave the password unchanged and proceed to step 7. 5 Enter a 4-digit password. L If you enter an incorrect digit, press {Clear}, and enter the digit again. To delete the entire password, press and hold {Clear} for three seconds. 6 Press Next to save the new password. 7 Press {V} or {^} to select whether to turn the direct handset access ON or OFF. 8 Press Save to save the direct handset access setting. L Confirmation tone is heard. Note: L To check the password, repeat step 1 to step 4 to display the password. When finished, press {OFF}. Listening to messages from the base unit Base Unit If the F indicator flashes, a new message has been received in the general delivery mailbox. The base unit user (operator) is responsible for handling the following aspects of the general delivery mailbox: L Checking the mailbox for messages and transferring them to the appropriate mailboxes. L Erasing unnecessary messages. Note: L When there is no storage space left for new messages, the base displays "Message full". L When there is available recording space for less than ten messages, the base displays "Message space: 9msg". L When available recording time is less than ten minutes, the base displays "Message space: 9min". During playback the F indicator lights. 52 For assistance, please visit http://www.panasonic.com/phonehelp
-
 1
1 -
2
-
3
-
4
-
5
-
6
-
7
-
8
-
9
-
10
-
11
-
12
-
13
-
14
-
15
-
16
-
17
-
18
-
19
-
20
-
21
-
22
-
23
-
24
-
25
-
26
-
27
-
28
-
29
-
30
-
31
-
32
-
33
-
34
-
35
-
36
-
37
-
38
-
39
-
40
-
41
-
42
-
43
-
44
-
45
-
46
-
 47
47 -
 48
48 -
 49
49 -
 50
50 -
 51
51 -
 52
52 -
 53
53 -
 54
54 -
 55
55 -
 56
56 -
 57
57 -
58
-
59
-
60
-
61
-
62
-
63
-
64
-
65
-
66
-
67
-
68
-
69
-
70
-
71
-
72
-
73
-
74
-
75
-
76
-
77
-
78
-
79
-
80
-
81
-
82
-
83
-
84
-
85
-
86
-
87
-
88
-
89
-
90
-
91
-
92
-
93
-
94
-
95
-
96
-
97
-
98
-
99
-
100
-
101
-
102
-
103
-
104
-
105
-
106
-
107
-
108
-
109
-
110
-
111
-
112
-
113
-
114
-
115
-
116
-
117
-
118
-
119
-
120
-
121
-
122
-
123
-
124
 |
 |