Panasonic KX-TGA4500B Telephone Equipment - Page 67
Setting the Automated Attendant System, Turning on the Automated Attendant
 |
View all Panasonic KX-TGA4500B manuals
Add to My Manuals
Save this manual to your list of manuals |
Page 67 highlights
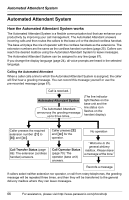
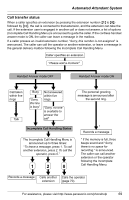
Automated Attendant System Setting the Automated Attendant System Base Unit The Automated Attendant System can be assigned to any line. You can record up to five greeting messages of up to two minutes each. The same messages can be used for the Answering System (page 71). Note: L Try to record brief messages to leave more time for recording new messages. The following greeting message is pre-recorded: "Hello, this is Automated Attendant System. Press 1 for English. Presione 2 pare el Espanol. Please enter your party's extension, followed by #. If you are using a rotary telephone, please stay on the line." Turning on the Automated Attendant System 1 Press the line's {ANSWER ON} key. 2 Scroll to "Auto attendant" by pressing {}, then press {ENTER}. L The current greeting is played. L The line indicator icon is displayed. Selecting the pre-recorded greeting message 1 Press the line's {ANSWER ON} key. L The current setting is displayed. 2 Select "Setup" by pressing {}, then press {ENTER}. 3 Select "Auto attendant" by pressing {}, then press {ENTER}. 4 Select "Select greeting" then press {ENTER}. 5 Select "Prerecord", then press {ENTER}. L The pre-recorded message is played. Recording a user greeting message 1 Press the line's {ANSWER ON} key. L The current setting is displayed. 2 Select "Setup" by pressing {}, then press {ENTER}. 3 Select "User greetings" by pressing {}, then press {ENTER}. 4 Select a greeting, "Greeting 1" to "Greeting 5" by pressing {}, then press {ENTER}. L The current user greeting message is played, if stored. L If a greeting has not been stored, "(none)" is displayed against the greeting. 5 Press {1} to change the greeting, followed by {g} to start recording. 6 After the tone, talk clearly, about 8 inches (20 cm) away from the microphone (see page 18 for its location). To end, press {1}. L If the elapsed recording time exceeds two minutes, the unit will stop recording. L The recorded message will be played. L To change the message, press {1} and restart from step 5. 7 Press {2} to accept the recorded message. Selecting/changing the recorded message 1 Press the line's {ANSWER ON} key. 2 Scroll to "Setup" by pressing {}, then press {ENTER}. 3 Scroll to "User greetings" by pressing {}, then press {ENTER}. 4 Select "Greeting 1" to "Greeting 5" by pressing {}, then press {ENTER}. L The current greeting is played. For assistance, please visit http://www.panasonic.com/phonehelp 67
-
 1
1 -
2
-
3
-
4
-
5
-
6
-
7
-
8
-
9
-
10
-
11
-
12
-
13
-
14
-
15
-
16
-
17
-
18
-
19
-
20
-
21
-
22
-
23
-
24
-
25
-
26
-
27
-
28
-
29
-
30
-
31
-
32
-
33
-
34
-
35
-
36
-
37
-
38
-
39
-
40
-
41
-
42
-
43
-
44
-
45
-
46
-
47
-
48
-
49
-
50
-
51
-
52
-
53
-
54
-
55
-
56
-
57
-
58
-
59
-
60
-
61
-
 62
62 -
 63
63 -
 64
64 -
 65
65 -
 66
66 -
 67
67 -
 68
68 -
 69
69 -
 70
70 -
 71
71 -
 72
72 -
73
-
74
-
75
-
76
-
77
-
78
-
79
-
80
-
81
-
82
-
83
-
84
-
85
-
86
-
87
-
88
-
89
-
90
-
91
-
92
-
93
-
94
-
95
-
96
-
97
-
98
-
99
-
100
-
101
-
102
-
103
-
104
-
105
-
106
-
107
-
108
-
109
-
110
-
111
-
112
-
113
-
114
-
115
-
116
-
117
-
118
-
119
-
120
-
121
-
122
-
123
-
124
 |
 |
