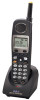
Panasonic KX-TGA4500B Telephone Equipment - Page 81
Caller ID edit, Setting up ring groups, Initial setting, Ringer setting, Ring group
 |
View all Panasonic KX-TGA4500B manuals
Add to My Manuals
Save this manual to your list of manuals |
Page 81 highlights
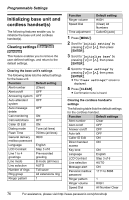
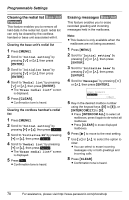
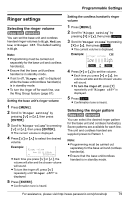
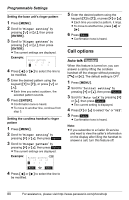
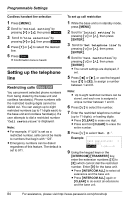
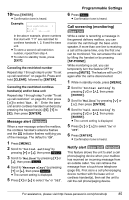
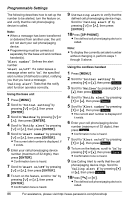
Programmable Settings Caller ID edit Handset Base Unit You can turn the Caller ID number auto edit feature (page 49) on or off. The default setting is ON. Using the base unit 1 Press {MENU}. 2 Scroll to "Initial setting" by pressing {}, then press {ENTER}. 3 Scroll to "Caller ID edit" by pressing {}, then press {ENTER}. 4 Press {} to select "On" or "Off". 5 Press {ENTER}. L Confirmation tone is heard. Using the cordless handset 1 Press {MENU}. 2 Scroll to "Initial setting" by pressing {V} or {^}, then press Select . 3 Scroll to "Caller ID edit" by pressing {V} or {^}, then press Select . 4 Press {V} or {^} to select "On" or "Off". 5 Press Save . L Confirmation tone is heard. Setting up ring groups Base Unit This feature allows you to specify which extensions (cordless handsets or base unit) will ring when incoming calls are received on specific lines. To stop an individual extension (handset or the base unit) ringing for incoming calls on a specific line, remove the handset or base unit from the ring group for that line. The base unit or a handset can make calls using a line even when they have been removed from that line's ring group. Note: L Ensure that the base unit is in standby mode before attempting to set up this feature. 1 Press {MENU}. 2 Scroll to "Ringer setting" by pressing {}, then press {ENTER}. 3 Scroll to "Ring group" by pressing {}, then press {ENTER}. 4 Press {f} or {g} to select the line (LINE 1 to 4). L The current settings are displayed. 5 Press {
-
 1
1 -
2
-
3
-
4
-
5
-
6
-
7
-
8
-
9
-
10
-
11
-
12
-
13
-
14
-
15
-
16
-
17
-
18
-
19
-
20
-
21
-
22
-
23
-
24
-
25
-
26
-
27
-
28
-
29
-
30
-
31
-
32
-
33
-
34
-
35
-
36
-
37
-
38
-
39
-
40
-
41
-
42
-
43
-
44
-
45
-
46
-
47
-
48
-
49
-
50
-
51
-
52
-
53
-
54
-
55
-
56
-
57
-
58
-
59
-
60
-
61
-
62
-
63
-
64
-
65
-
66
-
67
-
68
-
69
-
70
-
71
-
72
-
73
-
74
-
75
-
 76
76 -
 77
77 -
 78
78 -
 79
79 -
 80
80 -
 81
81 -
 82
82 -
 83
83 -
 84
84 -
 85
85 -
 86
86 -
87
-
88
-
89
-
90
-
91
-
92
-
93
-
94
-
95
-
96
-
97
-
98
-
99
-
100
-
101
-
102
-
103
-
104
-
105
-
106
-
107
-
108
-
109
-
110
-
111
-
112
-
113
-
114
-
115
-
116
-
117
-
118
-
119
-
120
-
121
-
122
-
123
-
124
 |
 |