Panasonic WJND300A WJND300A User Guide - Page 19
[Setup] Tab (Quick), Display Setup, Camera Setup, Rec & Event Setup, Network Setup
 |
View all Panasonic WJND300A manuals
Add to My Manuals
Save this manual to your list of manuals |
Page 19 highlights
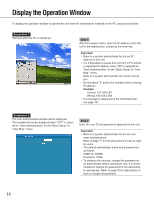
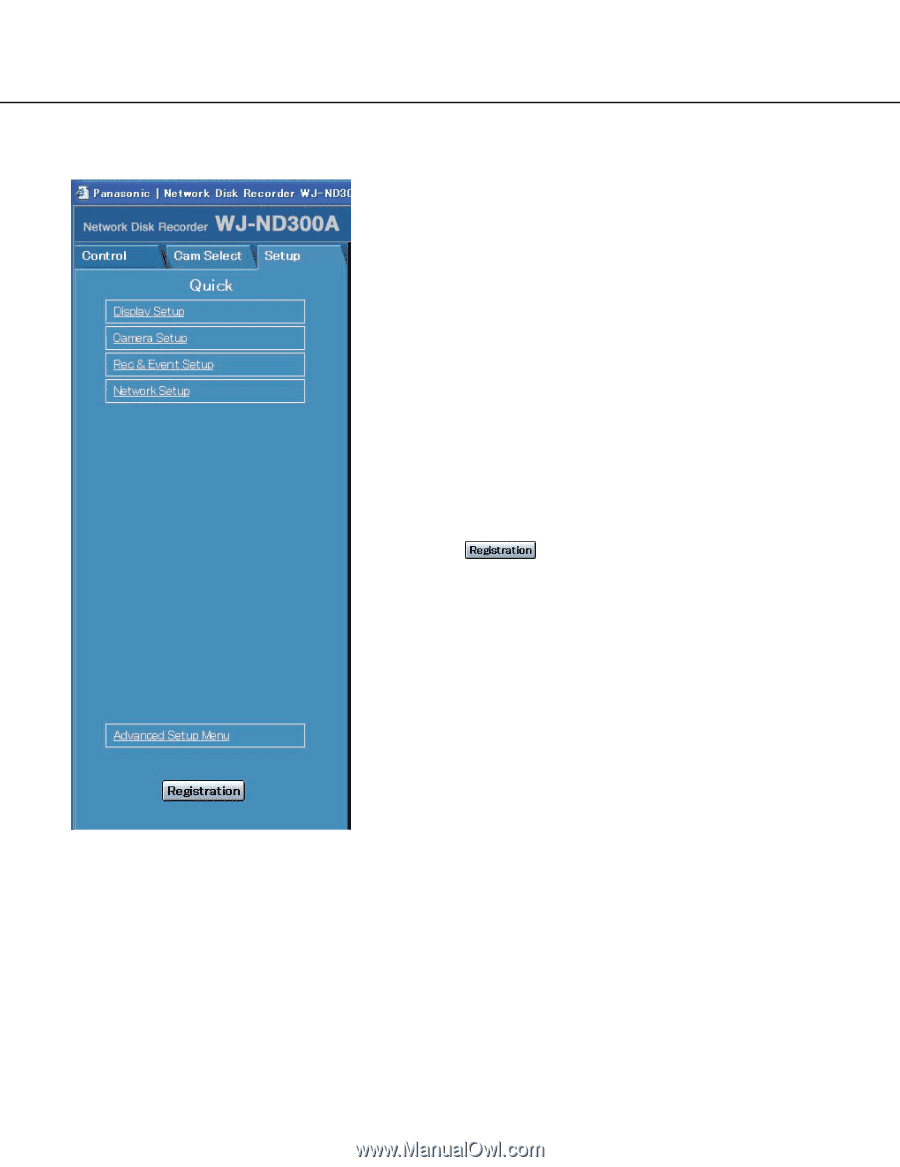
[Setup] Tab (Quick) Display Setup This button is for performing basic settings such as date, time, and language display. Refer to page 28 for further information. Camera Setup This button is for performing camera network settings and group settings. Refer to page 30 for further information. Rec & Event Setup Performs the basic settings for recording operation and for event action. Refer to page 31 for further information. Network Setup Settings for a network can be performed. Refer to page 35 for further information. [Registration] button Applies the settings to this unit. Click this button to complete the setting after editing on the setup menu. 19
-
 1
1 -
2
-
3
-
4
-
5
-
6
-
7
-
8
-
9
-
10
-
11
-
12
-
13
-
 14
14 -
 15
15 -
 16
16 -
 17
17 -
 18
18 -
 19
19 -
 20
20 -
 21
21 -
 22
22 -
 23
23 -
 24
24 -
25
-
26
-
27
-
28
-
29
-
30
-
31
-
32
-
33
-
34
-
35
-
36
-
37
-
38
-
39
-
40
-
41
-
42
-
43
-
44
-
45
-
46
-
47
-
48
-
49
-
50
-
51
-
52
-
53
-
54
-
55
-
56
-
57
-
58
-
59
-
60
-
61
-
62
-
63
-
64
-
65
-
66
-
67
-
68
-
69
-
70
-
71
-
72
-
73
-
74
-
75
-
76
-
77
-
78
-
79
-
80
-
81
-
82
-
83
-
84
-
85
-
86
-
87
-
88
-
89
-
90
-
91
-
92
-
93
-
94
-
95
-
96
-
97
-
98
-
99
-
100
-
101
-
102
 |
 |
19
[Setup] Tab (Quick)
Display Setup
This button is for performing basic settings such as
date, time, and language display. Refer to page 28 for
further information.
Camera Setup
This button is for performing camera network settings
and group settings. Refer to page 30 for further informa-
tion.
Rec & Event Setup
Performs the basic settings for recording operation and
for event action. Refer to page 31 for further informa-
tion.
Network Setup
Settings for a network can be performed. Refer to page
35 for further information.
[Registration] button
Applies the settings to this unit. Click this button to com-
plete the setting after editing on the setup menu.