Panasonic WJND300A WJND300A User Guide - Page 20
[Setup] Tab (Advanced), User Mng.] button
 |
View all Panasonic WJND300A manuals
Add to My Manuals
Save this manual to your list of manuals |
Page 20 highlights
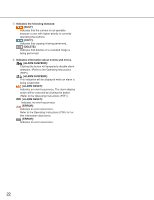
[Setup] Tab (Advanced) Main menu Submenu Important: When the settings are applied, all users who have logged in to this unit will be forcibly logged out. [System] button The menu for the required system settings to activate this unit will be displayed. Refer to page 42 for further information. [Recording] button The menu for the recording settings will be displayed. Perform the basic settings for recording and the settings for emergency recording. Refer to page 46 for further information. [Event] button Displays the setting menu for event actions of each event type (site alarm, terminal alarm and command alarm). Refer to page 49 for further information. [Schedule] button The menu for the settings of the recording schedule (performs recording/event action by designating the time and a day of the week) will be displayed. Refer to page 53 for further information. [Camera] This button is for performing camera network settings, group settings and sequence operation settings. Refer to page 60 for further information. [Comm] button The menu for basic network settings will be displayed. Refer to page 64 for further information. [User Mng.] button Displays a menu for registering user information. Refer to page 75 for further information. [Maintenance] button The menu for the settings of the hard disk will be displayed. Refer to page 82 for further information. [Registration] button Applies the settings to this unit. Click this button to complete the setting after editing on the setup menu. 20
-
 1
1 -
2
-
3
-
4
-
5
-
6
-
7
-
8
-
9
-
10
-
11
-
12
-
13
-
14
-
 15
15 -
 16
16 -
 17
17 -
 18
18 -
 19
19 -
 20
20 -
 21
21 -
 22
22 -
 23
23 -
 24
24 -
 25
25 -
26
-
27
-
28
-
29
-
30
-
31
-
32
-
33
-
34
-
35
-
36
-
37
-
38
-
39
-
40
-
41
-
42
-
43
-
44
-
45
-
46
-
47
-
48
-
49
-
50
-
51
-
52
-
53
-
54
-
55
-
56
-
57
-
58
-
59
-
60
-
61
-
62
-
63
-
64
-
65
-
66
-
67
-
68
-
69
-
70
-
71
-
72
-
73
-
74
-
75
-
76
-
77
-
78
-
79
-
80
-
81
-
82
-
83
-
84
-
85
-
86
-
87
-
88
-
89
-
90
-
91
-
92
-
93
-
94
-
95
-
96
-
97
-
98
-
99
-
100
-
101
-
102
 |
 |
