Panasonic WJND300A WJND300A User Guide - Page 7
Operations Flow
 |
View all Panasonic WJND300A manuals
Add to My Manuals
Save this manual to your list of manuals |
Page 7 highlights
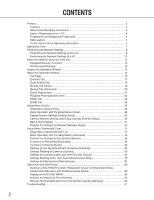
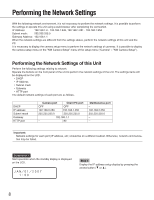
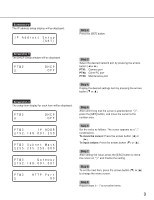
Operations Flow The operation flow of this unit is as follows. z Rack Mounting x Connections Install the unit in the rack. Refer to the Installation Guide for further information about rack mounting. Refer to the provided Installation Guide for further information about connections. c Startup Turn on the power of the unit. For further information, refer to the Installation Guide. v Network settings of this unit (page 8) Operate the buttons on the front panel of the unit to perform the network settings of the unit. b Network settings of the PC (page 10) Change the TCP/IP setting of the PC to conform to the settings of this unit. n Format (initialize) hard disk drives (page 92) Display the disk configuration menu and format the hard disk drives. m Display the camera setup menu and perform the network settings of cameras. (page 30) Refer to the Setup Instructions (PDF) for descriptions of how to display the camera setup menu. , Setup (pages 26 - 88) Perform the required settings on the setup menu to start operation. ➜➜ Start operation 7
-
 1
1 -
 2
2 -
 3
3 -
 4
4 -
 5
5 -
 6
6 -
 7
7 -
 8
8 -
 9
9 -
 10
10 -
 11
11 -
 12
12 -
13
-
14
-
15
-
16
-
17
-
18
-
19
-
20
-
21
-
22
-
23
-
24
-
25
-
26
-
27
-
28
-
29
-
30
-
31
-
32
-
33
-
34
-
35
-
36
-
37
-
38
-
39
-
40
-
41
-
42
-
43
-
44
-
45
-
46
-
47
-
48
-
49
-
50
-
51
-
52
-
53
-
54
-
55
-
56
-
57
-
58
-
59
-
60
-
61
-
62
-
63
-
64
-
65
-
66
-
67
-
68
-
69
-
70
-
71
-
72
-
73
-
74
-
75
-
76
-
77
-
78
-
79
-
80
-
81
-
82
-
83
-
84
-
85
-
86
-
87
-
88
-
89
-
90
-
91
-
92
-
93
-
94
-
95
-
96
-
97
-
98
-
99
-
100
-
101
-
102
 |
 |
