Panasonic WJND300A WJND300A User Guide - Page 8
Performing the Network Settings, Performing the Network Settings of this Unit
 |
View all Panasonic WJND300A manuals
Add to My Manuals
Save this manual to your list of manuals |
Page 8 highlights
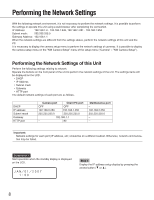
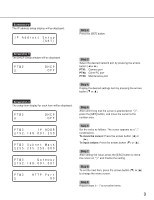
Performing the Network Settings With the following network environment, it is not necessary to perform the network settings. It is possible to perform the settings or operate this unit using a web browser after completing the connection. IP Address: 192.168.1.2 - 192.168.1.249, 192.168.1.251 - 192.168.1.254 Subnet mask: 255.255.255.0 Gateway Address: 192.168.1.1 When the network settings are different from the settings above, perform the network settings of this unit and the PC. It is necessary to display the camera setup menu to perform the network settings of cameras. It is possible to display the camera setup menu on the "NW Camera Setup" menu of the setup menu ("Camera" - "NW Camera Setup"). Performing the Network Settings of this Unit Perform the following settings relating to network. Operate the buttons on the front panel of the unit to perform the network settings of the unit. The settings items will be displayed on the LCD. • DHCP • IP Address • Subnet mask • Gateway • HTTP port The default network settings of each port are as follows. DHCP IP address Subnet mask Gateway HTTP port Camera port Client PC port OFF OFF 192.168.0.250 192.168.1.250 255.255.255.0 255.255.255.0 192.168.1.1 - 80 Maintenance port - 192.168.2.250 255.255.255.0 - - Important: Network settings for each port (IP address, etc.) should be on a different subnet. Otherwise, network communication may be failed. Screenshot 1 Start operation when the standby display is displayed on the LCD. Step 1 Display the IP address setup display by pressing the arrows button (C or D). 8
-
 1
1 -
2
-
 3
3 -
 4
4 -
 5
5 -
 6
6 -
 7
7 -
 8
8 -
 9
9 -
 10
10 -
 11
11 -
 12
12 -
 13
13 -
14
-
15
-
16
-
17
-
18
-
19
-
20
-
21
-
22
-
23
-
24
-
25
-
26
-
27
-
28
-
29
-
30
-
31
-
32
-
33
-
34
-
35
-
36
-
37
-
38
-
39
-
40
-
41
-
42
-
43
-
44
-
45
-
46
-
47
-
48
-
49
-
50
-
51
-
52
-
53
-
54
-
55
-
56
-
57
-
58
-
59
-
60
-
61
-
62
-
63
-
64
-
65
-
66
-
67
-
68
-
69
-
70
-
71
-
72
-
73
-
74
-
75
-
76
-
77
-
78
-
79
-
80
-
81
-
82
-
83
-
84
-
85
-
86
-
87
-
88
-
89
-
90
-
91
-
92
-
93
-
94
-
95
-
96
-
97
-
98
-
99
-
100
-
101
-
102
 |
 |
