Sony PMWF3K Operating Instructions - Page 68
Selecting a Picture Profile, Copying the Settings of a Picture Profile, P.PROFILE menu
 |
View all Sony PMWF3K manuals
Add to My Manuals
Save this manual to your list of manuals |
Page 68 highlights
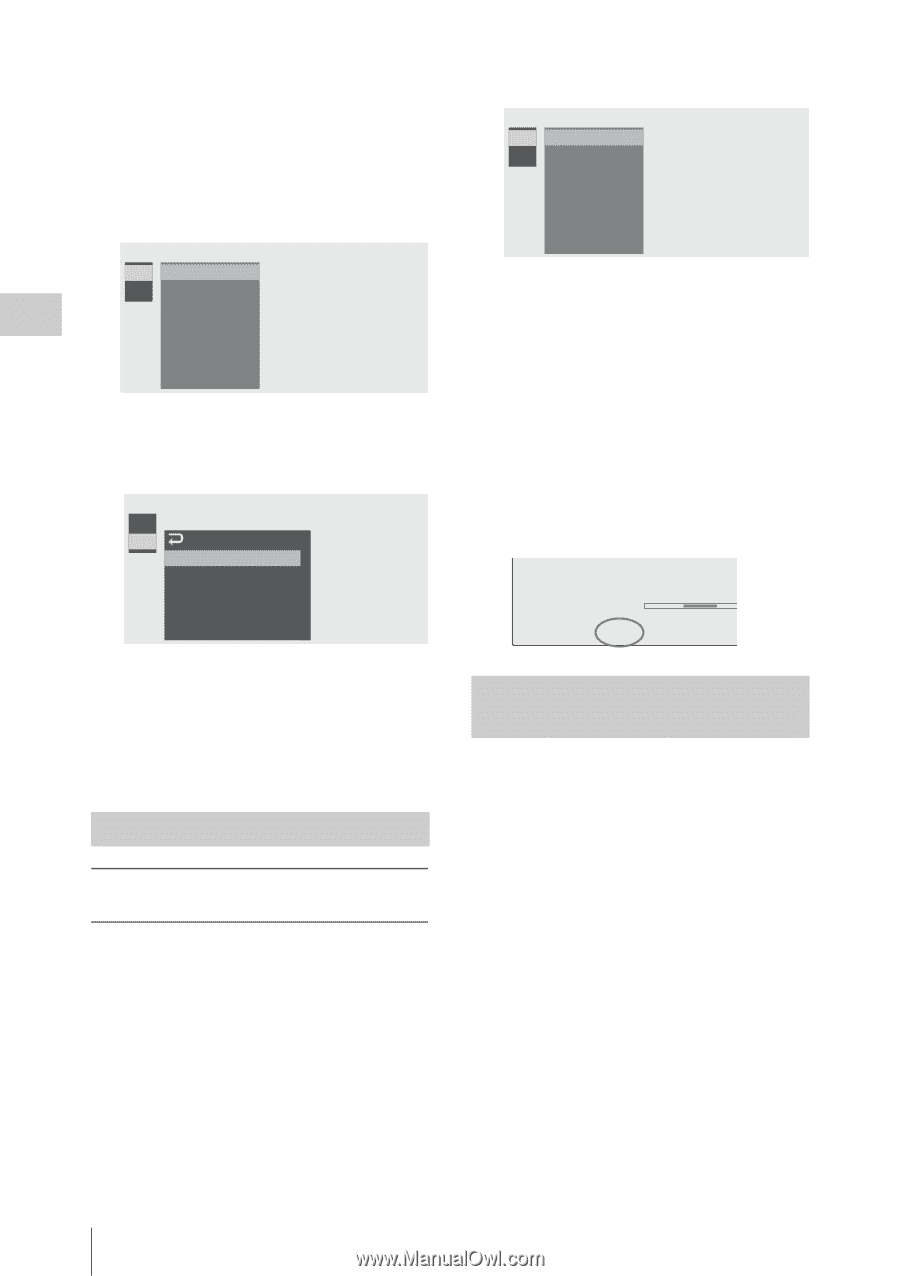
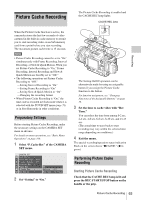
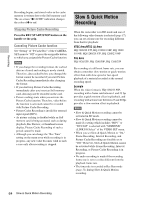
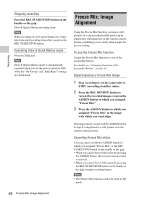
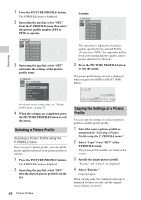
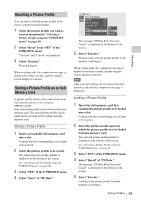
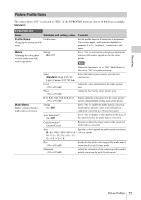
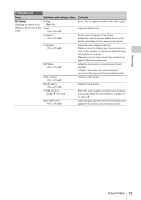
B Recording 1 Press the PICTURE PROFILE button. The P.PROFILE menu is displayed. 2 Operating the jog dial, select "SEL" from the P. PROFILE menu then select the picture profile number (PP1 to PP10) to operate. P . PROF I LE SEL OFF SET PP1: STANDARD PP2: STANDARD PP3: STANDARD PP4: STANDARD PP5: STANDARD PP6: STANDARD 3 Operating the jog dial, select "SET" and make the settings of the picture profile items. P . PROF I LE SEL PP1: STANDARD SET Pr o f i l e Name Mat r i x B Multi Matrix B Whi te B HD Detai l B For details on the setting items, see "Picture Profile Items" on page 71. 4 When the settings are completed, press the PICTURE PROFILE button to exit the menu. Selecting a Picture Profile Selecting a Picture Profile using the P.PROFILE menu Once you store a picture profile, you can call the picture quality registered in the picture profile as follows: 1 Press the PICTURE PROFILE button. The P.PROFILE menu is displayed. 2 Operating the jog dial, select "SEL" then the desired picture profile from the list. 68 Picture Profiles Example: P . PROF I LE SEL OFF SET PP1: SceneA PP2: SceneB PP3: SceneC PP4: SceneD PP5: SceneE PP6: SceneF The camcorder is adjusted to the picture quality specified by the selected Profile. (If you select "OFF," the camcorder will be fixed at the standard picture quality, and no picture adjustment is allowed.) 3 Press the PICTURE PROFILE button to exit the menu. The picture profile being selected is displayed when you press the DISPLAY/BATT INFO button. TLCS . 1 1.5 2 3 4 5 7 ATW 4300K PP1 ++T1.6 18dB Copying the Settings of a Picture Profile You can copy the settings of a selected picture profile to another picture profile. 1 Select the source picture profile as mentioned in "Selecting a Picture Profile using the P. PROFILE menu". 2 Select "Copy" from "SET" of the P.PROFILE menu. The picture profile numbers are listed on the screen. 3 Specify the target picture profile. "Execute" and "Cancel" are displayed. 4 Select "Execute." Copying begins. When copying ends, the completion message is displayed for three seconds, and the original screen display is restored.
-
 1
1 -
2
-
3
-
4
-
5
-
6
-
7
-
8
-
9
-
10
-
11
-
12
-
13
-
14
-
15
-
16
-
17
-
18
-
19
-
20
-
21
-
22
-
23
-
24
-
25
-
26
-
27
-
28
-
29
-
30
-
31
-
32
-
33
-
34
-
35
-
36
-
37
-
38
-
39
-
40
-
41
-
42
-
43
-
44
-
45
-
46
-
47
-
48
-
49
-
50
-
51
-
52
-
53
-
54
-
55
-
56
-
57
-
58
-
59
-
60
-
61
-
62
-
 63
63 -
 64
64 -
 65
65 -
 66
66 -
 67
67 -
 68
68 -
 69
69 -
 70
70 -
 71
71 -
 72
72 -
 73
73 -
74
-
75
-
76
-
77
-
78
-
79
-
80
-
81
-
82
-
83
-
84
-
85
-
86
-
87
-
88
-
89
-
90
-
91
-
92
-
93
-
94
-
95
-
96
-
97
-
98
-
99
-
100
-
101
-
102
-
103
-
104
-
105
-
106
-
107
-
108
-
109
-
110
-
111
-
112
-
113
-
114
-
115
-
116
-
117
-
118
-
119
-
120
-
121
-
122
-
123
-
124
-
125
-
126
-
127
-
128
-
129
-
130
-
131
-
132
-
133
-
134
-
135
-
136
-
137
-
138
-
139
-
140
-
141
-
142
-
143
-
144
-
145
-
146
-
147
-
148
-
149
-
150
 |
 |