Toshiba GSC-R60 Owners Manual - Page 35
Setting the Date and Time
 |
View all Toshiba GSC-R60 manuals
Add to My Manuals
Save this manual to your list of manuals |
Page 35 highlights
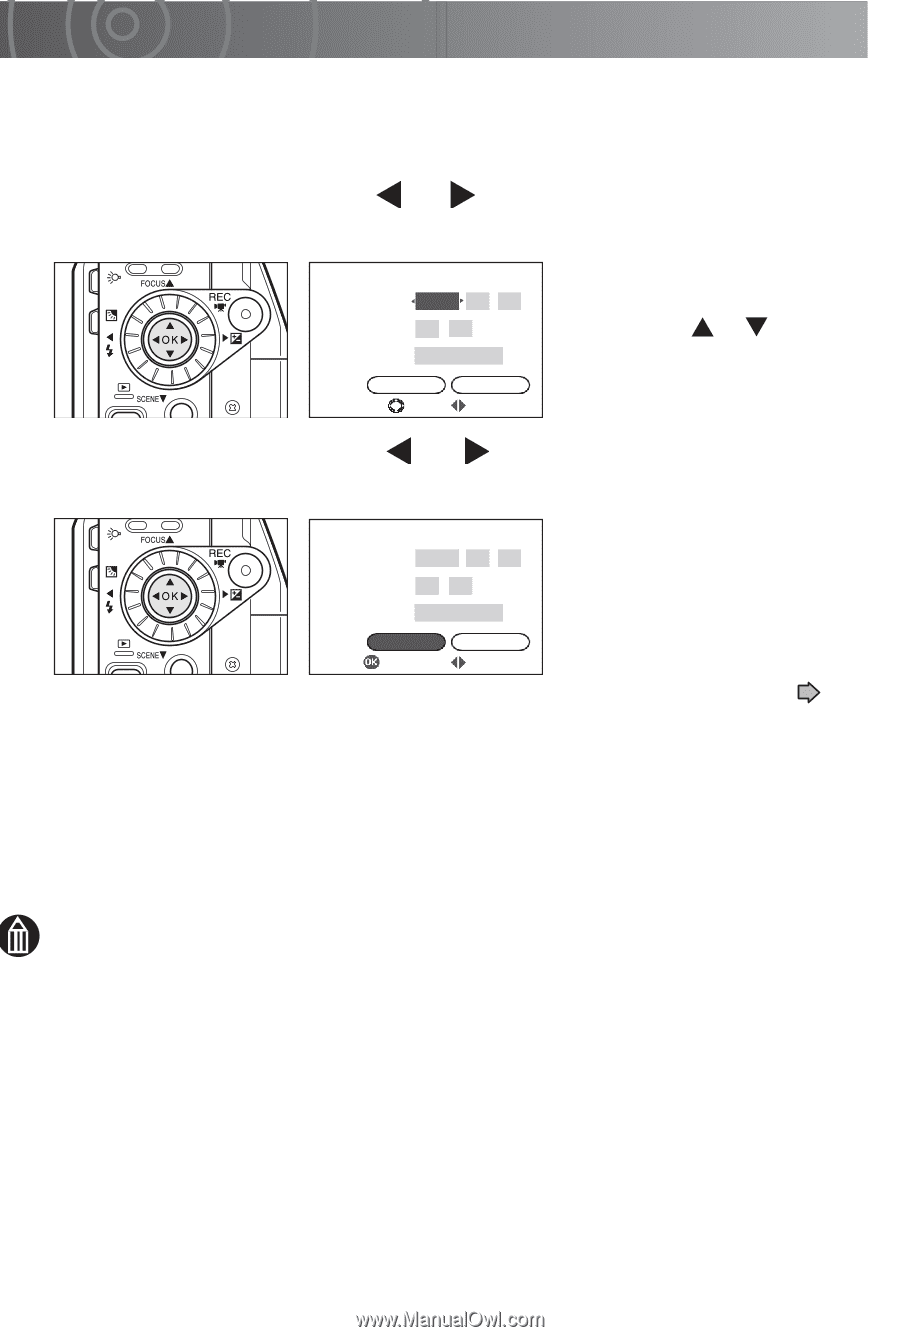
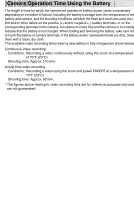
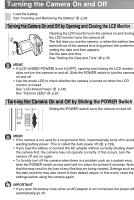
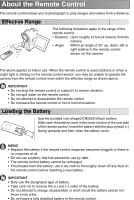
Setting the Date and Time The first time you use the camera, or when the battery has been left out of the camera for a long period, the screen for setting the date and time automatically appears. Use this screen to set the date and time. Note that you cannot set seconds. 1 Move the OK button to or to select a setting and then use the jog dial to select a value. DATE AND TIME SETTING DATE 2006 01 . 01 TIME 00 : 00 FORMAT YYYY.MM.DD OK CANCEL CHANGE SELECT After selecting the desired setting, you can also move the OK button to or to set the value. 2 Move the OK button to or to select [OK] and then press the OK button. DATE AND TIME SETTING DATE 2006 04 . 01 TIME 13 : 05 FORMAT YYYY.MM.DD OK OK CANCEL SELECT This sets the date and time. The first time you use the camera, the display switches to the create album screen. Use this screen to create your albums. See "Creating Albums" p.36. If you have already created albums, the camera switches to recording mode. To cancel out of date and time setting, select [CANCEL] and press the OK button. MEMO • The order in which the date appears depends on the selected format. The available formats are [MM/DD/YYYY], [YYYY.MM.DD] and [DD/MM/YYYY]. • When you finish setting the date and time after selecting [DATE AND TIME SETTING] in the setup menu, the setup menu reappears.
-
 1
1 -
2
-
3
-
4
-
5
-
6
-
7
-
8
-
9
-
10
-
11
-
12
-
13
-
14
-
15
-
16
-
17
-
18
-
19
-
20
-
21
-
22
-
23
-
24
-
25
-
26
-
27
-
28
-
29
-
 30
30 -
 31
31 -
 32
32 -
 33
33 -
 34
34 -
 35
35 -
 36
36 -
 37
37 -
 38
38 -
 39
39 -
 40
40 -
41
-
42
-
43
-
44
-
45
-
46
-
47
-
48
-
49
-
50
-
51
-
52
-
53
-
54
-
55
-
56
-
57
-
58
-
59
-
60
-
61
-
62
-
63
-
64
-
65
-
66
-
67
-
68
-
69
-
70
-
71
-
72
-
73
-
74
-
75
-
76
-
77
-
78
-
79
-
80
-
81
-
82
-
83
-
84
-
85
-
86
-
87
-
88
-
89
-
90
-
91
-
92
-
93
-
94
-
95
-
96
-
97
-
98
-
99
-
100
-
101
-
102
-
103
-
104
-
105
-
106
-
107
-
108
-
109
-
110
-
111
-
112
-
113
-
114
-
115
-
116
-
117
-
118
-
119
-
120
-
121
-
122
-
123
-
124
-
125
-
126
-
127
-
128
-
129
-
130
-
131
-
132
-
133
-
134
-
135
-
136
-
137
-
138
-
139
-
140
-
141
-
142
-
143
-
144
-
145
-
146
-
147
-
148
-
149
-
150
-
151
-
152
-
153
-
154
-
155
-
156
-
157
-
158
-
159
-
160
-
161
-
162
-
163
-
164
-
165
-
166
-
167
-
168
-
169
-
170
-
171
-
172
-
173
-
174
-
175
-
176
-
177
-
178
-
179
-
180
-
181
-
182
-
183
-
184
-
185
-
186
-
187
-
188
-
189
-
190
-
191
-
192
-
193
-
194
-
195
-
196
-
197
-
198
-
199
-
200
-
201
-
202
-
203
-
204
-
205
-
206
-
207
-
208
-
209
-
210
-
211
-
212
-
213
-
214
-
215
-
216
-
217
-
218
-
219
-
220
-
221
-
222
-
223
-
224
-
225
-
226
-
227
-
228
-
229
-
230
-
231
-
232
-
233
-
234
-
235
-
236
-
237
-
238
-
239
-
240
-
241
-
242
-
243
-
244
-
245
-
246
-
247
-
248
-
249
-
250
-
251
-
252
-
253
-
254
-
255
-
256
-
257
-
258
-
259
-
260
-
261
-
262
-
263
-
264
-
265
-
266
-
267
 |
 |