Toshiba GSC-R60 Owners Manual - Page 93
Changing the Image Sharpness
 |
View all Toshiba GSC-R60 manuals
Add to My Manuals
Save this manual to your list of manuals |
Page 93 highlights
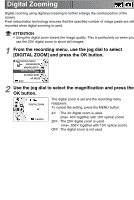
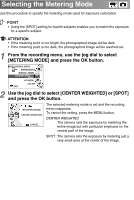
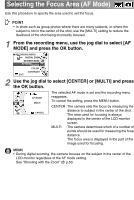
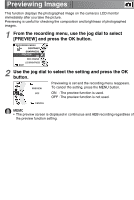
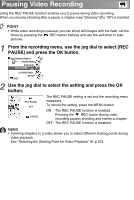
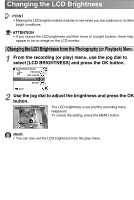
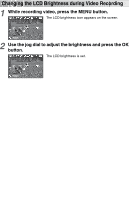
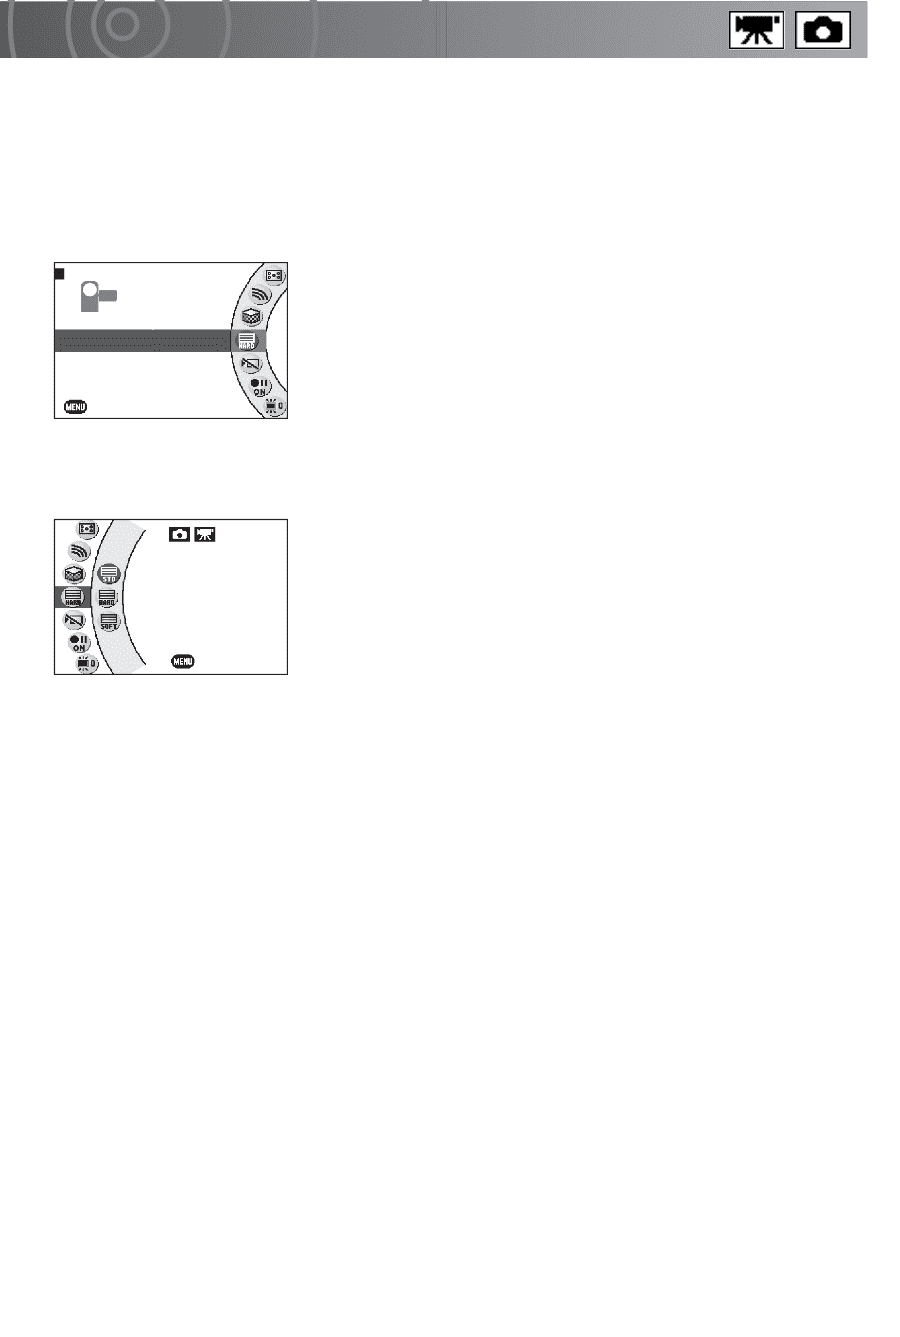
Changing the Image Sharpness Use this procedure to sharpen or soften the image outlines. You can use this function to make the outlines of objects crisper or make them less clearly defined, altering the tone of the image. 1 From the recording menu, use the jog dial to select [SHARPNESS] and press the OK button. RECORDING MENU COLOR CONTRAST SHARPNESS HARD PREVIEW EXIT REC PAUSE 2 Use the jog dial to select the sharpness setting and press the OK button. SHARPNESS STANDARD CANCEL The selected sharpness is set and the recording menu reappears. To cancel the setting, press the MENU button. STANDARD : Normal edge sharpness HARD : Sharper edges SOFT : Softer edges
-
 1
1 -
2
-
3
-
4
-
5
-
6
-
7
-
8
-
9
-
10
-
11
-
12
-
13
-
14
-
15
-
16
-
17
-
18
-
19
-
20
-
21
-
22
-
23
-
24
-
25
-
26
-
27
-
28
-
29
-
30
-
31
-
32
-
33
-
34
-
35
-
36
-
37
-
38
-
39
-
40
-
41
-
42
-
43
-
44
-
45
-
46
-
47
-
48
-
49
-
50
-
51
-
52
-
53
-
54
-
55
-
56
-
57
-
58
-
59
-
60
-
61
-
62
-
63
-
64
-
65
-
66
-
67
-
68
-
69
-
70
-
71
-
72
-
73
-
74
-
75
-
76
-
77
-
78
-
79
-
80
-
81
-
82
-
83
-
84
-
85
-
86
-
87
-
 88
88 -
 89
89 -
 90
90 -
 91
91 -
 92
92 -
 93
93 -
 94
94 -
 95
95 -
 96
96 -
 97
97 -
 98
98 -
99
-
100
-
101
-
102
-
103
-
104
-
105
-
106
-
107
-
108
-
109
-
110
-
111
-
112
-
113
-
114
-
115
-
116
-
117
-
118
-
119
-
120
-
121
-
122
-
123
-
124
-
125
-
126
-
127
-
128
-
129
-
130
-
131
-
132
-
133
-
134
-
135
-
136
-
137
-
138
-
139
-
140
-
141
-
142
-
143
-
144
-
145
-
146
-
147
-
148
-
149
-
150
-
151
-
152
-
153
-
154
-
155
-
156
-
157
-
158
-
159
-
160
-
161
-
162
-
163
-
164
-
165
-
166
-
167
-
168
-
169
-
170
-
171
-
172
-
173
-
174
-
175
-
176
-
177
-
178
-
179
-
180
-
181
-
182
-
183
-
184
-
185
-
186
-
187
-
188
-
189
-
190
-
191
-
192
-
193
-
194
-
195
-
196
-
197
-
198
-
199
-
200
-
201
-
202
-
203
-
204
-
205
-
206
-
207
-
208
-
209
-
210
-
211
-
212
-
213
-
214
-
215
-
216
-
217
-
218
-
219
-
220
-
221
-
222
-
223
-
224
-
225
-
226
-
227
-
228
-
229
-
230
-
231
-
232
-
233
-
234
-
235
-
236
-
237
-
238
-
239
-
240
-
241
-
242
-
243
-
244
-
245
-
246
-
247
-
248
-
249
-
250
-
251
-
252
-
253
-
254
-
255
-
256
-
257
-
258
-
259
-
260
-
261
-
262
-
263
-
264
-
265
-
266
-
267
 |
 |
Changing the Image Sharpness
Use this procedure to sharpen or soften the image outlines. You can use this function to
make the outlines of objects crisper or make them less clearly defined, altering the tone
of the image.
1
From the recording menu, use the jog dial to select
[SHARPNESS] and press the OK button.
2
Use the jog dial to select the sharpness setting and press
the OK button.
The selected sharpness is set and the recording menu
reappears.
To cancel the setting, press the MENU button.
STANDARD : Normal edge sharpness
HARD
: Sharper edges
SOFT
: Softer edges
RECORDING MENU
COLOR
CONTRAST
SHARPNESS
PREVIEW
EXIT
HARD
REC PAUSE
SHARPNESS
STANDARD
CANCEL