Yamaha MD4S Owner's Manual - Page 53
Punch-in/out using REC SELECT, Press the PLAY button.
 |
View all Yamaha MD4S manuals
Add to My Manuals
Save this manual to your list of manuals |
Page 53 highlights
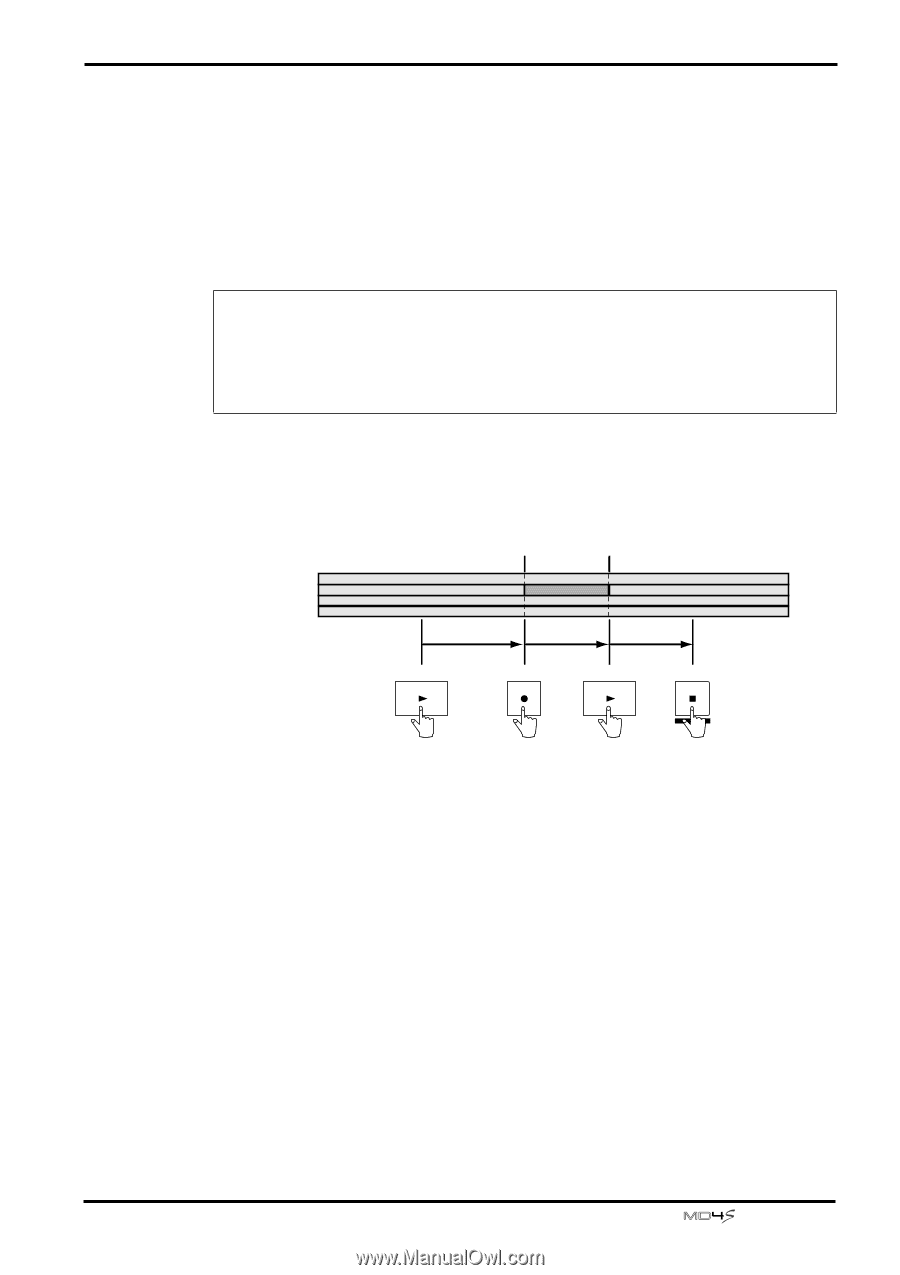
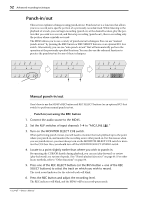
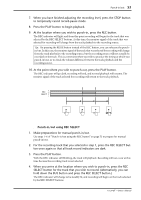
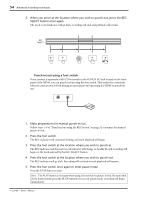
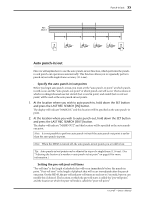
Punch-in/out 53 7. When you have finished adjusting the recording level, press the STOP button to temporarily cancel record-pause mode. 8. Press the PLAY button to begin playback. 9. At the location where you wish to punch-in, press the REC button. The REC indicator will light, and from this point recording will begin for the track that was selected by the REC SELECT buttons. At this time, the monitor signal of the track that was selected for recording will change from the track playback to the recording source. Tip: By pressing the REHE button instead of the REC button, you can rehearse the punchin/out. In this case, the monitor signal of the track that was selected for recording will change from the track playback to the recording source, but the recording source will not actually be recorded on the track. This is convenient when you wish to practice the timing at which you punch-in/out, or to check the volume difference between the track playback and the recording source. 10. At the point where you wish to punch-out, press the PLAY button. The REC indicator will go dark, recording will end, and normal playback will resume. The monitor signal of the track selected for recording will return to the track playback. REC 4 3 SELECT 2 1 Punch-in point Punch-out point Playback Record Playback PLAY REC PLAY STOP TOC WRITE s Punch-in/out using REC SELECT 1. Make preparations for manual punch-in/out. Use steps 1-6 of "Punch-in/out using the REC button" on page 52 to prepare for manual punch-in/out. 2. For the recording track that you selected in step 1, press the REC SELECT button once again so that all track record indicators are dark. 3. Press the PLAY button. With the REC indicator still blinking, the track will playback. Recording will not occur at this time because the recording track is not selected. 4. When you arrive at the location where you wish to punch-in, press the REC SELECT button for the track that you wish to record. (Alternatively, you can hold down the BUS button and press the REC SELECT button.) The REC indicator will change to be steadily lit, and recording will begin on the track selected by the REC SELECT buttons. -Owner's Manual
-
 1
1 -
2
-
3
-
4
-
5
-
6
-
7
-
8
-
9
-
10
-
11
-
12
-
13
-
14
-
15
-
16
-
17
-
18
-
19
-
20
-
21
-
22
-
23
-
24
-
25
-
26
-
27
-
28
-
29
-
30
-
31
-
32
-
33
-
34
-
35
-
36
-
37
-
38
-
39
-
40
-
41
-
42
-
43
-
44
-
45
-
46
-
47
-
 48
48 -
 49
49 -
 50
50 -
 51
51 -
 52
52 -
 53
53 -
 54
54 -
 55
55 -
 56
56 -
 57
57 -
 58
58 -
59
-
60
-
61
-
62
-
63
-
64
-
65
-
66
-
67
-
68
-
69
-
70
-
71
-
72
-
73
-
74
-
75
-
76
-
77
-
78
-
79
-
80
-
81
-
82
-
83
-
84
-
85
-
86
-
87
-
88
-
89
-
90
-
91
-
92
-
93
-
94
-
95
-
96
-
97
-
98
-
99
-
100
-
101
-
102
-
103
-
104
-
105
-
106
-
107
-
108
-
109
-
110
-
111
-
112
-
113
-
114
-
115
 |
 |