Yamaha MD4S Owner's Manual - Page 58
Multi-take auto punch-in/out, Rehearsing the auto punch-in/out multi-take
 |
View all Yamaha MD4S manuals
Add to My Manuals
Save this manual to your list of manuals |
Page 58 highlights
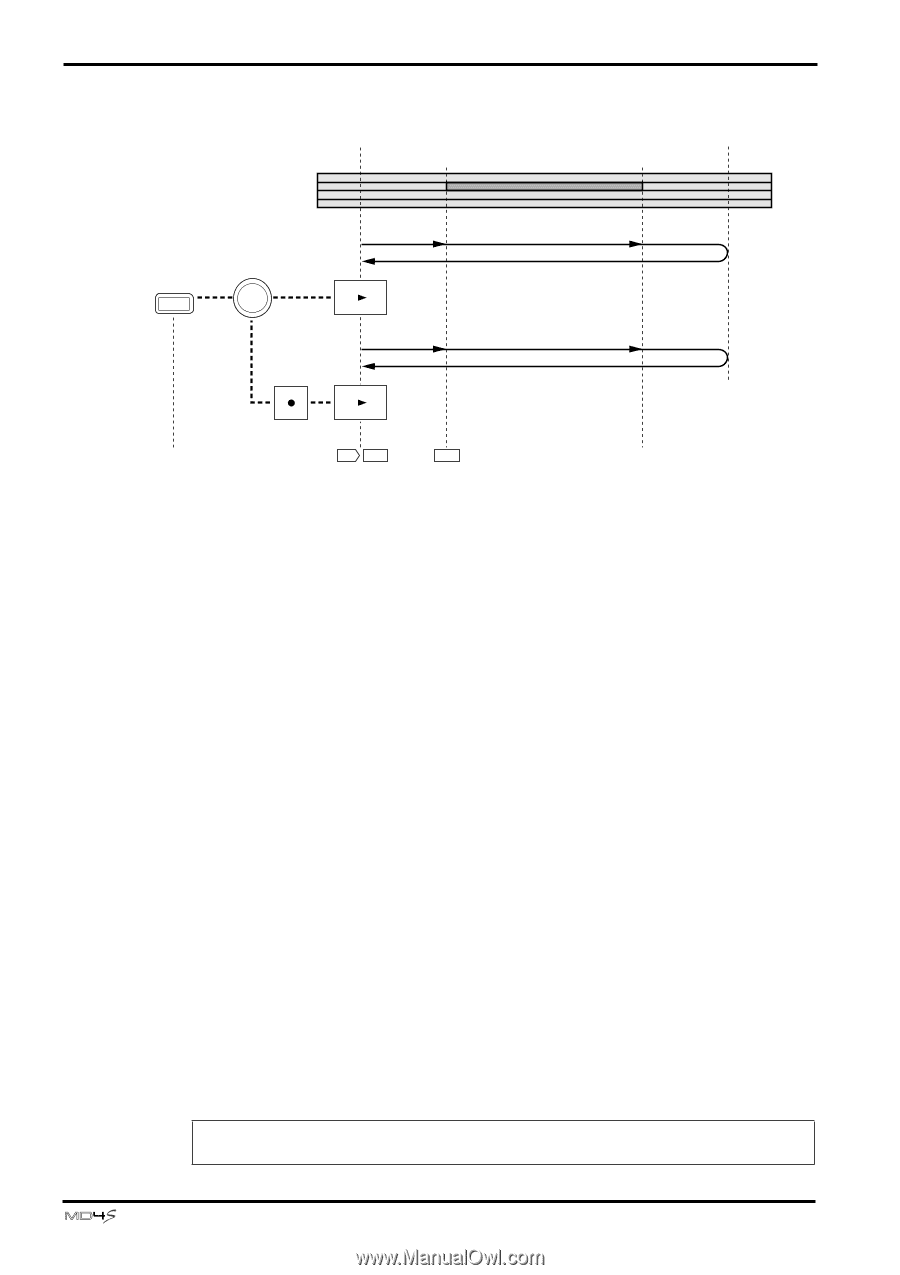
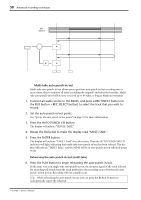
58 Advanced recording techniques AUTO PUNCH I/O REC SELECT Pre-roll point Post-roll point Punch-in point Punch-out point 4 3 2 1 Playback (rehearsal-ready) Rehearsal Playback PLAY ENTER Playback (record-ready) Record Playback REC PLAY SINGLE TAKE IN OUT OUT s Multi-take auto punch-in/out Multi-take auto punch-in/out allows you to perform auto punch-in/out recording two or more times, then to audition all takes (including the original) and select the best take. Multitake auto punch-in/out allows you to record up to 99 takes, as long as blank area remains. 1. Connect an audio source to the MD4S, and press a REC SELECT button (or the BUS button + REC SELECT button) to select the track that you wish to record. 2. Set the auto punch-in/out points. See "Specify the auto punch-in/out points" on page 55 for more information. 3. Press the AUTO PUNCH I/O button. The display will indicate "SINGLE TAKE." 4. Rotate the DATA dial to make the display read "MULTI TAKE." 5. Press the ENTER button. The display will indicate "TAKE 1 Load" for a short time. Then the AUTO PUNCH MULTI indicator will light, indicating that multi-take auto punch-in/out has been selected. The display will indicate "TAKE 1 Rehe," and the MD4S will be in auto punch-in/out rehearsal-pause mode. Rehearsing the auto punch-in/out (multi-take) 6. Press the PLAY button to begin rehearsing the auto punch-in/out. In the same way as in single-take auto punch-in/out, the monitor signal of the track selected for recording will switch from the track playback to the recording source between the auto punch-in/out points. Recording will not actually occur. Tip: While rehearsing the auto punch-in/out, you can press the REPEAT button to automatically repeat the rehearsal. -Owner's Manual
-
 1
1 -
2
-
3
-
4
-
5
-
6
-
7
-
8
-
9
-
10
-
11
-
12
-
13
-
14
-
15
-
16
-
17
-
18
-
19
-
20
-
21
-
22
-
23
-
24
-
25
-
26
-
27
-
28
-
29
-
30
-
31
-
32
-
33
-
34
-
35
-
36
-
37
-
38
-
39
-
40
-
41
-
42
-
43
-
44
-
45
-
46
-
47
-
48
-
49
-
50
-
51
-
52
-
 53
53 -
 54
54 -
 55
55 -
 56
56 -
 57
57 -
 58
58 -
 59
59 -
 60
60 -
 61
61 -
 62
62 -
 63
63 -
64
-
65
-
66
-
67
-
68
-
69
-
70
-
71
-
72
-
73
-
74
-
75
-
76
-
77
-
78
-
79
-
80
-
81
-
82
-
83
-
84
-
85
-
86
-
87
-
88
-
89
-
90
-
91
-
92
-
93
-
94
-
95
-
96
-
97
-
98
-
99
-
100
-
101
-
102
-
103
-
104
-
105
-
106
-
107
-
108
-
109
-
110
-
111
-
112
-
113
-
114
-
115
 |
 |