Yamaha MD4S Owner's Manual - Page 92
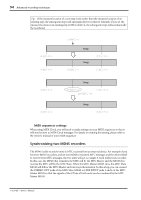
Synchronization using MIDI Clock, MIDI sequencer settings
 |
View all Yamaha MD4S manuals
Add to My Manuals
Save this manual to your list of manuals |
Page 92 highlights
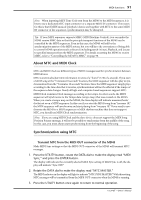
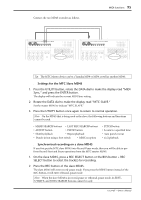
92 Advanced recording techniques s MIDI sequencer settings To use MTC, your MIDI sequencer must be set to synchronize to the MTC messages it receives. In this case, you must set the frame rate to 30 frames/second. For details on making this setting, refer to the owner's manual of your MIDI sequencer. Synchronization using MIDI Clock s Transmit MIDI Clock from the MIDI OUT connector of the MD4S Make MIDI Sync settings so that the MIDI OUT connector of the MD4S will transmit MIDI Clock messages. 1. Press the UTILITY button, rotate the DATA dial to make the display read "MIDI Sync," and press the ENTER button. The display will indicate the currently selected MIDI Sync setting. If MIDI Sync is off, the display will indicate "Sync OFF." 2. Rotate the DATA dial to make the display read "MIDI CLOCK." The MIDI indicator in the display will light to indicate "MIDI CLOCK." 3. Press the UTILITY button once again to return to normal operation. s Programming a tempo map Tempo and meter (time signature) data can be programmed into a MD4S song. For each song, you can program 26 steps (A-Z) each of tempo data and meter data, allowing you to change tempo and meter during the song. Before you start programming a tempo map, it will be convenient to use the "Tempo Map Chart" on page 111 to make a note of the measures at which the tempo or meter changes. 1. Press the ENTER button, rotate the DATA dial to make the display read "Song Tempo," and press the ENTER button. The display will indicate "Meter Setup" or "Tempo Setup." 2. Rotate the DATA dial to select "Meter" if you wish to program time signature data or "Tempo" if you wish to program tempo data. Then press the ENTER button. The display will indicate "Edit Meter" or "Edit Tempo." 3. Rotate the DATA dial to make the display read "Edit" if you are editing an existing tempo map or "New" if you are programming a new tempo map. Then press the ENTER button. The display will indicate step A at the first measure. The character "A" that indicates the step will be blinking. -Owner's Manual
-
 1
1 -
2
-
3
-
4
-
5
-
6
-
7
-
8
-
9
-
10
-
11
-
12
-
13
-
14
-
15
-
16
-
17
-
18
-
19
-
20
-
21
-
22
-
23
-
24
-
25
-
26
-
27
-
28
-
29
-
30
-
31
-
32
-
33
-
34
-
35
-
36
-
37
-
38
-
39
-
40
-
41
-
42
-
43
-
44
-
45
-
46
-
47
-
48
-
49
-
50
-
51
-
52
-
53
-
54
-
55
-
56
-
57
-
58
-
59
-
60
-
61
-
62
-
63
-
64
-
65
-
66
-
67
-
68
-
69
-
70
-
71
-
72
-
73
-
74
-
75
-
76
-
77
-
78
-
79
-
80
-
81
-
82
-
83
-
84
-
85
-
86
-
 87
87 -
 88
88 -
 89
89 -
 90
90 -
 91
91 -
 92
92 -
 93
93 -
 94
94 -
 95
95 -
 96
96 -
 97
97 -
98
-
99
-
100
-
101
-
102
-
103
-
104
-
105
-
106
-
107
-
108
-
109
-
110
-
111
-
112
-
113
-
114
-
115
 |
 |