Yamaha MD4S Owner's Manual - Page 76
Erasing an entire track Track Erase, Copying/converting a song Song Copy, Track Erase.
 |
View all Yamaha MD4S manuals
Add to My Manuals
Save this manual to your list of manuals |
Page 76 highlights
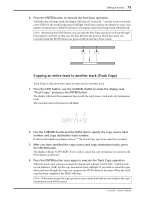
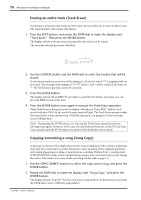
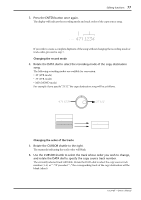
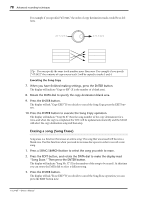
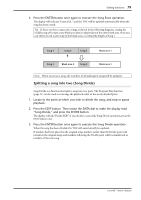
76 Advanced recording techniques Erasing an entire track (Track Erase) Track Erase is a function that erases an entire track. You can select one or more tracks to erase. The erased track(s) will contain only silence. 1. Press the EDIT button, and rotate the DATA dial to make the display read "Track Erase." Then press the ENTER button. The display will show the parameter that specifies the track(s) to be erased. The currently selected parameter will blink. Track to erase 2. Use the CURSOR shuttle and the DATA dial to select the track(s) that will be erased. Tracks whose numbers are shown will be displayed. (Tracks for which "*" is displayed will not be erased.) For example with settings of "12**T," tracks 1 and 2 will be erased. If all tracks are "*" the Track Erase operation cannot be executed. 3. Press the ENTER button. The display will ask "Erase EXE?" If you wish to cancel the Track Erase operation, you can press the EXIT button at this time. 4. Press the ENTER button once again to execute the Track Erase operation. While Track Erase is being executed, the display will indicate "Erase EXE.." and the track record indicator (DIR) for the track(s) being erased will light. The Track Erase operation takes four minutes for a four-minute song. While the operation is in progress, tracks not being erased will play back. Note: By pressing the STOP button, you can stop the Track Erase operation mid-way through its progress. However, in this case, the data between the point at which Track Erase was executed until the STOP button was pressed will already have been erased. Copying/converting a song (Song Copy) Song Copy is a function that duplicates an entire song, including the title, markers, and tempo map data. It is convenient to use this function to create a backup of the original song before performing ping-pong recording or punch-in/out recording. If desired, the recording mode (4TR/2TR/MONO mode) of the copy destination song can be converted, and you may change the order of the tracks. (For more on the recording modes, refer to page 11.) 1. Use the SONG SEARCH buttons to select the copy source song, and press the ENTER button. 2. Rotate the DATA dial to make the display read "Song Copy," and press the ENTER button. The display will ask "Copy X?" (X is the copy source song number). At this time you can rotate the DATA dial to select a different song number. -Owner's Manual
-
 1
1 -
2
-
3
-
4
-
5
-
6
-
7
-
8
-
9
-
10
-
11
-
12
-
13
-
14
-
15
-
16
-
17
-
18
-
19
-
20
-
21
-
22
-
23
-
24
-
25
-
26
-
27
-
28
-
29
-
30
-
31
-
32
-
33
-
34
-
35
-
36
-
37
-
38
-
39
-
40
-
41
-
42
-
43
-
44
-
45
-
46
-
47
-
48
-
49
-
50
-
51
-
52
-
53
-
54
-
55
-
56
-
57
-
58
-
59
-
60
-
61
-
62
-
63
-
64
-
65
-
66
-
67
-
68
-
69
-
70
-
 71
71 -
 72
72 -
 73
73 -
 74
74 -
 75
75 -
 76
76 -
 77
77 -
 78
78 -
 79
79 -
 80
80 -
 81
81 -
82
-
83
-
84
-
85
-
86
-
87
-
88
-
89
-
90
-
91
-
92
-
93
-
94
-
95
-
96
-
97
-
98
-
99
-
100
-
101
-
102
-
103
-
104
-
105
-
106
-
107
-
108
-
109
-
110
-
111
-
112
-
113
-
114
-
115
 |
 |
