Yamaha MD4S Owner's Manual - Page 86
Erasing a disc Disc Erase, Viewing disc contents, Press the ENTER button once again
 |
View all Yamaha MD4S manuals
Add to My Manuals
Save this manual to your list of manuals |
Page 86 highlights
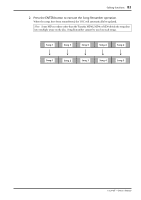
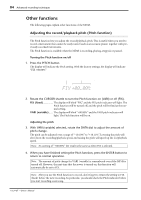
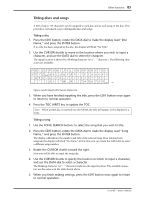
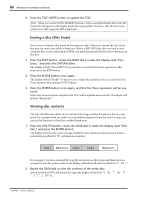
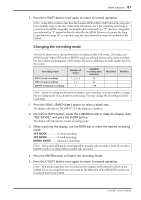
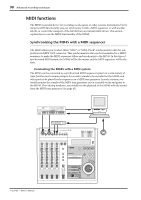
86 Advanced recording techniques 6. Press the TOC WRITE button to update the TOC. Note: When you use the SONG SEARCH buttons to select a song that already has a title, the song title will appear in the display beside the song number. However, only the first seven characters of the song title will be displayed. Erasing a disc (Disc Erase) Disc Erase is a function that erases all the songs on a disc. When you execute the Disc Erase function, the entire disc will be a blank area. Before a MD DATA disc that was used to store computer data can be used with the MD4S, you must first execute the Disc Erase operation on that disc. 1. Press the EDIT button, rotate the DATA dial to make the display read "Disc Erase," and press the ENTER button. The display will ask "Erase EXE?" If you decide to cancel the Disc Erase operation at this point, press the EXIT button. 2. Press the ENTER button once again. The display will ask "Really?" so that you can confirm the operation. You can cancel the Disc Erase operation by pressing the EXIT button. 3. Press the ENTER button once again, and the Disc Erase operation will be executed. When Disc Erase has been completed, the TOC will be updated automatically. The display will indicate "Blank Disc." Viewing disc contents The Disc Info function allows you to view how the songs and blank areas on a disc are organized. For example when you wish to record additional material onto the end of a song, you can use this function to check the available blank areas. 1. Press the UTILITY button, rotate the DATA dial to make the display read "Disc Info," and press the ENTER button. The display will show the order of songs and blank areas. Numbers indicate song numbers, and numbers prefixed by "B" are blank area numbers. Song 1 Blank area 2 Song 3 Song 2 Blank area 1 For example if you have executed the Song Move function so that songs and blank areas are arranged on the disc as shown above, the display will indicate the first two blocks as "1¡B2¡". 2. Rotate the DATA dial to view the contents of the entire disc. As you rotate the DATA dial toward the right, the display will indicate "1¡B2¡", "¡B2¡3", "¡3¡," "¡2¡B1" etc. -Owner's Manual
-
 1
1 -
2
-
3
-
4
-
5
-
6
-
7
-
8
-
9
-
10
-
11
-
12
-
13
-
14
-
15
-
16
-
17
-
18
-
19
-
20
-
21
-
22
-
23
-
24
-
25
-
26
-
27
-
28
-
29
-
30
-
31
-
32
-
33
-
34
-
35
-
36
-
37
-
38
-
39
-
40
-
41
-
42
-
43
-
44
-
45
-
46
-
47
-
48
-
49
-
50
-
51
-
52
-
53
-
54
-
55
-
56
-
57
-
58
-
59
-
60
-
61
-
62
-
63
-
64
-
65
-
66
-
67
-
68
-
69
-
70
-
71
-
72
-
73
-
74
-
75
-
76
-
77
-
78
-
79
-
80
-
 81
81 -
 82
82 -
 83
83 -
 84
84 -
 85
85 -
 86
86 -
 87
87 -
 88
88 -
 89
89 -
 90
90 -
 91
91 -
92
-
93
-
94
-
95
-
96
-
97
-
98
-
99
-
100
-
101
-
102
-
103
-
104
-
105
-
106
-
107
-
108
-
109
-
110
-
111
-
112
-
113
-
114
-
115
 |
 |