Brother International BES Lettering INSTRUCTION MANUAL - English - Page 116
Working with Name Drops
 |
View all Brother International BES Lettering manuals
Add to My Manuals
Save this manual to your list of manuals |
Page 116 highlights
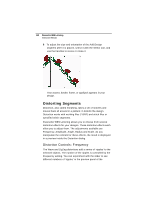
114 Pacesetter BES Lettering Instruction Manual Working with Name Drops Name Drops allow you to create a model to make a number of similar designs. In a template, each lettering or design segment is treated as a unit that can be replaced. For example, a lettering segment can be changed so that it uses a different font or text, but the segment appears in the same place as the model. (An example of a application for the Name Drops tool might be to create T-shirts for each player on a sports team; instead of creating a separate design for each T-shirt, use Name drops to create each shirt using the same logo design, but with a different name.) Each design that will be generated by the tool will have its own row in the dialog, displaying the text, the font, the font height, and the alignment of the lettering. Add a new row for each separate embroidery design you need. To use the Name Drops Wizard: 1 Create the design you want to use as a basis for the Template; using one of the text tools, include some "placeholder" text in the design. The Name Drops will only work with files that contain only a single text segment. However, if you want to use a file that already has a text segment in it, you can get around this constraint by converting the original text to stitches. Select the text, right-click, and choose "Preserve as stitches" from the context menu. You can then add a new text segment to the design, and that will be the one that varies in the Name Drops Wizard. 2 Save the design. 3 On Home tab, click on the Name Drops You see the Name Drops dialog. icon.
-
 1
1 -
2
-
3
-
4
-
5
-
6
-
7
-
8
-
9
-
10
-
11
-
12
-
13
-
14
-
15
-
16
-
17
-
18
-
19
-
20
-
21
-
22
-
23
-
24
-
25
-
26
-
27
-
28
-
29
-
30
-
31
-
32
-
33
-
34
-
35
-
36
-
37
-
38
-
39
-
40
-
41
-
42
-
43
-
44
-
45
-
46
-
47
-
48
-
49
-
50
-
51
-
52
-
53
-
54
-
55
-
56
-
57
-
58
-
59
-
60
-
61
-
62
-
63
-
64
-
65
-
66
-
67
-
68
-
69
-
70
-
71
-
72
-
73
-
74
-
75
-
76
-
77
-
78
-
79
-
80
-
81
-
82
-
83
-
84
-
85
-
86
-
87
-
88
-
89
-
90
-
91
-
92
-
93
-
94
-
95
-
96
-
97
-
98
-
99
-
100
-
101
-
102
-
103
-
104
-
105
-
106
-
107
-
108
-
109
-
110
-
 111
111 -
 112
112 -
 113
113 -
 114
114 -
 115
115 -
 116
116 -
 117
117 -
 118
118 -
 119
119 -
 120
120 -
 121
121 -
122
-
123
-
124
-
125
-
126
-
127
-
128
-
129
-
130
-
131
-
132
-
133
-
134
-
135
-
136
-
137
-
138
-
139
-
140
-
141
-
142
-
143
-
144
-
145
-
146
 |
 |
