Brother International BES Lettering INSTRUCTION MANUAL - English - Page 60
The Properties Panel, Adjusting Text Properties
 |
View all Brother International BES Lettering manuals
Add to My Manuals
Save this manual to your list of manuals |
Page 60 highlights
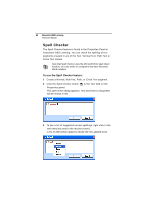
58 Pacesetter BES Lettering Instruction Manual The Properties Panel The Pacesetter BES Lettering Properties Panel appears on the right of the workspace. This panel displays, and allows you to modify, all the properties associated with the lettering in your designs. These properties include the text properties, the fill properties, underlay properties, and pull-compensation properties. Each of these types of properties has its own section in the Properties Panel, and each will be discussed in detail in its own section to follow. If you need to make room in the Properties Panel in order to see some of the fields better, you can collapse one or more areas by clicking the small minus sign next to its name; the box will then display a small plus sign. Clicking on the plus sign expands that area again. Adjusting Text Properties The Properties Panel allows you to modify various properties of the currently selected text segment. You can use this area of the panel to change text itself, choose a font, and select the height, alignment, and spacing of the letters. You can also alter the sewing sequence, and determine how trims and lock stitches will be applied to the segment. The property fields you see in the text area may be different, depending on which kind of text frame is selected; for example, when a Circle frame is selected, this area will show two places where you can input text, labelled 'Upper' and 'Lower'. The properties that you will see displayed will be slightly different depending on which type of text (Normal, Path, Vertical, Circle or Monogram) is currently selected.
-
 1
1 -
2
-
3
-
4
-
5
-
6
-
7
-
8
-
9
-
10
-
11
-
12
-
13
-
14
-
15
-
16
-
17
-
18
-
19
-
20
-
21
-
22
-
23
-
24
-
25
-
26
-
27
-
28
-
29
-
30
-
31
-
32
-
33
-
34
-
35
-
36
-
37
-
38
-
39
-
40
-
41
-
42
-
43
-
44
-
45
-
46
-
47
-
48
-
49
-
50
-
51
-
52
-
53
-
54
-
 55
55 -
 56
56 -
 57
57 -
 58
58 -
 59
59 -
 60
60 -
 61
61 -
 62
62 -
 63
63 -
 64
64 -
 65
65 -
66
-
67
-
68
-
69
-
70
-
71
-
72
-
73
-
74
-
75
-
76
-
77
-
78
-
79
-
80
-
81
-
82
-
83
-
84
-
85
-
86
-
87
-
88
-
89
-
90
-
91
-
92
-
93
-
94
-
95
-
96
-
97
-
98
-
99
-
100
-
101
-
102
-
103
-
104
-
105
-
106
-
107
-
108
-
109
-
110
-
111
-
112
-
113
-
114
-
115
-
116
-
117
-
118
-
119
-
120
-
121
-
122
-
123
-
124
-
125
-
126
-
127
-
128
-
129
-
130
-
131
-
132
-
133
-
134
-
135
-
136
-
137
-
138
-
139
-
140
-
141
-
142
-
143
-
144
-
145
-
146
 |
 |
