Brother International BES Lettering INSTRUCTION MANUAL - English - Page 41
Custom Shapes for Text on a Path - software 2
 |
View all Brother International BES Lettering manuals
Add to My Manuals
Save this manual to your list of manuals |
Page 41 highlights
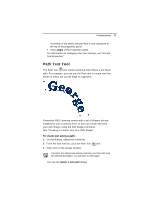
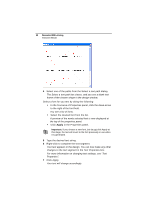
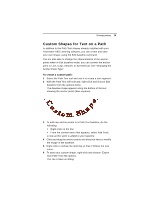
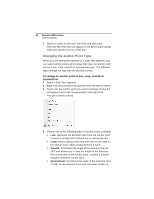
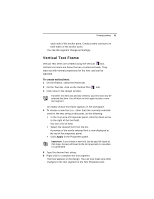
Creating Lettering 39 Custom Shapes for Text on a Path In addition to the Path Text shapes already installed with your Pacesetter BES Lettering software, you can create and save your own shape, using the Edit baseline command. You are also able to change the characteristics of the anchor points when in Edit baseline mode; you can convert the anchor point to Line, Cusp, Smooth, or Symmetrical. See "Changing the Anchor Point Type". To create a custom path: 1 Select the Path Text tool and use it to create a text segment. 2 With the Path Text still selected, right-click and choose Edit baseline from the options menu. The baseline shape appears along the bottom of the text, showing the anchor points (blue squares). 3 To add new anchor points to a Path Text baseline, do the following: Right-click on the line. From the context menu that appears, select Add Point. A new anchor point is added to your baseline. 4 Click and drag the anchor points and direction lines to modify the shape of the baseline. 5 Right-click to redraw the lettering so that it follows the new curve. 6 To save your custom shape, right-click and choose "Export Text Path" from the options. You see a Save as dialog.
-
 1
1 -
2
-
3
-
4
-
5
-
6
-
7
-
8
-
9
-
10
-
11
-
12
-
13
-
14
-
15
-
16
-
17
-
18
-
19
-
20
-
21
-
22
-
23
-
24
-
25
-
26
-
27
-
28
-
29
-
30
-
31
-
32
-
33
-
34
-
35
-
 36
36 -
 37
37 -
 38
38 -
 39
39 -
 40
40 -
 41
41 -
 42
42 -
 43
43 -
 44
44 -
 45
45 -
 46
46 -
47
-
48
-
49
-
50
-
51
-
52
-
53
-
54
-
55
-
56
-
57
-
58
-
59
-
60
-
61
-
62
-
63
-
64
-
65
-
66
-
67
-
68
-
69
-
70
-
71
-
72
-
73
-
74
-
75
-
76
-
77
-
78
-
79
-
80
-
81
-
82
-
83
-
84
-
85
-
86
-
87
-
88
-
89
-
90
-
91
-
92
-
93
-
94
-
95
-
96
-
97
-
98
-
99
-
100
-
101
-
102
-
103
-
104
-
105
-
106
-
107
-
108
-
109
-
110
-
111
-
112
-
113
-
114
-
115
-
116
-
117
-
118
-
119
-
120
-
121
-
122
-
123
-
124
-
125
-
126
-
127
-
128
-
129
-
130
-
131
-
132
-
133
-
134
-
135
-
136
-
137
-
138
-
139
-
140
-
141
-
142
-
143
-
144
-
145
-
146
 |
 |