Cisco 1601 Hardware Installation Guide - Page 164
Connecting Fast Ethernet HWICs to a Network, Additional References
 |
View all Cisco 1601 manuals
Add to My Manuals
Save this manual to your list of manuals |
Page 164 highlights
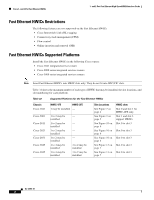
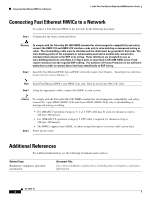
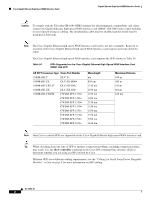
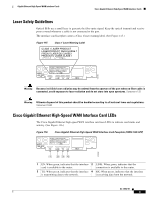
Connecting Fast Ethernet HWICs to a Network 1- and 2-Port Fast Ethernet High-Speed WAN Interface Cards Connecting Fast Ethernet HWICs to a Network To connect a Fast Ethernet HWIC to the network, do the following procedure: Step 1 Confirm that the router is powered down. Warning To comply with the Telcordia GR-1089 NEBS standard for electromagnetic compatibility and safety, connect the HWIC-1FE and HWIC-2FE interface cards only to intra-building or unexposed wiring or cable. The intrabuilding cable must be shielded and the shield must be grounded at both ends. The intra-building port(s) of the equipment or subassembly must not be metallically connected to interfaces that connect to the OSP or its wiring. These interfaces are designed for use as intra-building interfaces only (Type 2 or Type 4 ports as described in GR-1089-CORE, Issue 4) and require isolation from the exposed OSP cabling. The addition of Primary Protectors is not sufficient protection in order to connect these interfaces metallically to OSP wiring. Step 2 Insert the Fast Ethernet HWIC into an HWIC slot on the router. (See Chapter , "Installing Cisco Interface Cards in Cisco Access Routers.") Note Insert Fast Ethernet HWICs into HWIC slots only. They do not fit into WIC/VIC slots. Step 3 Using the appropriate cables, connect the HWIC to your system. Caution To comply with the Telcordia GR-1089 NEBS standard for electromagnetic compatibility and safety, connect the 1-port HWIC (HWIC-1FE) and 2-port HWIC (HWIC-2FE) only to intrabuilding or nonexposed wiring or cabling. Step 4 • For 10BASE-T operation, Category 3, 4, or 5 UTP cable may be used, for distances of up to 328 feet (100 meters). • For 100BASE-TX operation, Category 5 UTP cable is required, for distances of up to 328 feet (100 meters). • The HWICs support Auto-MDIX, so either straight-through or crossover cable can be used. Power up the router. Additional References For additional information, see the following documents and resources. Related Topic Regulatory compliance and safety information Document Title Cisco Network Modules and Interface Cards Regulatory Compliance and Safety Information OL-12851-01 4
-
 1
1 -
2
-
3
-
4
-
5
-
6
-
7
-
8
-
9
-
10
-
11
-
12
-
13
-
14
-
15
-
16
-
17
-
18
-
19
-
20
-
21
-
22
-
23
-
24
-
25
-
26
-
27
-
28
-
29
-
30
-
31
-
32
-
33
-
34
-
35
-
36
-
37
-
38
-
39
-
40
-
41
-
42
-
43
-
44
-
45
-
46
-
47
-
48
-
49
-
50
-
51
-
52
-
53
-
54
-
55
-
56
-
57
-
58
-
59
-
60
-
61
-
62
-
63
-
64
-
65
-
66
-
67
-
68
-
69
-
70
-
71
-
72
-
73
-
74
-
75
-
76
-
77
-
78
-
79
-
80
-
81
-
82
-
83
-
84
-
85
-
86
-
87
-
88
-
89
-
90
-
91
-
92
-
93
-
94
-
95
-
96
-
97
-
98
-
99
-
100
-
101
-
102
-
103
-
104
-
105
-
106
-
107
-
108
-
109
-
110
-
111
-
112
-
113
-
114
-
115
-
116
-
117
-
118
-
119
-
120
-
121
-
122
-
123
-
124
-
125
-
126
-
127
-
128
-
129
-
130
-
131
-
132
-
133
-
134
-
135
-
136
-
137
-
138
-
139
-
140
-
141
-
142
-
143
-
144
-
145
-
146
-
147
-
148
-
149
-
150
-
151
-
152
-
153
-
154
-
155
-
156
-
157
-
158
-
 159
159 -
 160
160 -
 161
161 -
 162
162 -
 163
163 -
 164
164 -
 165
165 -
 166
166 -
 167
167 -
 168
168 -
 169
169 -
170
-
171
-
172
-
173
-
174
-
175
-
176
-
177
-
178
-
179
-
180
-
181
-
182
-
183
-
184
-
185
-
186
-
187
-
188
-
189
-
190
-
191
-
192
-
193
-
194
-
195
-
196
-
197
-
198
-
199
-
200
-
201
-
202
-
203
-
204
-
205
-
206
-
207
-
208
-
209
-
210
-
211
-
212
-
213
-
214
-
215
-
216
 |
 |