Dell E310dw Dell Printer Users Guide - Page 43
Print Multiple Copies of the Same Document (Windows®), Change the Media Type (Windows®)
 |
View all Dell E310dw manuals
Add to My Manuals
Save this manual to your list of manuals |
Page 43 highlights
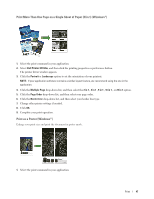
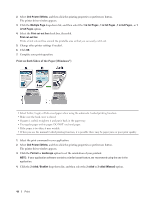
Print Multiple Copies of the Same Document (Windows®) 1. Select the print command in your application. 2. Select Dell Printer E310dw, and then click the printing properties or preferences button. The printer driver window appears. 3. Type the number of copies (1-999) you want in the Copies field. 4. Select the Collate check box, if needed. Collate When the Collate check box is selected, one complete copy of your document will be printed, and then reprinted according to the number of copies you choose. If the Collate check box is not selected, then each page will be printed according to the number of copies chosen before the next page of the document is printed. 5. Change other printer settings if needed. 6. Click OK. 7. Complete your print operation. Change the Media Type (Windows®) To achieve the best print results, the media being printed on should be selected in the driver. The machine changes the way it prints depending on the selected media type. 1. Select the print command in your application. 2. Select Dell Printer E310dw, and then click the printing properties or preferences button. The printer driver window appears. 3. Click the Media Type drop-down list, and then select the media type you want to use. Select this Media Type Plain Paper Thin Paper Thick Paper Thicker Paper Bond Paper Envelopes Env. Thick Env. Thin Recycled Paper Label For this paper Ordinary plain paper Ordinary thin paper Rough paper or thicker paper Select this option if you have selected Thick Paper , and toner smudges while printing. Bond paper Envelopes Select this option if the toner does not correctly stick to the envelope when the Envelopes option is selected. Select this option if the envelope is crumpled when the Envelopes option is selected. Recycled paper Label 4. Click OK. 5. Complete your print operation. Print 43
-
 1
1 -
2
-
3
-
4
-
5
-
6
-
7
-
8
-
9
-
10
-
11
-
12
-
13
-
14
-
15
-
16
-
17
-
18
-
19
-
20
-
21
-
22
-
23
-
24
-
25
-
26
-
27
-
28
-
29
-
30
-
31
-
32
-
33
-
34
-
35
-
36
-
37
-
 38
38 -
 39
39 -
 40
40 -
 41
41 -
 42
42 -
 43
43 -
 44
44 -
 45
45 -
 46
46 -
 47
47 -
 48
48 -
49
-
50
-
51
-
52
-
53
-
54
-
55
-
56
-
57
-
58
-
59
-
60
-
61
-
62
-
63
-
64
-
65
-
66
-
67
-
68
-
69
-
70
-
71
-
72
-
73
-
74
-
75
-
76
-
77
-
78
-
79
-
80
-
81
-
82
-
83
-
84
-
85
-
86
-
87
-
88
-
89
-
90
-
91
-
92
-
93
-
94
-
95
-
96
-
97
-
98
-
99
-
100
-
101
-
102
-
103
-
104
-
105
-
106
-
107
-
108
-
109
-
110
-
111
-
112
-
113
-
114
-
115
-
116
-
117
-
118
-
119
-
120
-
121
-
122
-
123
-
124
-
125
-
126
-
127
-
128
-
129
-
130
-
131
-
132
-
133
-
134
-
135
-
136
-
137
-
138
-
139
-
140
-
141
-
142
-
143
-
144
-
145
-
146
-
147
-
148
-
149
-
150
-
151
-
152
-
153
-
154
-
155
-
156
-
157
-
158
-
159
-
160
-
161
-
162
-
163
-
164
-
165
-
166
-
167
-
168
-
169
-
170
-
171
-
172
-
173
-
174
-
175
-
176
-
177
-
178
-
179
-
180
-
181
-
182
-
183
-
184
-
185
-
186
-
187
-
188
-
189
-
190
-
191
-
192
-
193
-
194
-
195
-
196
-
197
-
198
-
199
-
200
-
201
-
202
-
203
-
204
-
205
-
206
-
207
-
208
-
209
-
210
-
211
-
212
-
213
-
214
-
215
-
216
 |
 |
