Dell E310dw Dell Printer Users Guide - Page 74
Adjust the Print Density (Macintosh), Skip Blank Macintosh)
 |
View all Dell E310dw manuals
Add to My Manuals
Save this manual to your list of manuals |
Page 74 highlights
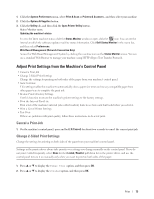
3. Click the application pop-up menu, and then select Print Settings. The Print Settings options appear. 4. Click the Advanced print settings list. 5. Select the Improve Print Output option. 6. Select Improve Toner Fixing. 7. Click Print. Adjust the Print Density (Macintosh) You can increase or decrease the print density. 1. From an application, such as Apple TextEdit, click the File menu, and then select Print. 2. Select Dell Printer E310dw. NOTE: For more page setup options, click the Show Details button. 3. Click the application pop-up menu, and then select Print Settings. The Print Settings options appear. 4. Click the Advanced print settings list. 5. Click Density Adjustment. 6. Clear the Printer Default check box. 7. To increase or decrease the print density, move the slide bar to the right or left. 8. Click Print. Skip Blank Page (Macintosh) Use this option to allow the printer driver to automatically detect blank pages and exclude them from printing. 1. From an application, such as Apple TextEdit, click the File menu, and then select Print. 2. Select Dell Printer E310dw. NOTE: For more page setup options, click the Show Details button. 3. Click the application pop-up menu, and then select Print Settings. The Print Settings options appear. 4. Click the Advanced print settings list. 5. Click the Other Print Options menu. 6. Select the Skip Blank Page check box. 7. Click Print. Monitor the Status of the Machine from Your Computer (Macintosh) The Status Monitor utility is a configurable software tool for monitoring the status of a device, allowing you to get immediate notification of error messages, such as paper empty or paper jam, at pre-set update intervals. You can also access Web Based Management. 74 Print
-
 1
1 -
2
-
3
-
4
-
5
-
6
-
7
-
8
-
9
-
10
-
11
-
12
-
13
-
14
-
15
-
16
-
17
-
18
-
19
-
20
-
21
-
22
-
23
-
24
-
25
-
26
-
27
-
28
-
29
-
30
-
31
-
32
-
33
-
34
-
35
-
36
-
37
-
38
-
39
-
40
-
41
-
42
-
43
-
44
-
45
-
46
-
47
-
48
-
49
-
50
-
51
-
52
-
53
-
54
-
55
-
56
-
57
-
58
-
59
-
60
-
61
-
62
-
63
-
64
-
65
-
66
-
67
-
68
-
 69
69 -
 70
70 -
 71
71 -
 72
72 -
 73
73 -
 74
74 -
 75
75 -
 76
76 -
 77
77 -
 78
78 -
 79
79 -
80
-
81
-
82
-
83
-
84
-
85
-
86
-
87
-
88
-
89
-
90
-
91
-
92
-
93
-
94
-
95
-
96
-
97
-
98
-
99
-
100
-
101
-
102
-
103
-
104
-
105
-
106
-
107
-
108
-
109
-
110
-
111
-
112
-
113
-
114
-
115
-
116
-
117
-
118
-
119
-
120
-
121
-
122
-
123
-
124
-
125
-
126
-
127
-
128
-
129
-
130
-
131
-
132
-
133
-
134
-
135
-
136
-
137
-
138
-
139
-
140
-
141
-
142
-
143
-
144
-
145
-
146
-
147
-
148
-
149
-
150
-
151
-
152
-
153
-
154
-
155
-
156
-
157
-
158
-
159
-
160
-
161
-
162
-
163
-
164
-
165
-
166
-
167
-
168
-
169
-
170
-
171
-
172
-
173
-
174
-
175
-
176
-
177
-
178
-
179
-
180
-
181
-
182
-
183
-
184
-
185
-
186
-
187
-
188
-
189
-
190
-
191
-
192
-
193
-
194
-
195
-
196
-
197
-
198
-
199
-
200
-
201
-
202
-
203
-
204
-
205
-
206
-
207
-
208
-
209
-
210
-
211
-
212
-
213
-
214
-
215
-
216
 |
 |
