Dell E310dw Dell Printer Users Guide - Page 96
Use Wi-Fi Direct™, Print from Your Mobile Device Using Wi-Fi Direct
 |
View all Dell E310dw manuals
Add to My Manuals
Save this manual to your list of manuals |
Page 96 highlights
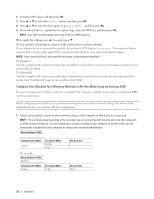
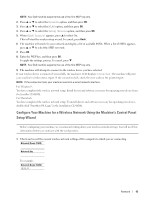
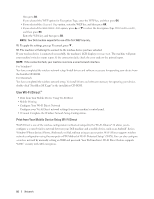
then press OK. If you selected the WEP option for Encryption Type, enter the WEP key, and then press OK. • If you selected the Shared Key option, enter the WEP key, and then press OK. • If you selected the WPA/WPA2-PSK option, press p or q to select the Encryption Type TKIP+AES or AES , and then press OK. Enter the WPA key, and then press OK. NOTE: Your Dell machine supports the use of the first WEP key only. 11. To apply the settings, press p. To cancel, press q . 12. The machine will attempt to connect to the wireless device you have selected. If your wireless device is connected successfully, the machine's LCD displays Connected. The machine will print your machine's wireless status report. If the connection fails, check the error code on the printed report. NOTE: If the connection fails, your machine reverts to a wired network interface. For Windows®: You have completed the wireless network setup. Install drivers and software necessary for operating your device from the Installer CD-ROM. For Macintosh: You have completed the wireless network setup. To install drivers and software necessary for operating your device, double-click "StartHereOS X.app" in the installation CD-ROM. Use Wi-Fi Direct™ • Print from Your Mobile Device Using Wi-Fi Direct • Mobile Printing • Configure Your Wi-Fi Direct Network Configure your Wi-Fi Direct network settings from your machine's control panel. • I Cannot Complete the Wireless Network Setup Configuration. Print from Your Mobile Device Using Wi-Fi Direct Wi-Fi Direct is one of the wireless configuration methods developed by the Wi-Fi Alliance®. It allows you to configure a secured wireless network between your Dell machine and a mobile device, such as an Android™ device, Windows®Phone device, iPhone, iPod touch, or iPad, without using an access point. Wi-Fi Direct supports wireless network configuration using the one-push or PIN Method of Wi-Fi Protected Setup™ (WPS). You can also configure a wireless network by manually setting an SSID and password. Your Dell machine's Wi-Fi Direct feature supports WPA2™ security with AES encryption. 96 Network
-
 1
1 -
2
-
3
-
4
-
5
-
6
-
7
-
8
-
9
-
10
-
11
-
12
-
13
-
14
-
15
-
16
-
17
-
18
-
19
-
20
-
21
-
22
-
23
-
24
-
25
-
26
-
27
-
28
-
29
-
30
-
31
-
32
-
33
-
34
-
35
-
36
-
37
-
38
-
39
-
40
-
41
-
42
-
43
-
44
-
45
-
46
-
47
-
48
-
49
-
50
-
51
-
52
-
53
-
54
-
55
-
56
-
57
-
58
-
59
-
60
-
61
-
62
-
63
-
64
-
65
-
66
-
67
-
68
-
69
-
70
-
71
-
72
-
73
-
74
-
75
-
76
-
77
-
78
-
79
-
80
-
81
-
82
-
83
-
84
-
85
-
86
-
87
-
88
-
89
-
90
-
 91
91 -
 92
92 -
 93
93 -
 94
94 -
 95
95 -
 96
96 -
 97
97 -
 98
98 -
 99
99 -
 100
100 -
 101
101 -
102
-
103
-
104
-
105
-
106
-
107
-
108
-
109
-
110
-
111
-
112
-
113
-
114
-
115
-
116
-
117
-
118
-
119
-
120
-
121
-
122
-
123
-
124
-
125
-
126
-
127
-
128
-
129
-
130
-
131
-
132
-
133
-
134
-
135
-
136
-
137
-
138
-
139
-
140
-
141
-
142
-
143
-
144
-
145
-
146
-
147
-
148
-
149
-
150
-
151
-
152
-
153
-
154
-
155
-
156
-
157
-
158
-
159
-
160
-
161
-
162
-
163
-
164
-
165
-
166
-
167
-
168
-
169
-
170
-
171
-
172
-
173
-
174
-
175
-
176
-
177
-
178
-
179
-
180
-
181
-
182
-
183
-
184
-
185
-
186
-
187
-
188
-
189
-
190
-
191
-
192
-
193
-
194
-
195
-
196
-
197
-
198
-
199
-
200
-
201
-
202
-
203
-
204
-
205
-
206
-
207
-
208
-
209
-
210
-
211
-
212
-
213
-
214
-
215
-
216
 |
 |